The Course Manager module in MyCo allows you to publish and sell online courses, manage student enrolments, distribute and collect homework, and issue completion certificates, all from within your MyCo admin. Students and trainees access their content through a separate, branded Customer Portal.
How it works, a quick overview
1. Create a Course
From the Course Manager section in your left-hand admin menu, navigate to My Programs/Courses and create a new course. Give it a title, a short description, a price, and set the duration of access. You can also configure free access days — a trial period during which students can explore the course before paying. A shareable registration link is generated automatically on the Course Details tab. Share this link with contacts so they can access the course registration page directly.

2. Build Your Course Content
From the Course Content tab, add the modules that make up your course. Each module is a single lesson or unit. For each module you set a title, paste a YouTube link for the video, and choose the access level, FREE/Paid access (visible to anyone including those on a free trial) or Paid access only (restricted to paying students). You can mix access levels within the same course, for example making Chapter 1 free so prospective students can preview before committing to purchase.

Very important -> How you type up and format your course content determines how it will display to students/learners. Make sure you type it up and format it properly.
3. Sell Your Course Through the Store
Any active, priced course appears automatically in your MyCo Store alongside your other products and services. Each course card displays the title, short description, a Course badge, the price, and an Enrol Now button that takes the student through to the registration page. Students can switch between currencies using the currency selector at the top of the store.

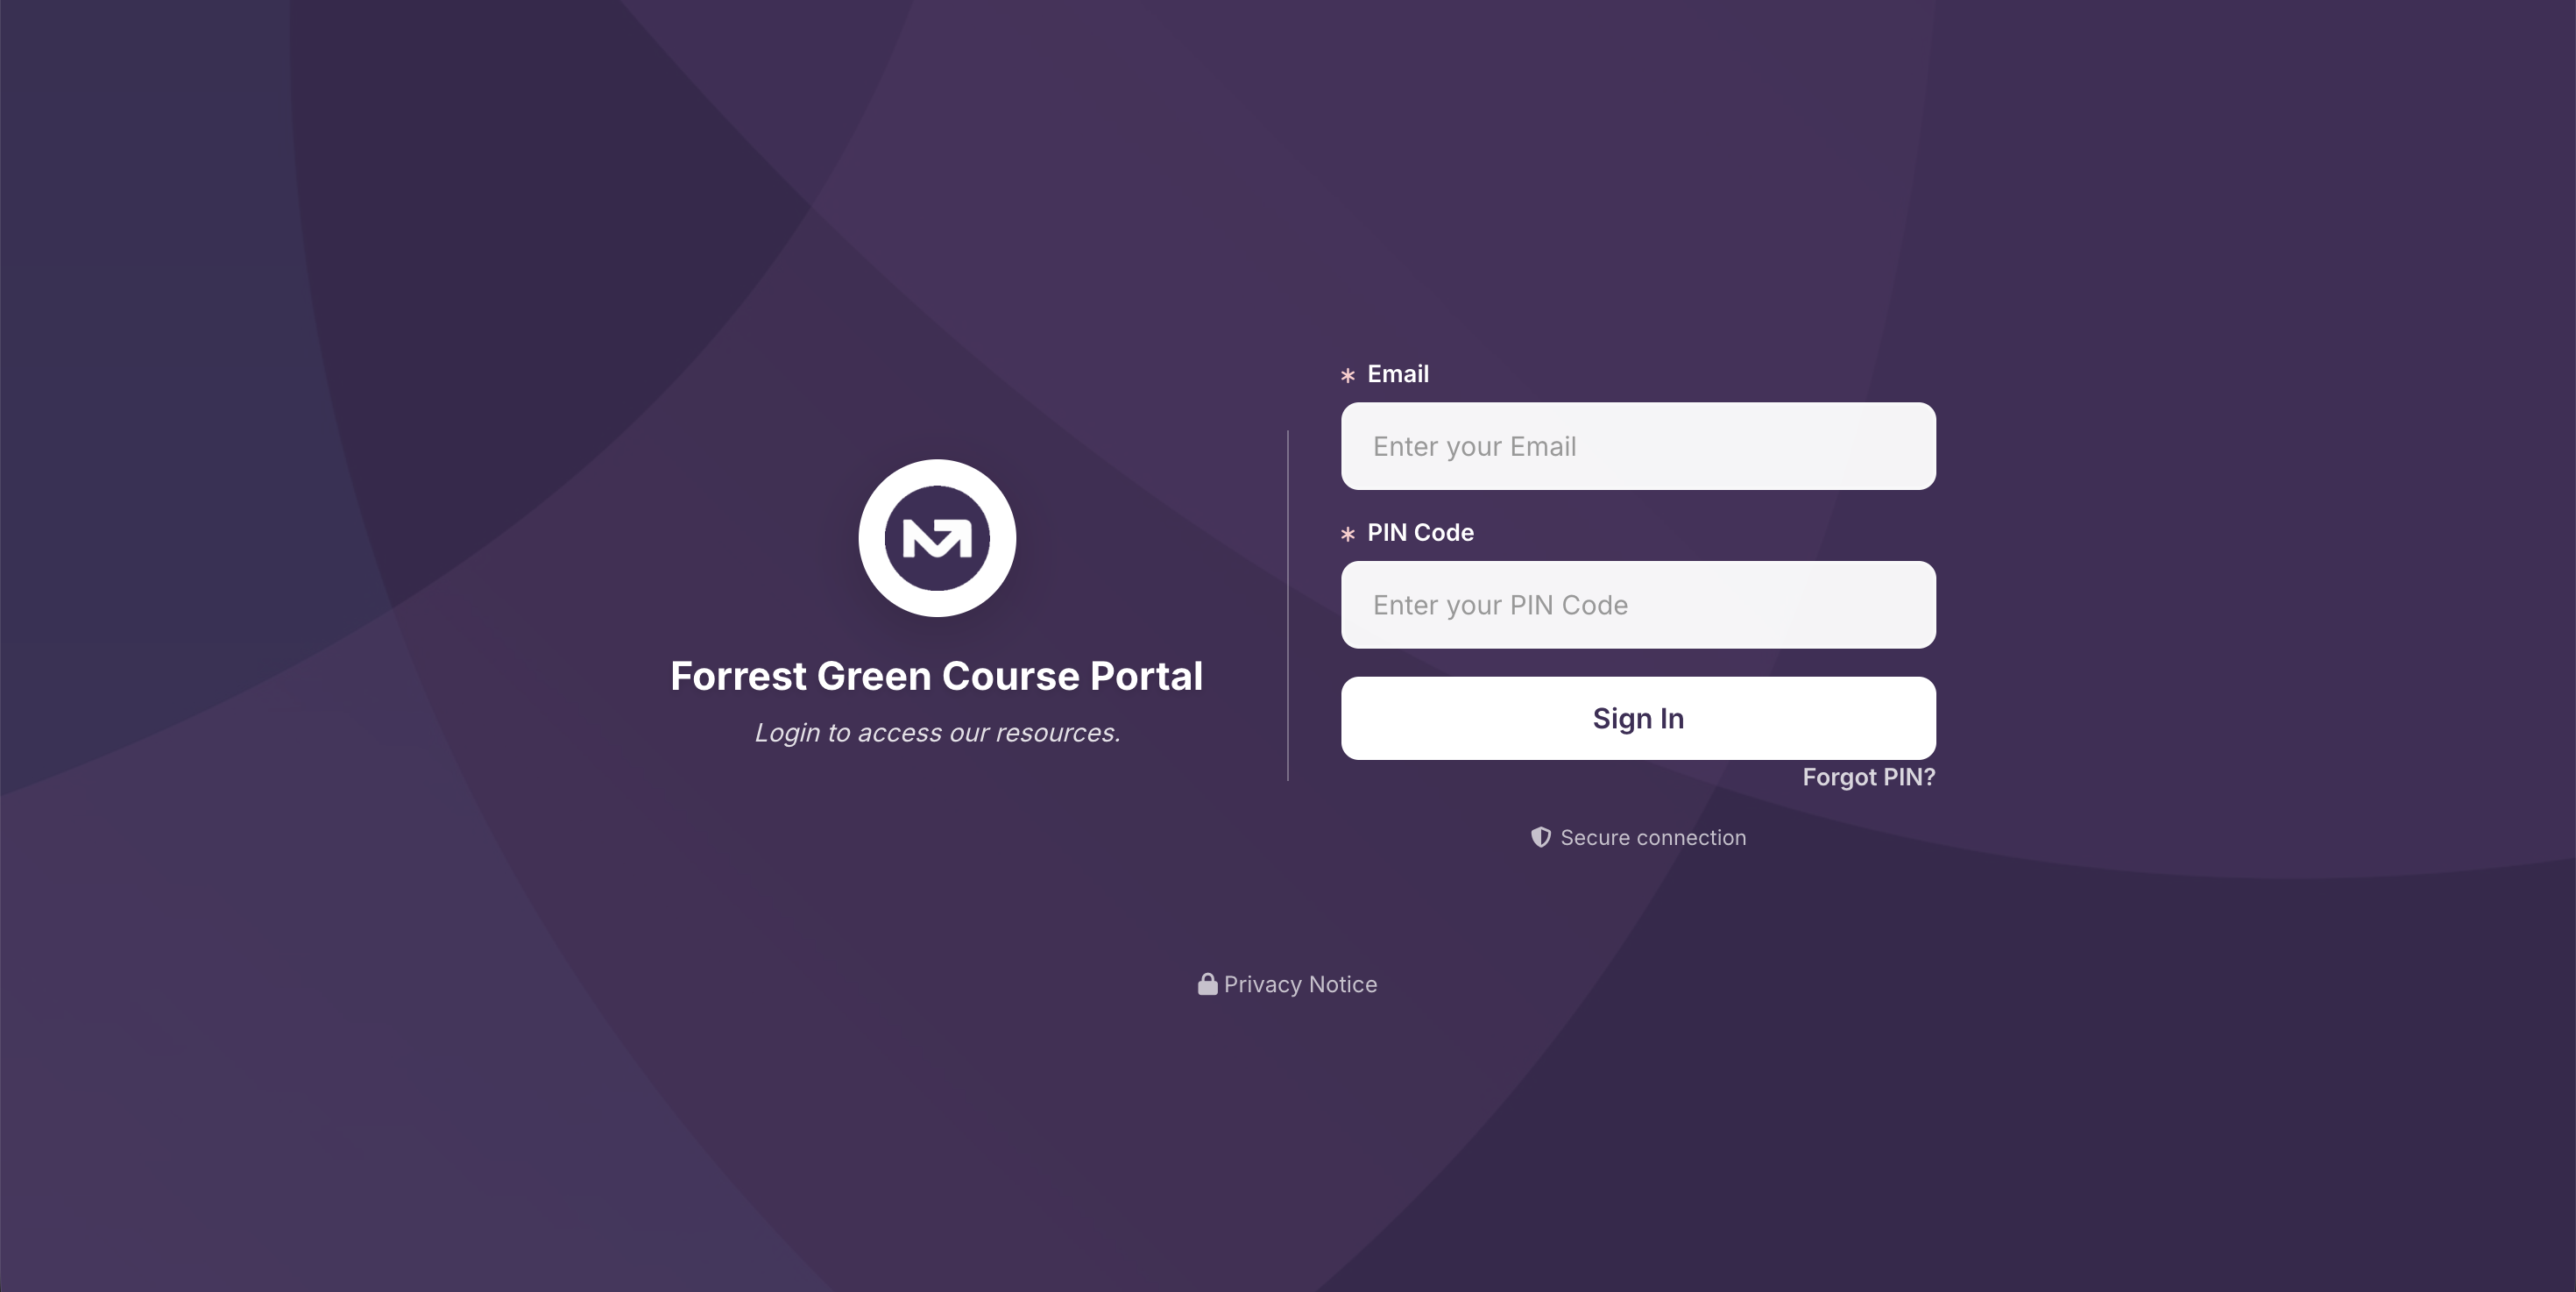
4. Students Access the Customer Portal
Your students and trainees access their course content through the Customer Portal, a separate, branded portal hosted by MyCo. They do not need a MyCo account. Authentication is via their email address on file and their 4-digit PIN code, which is found on the contact record under the Additional Info tab.
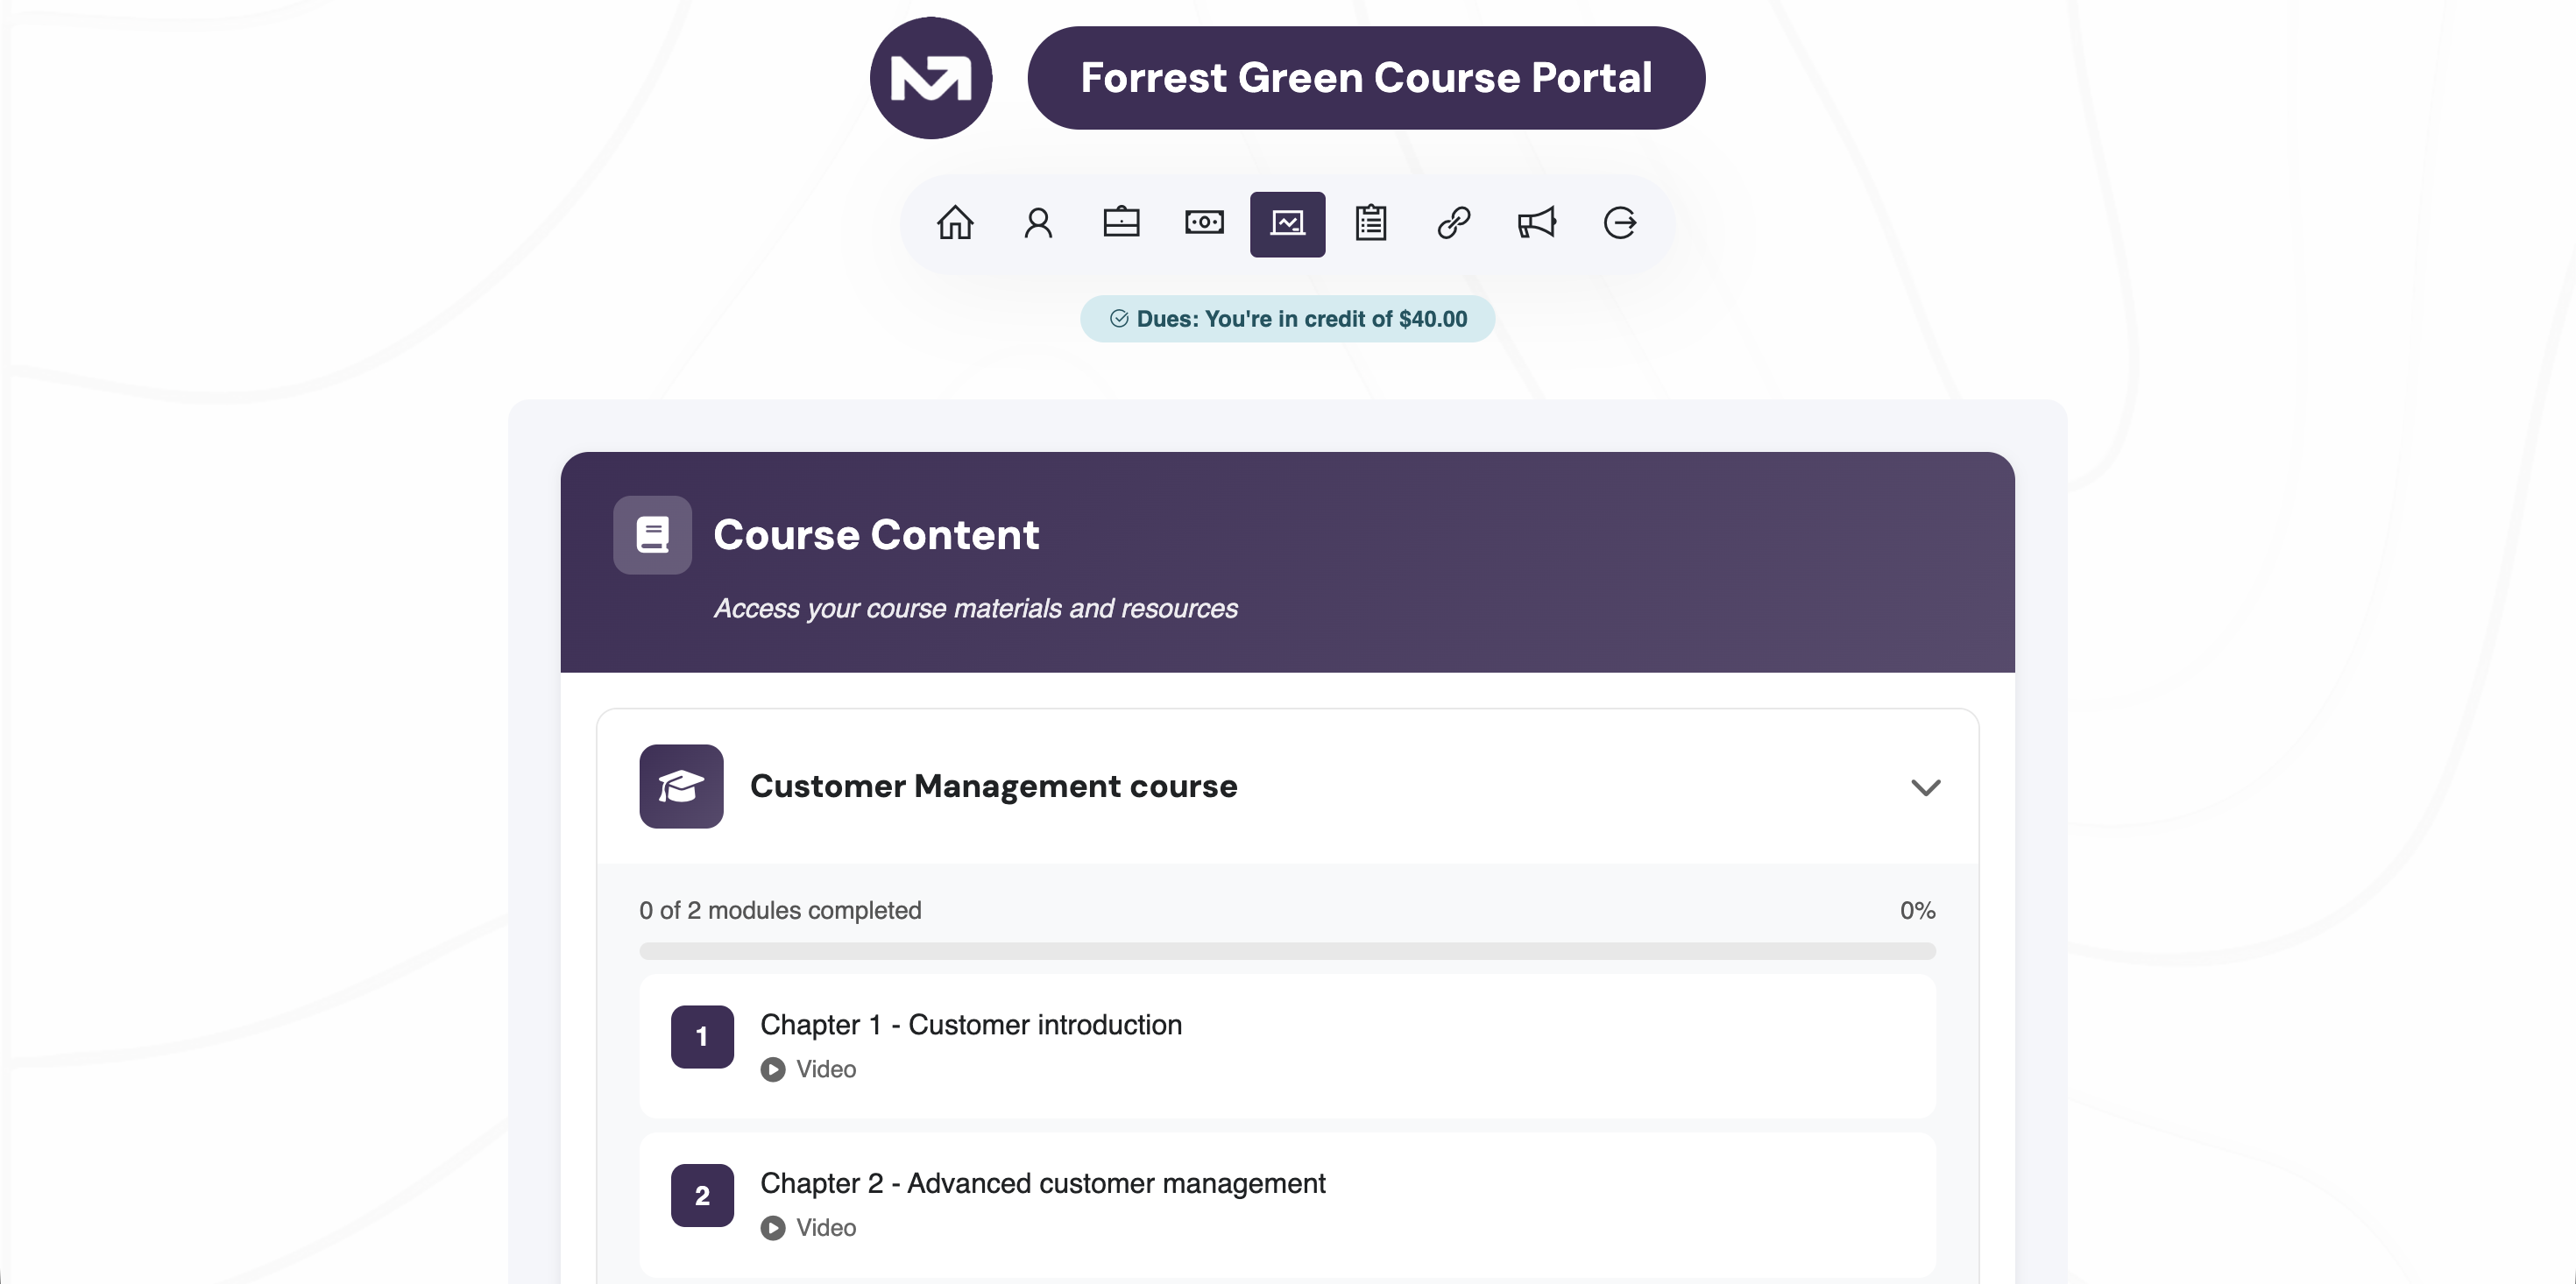
5. Students Work Through Their Course
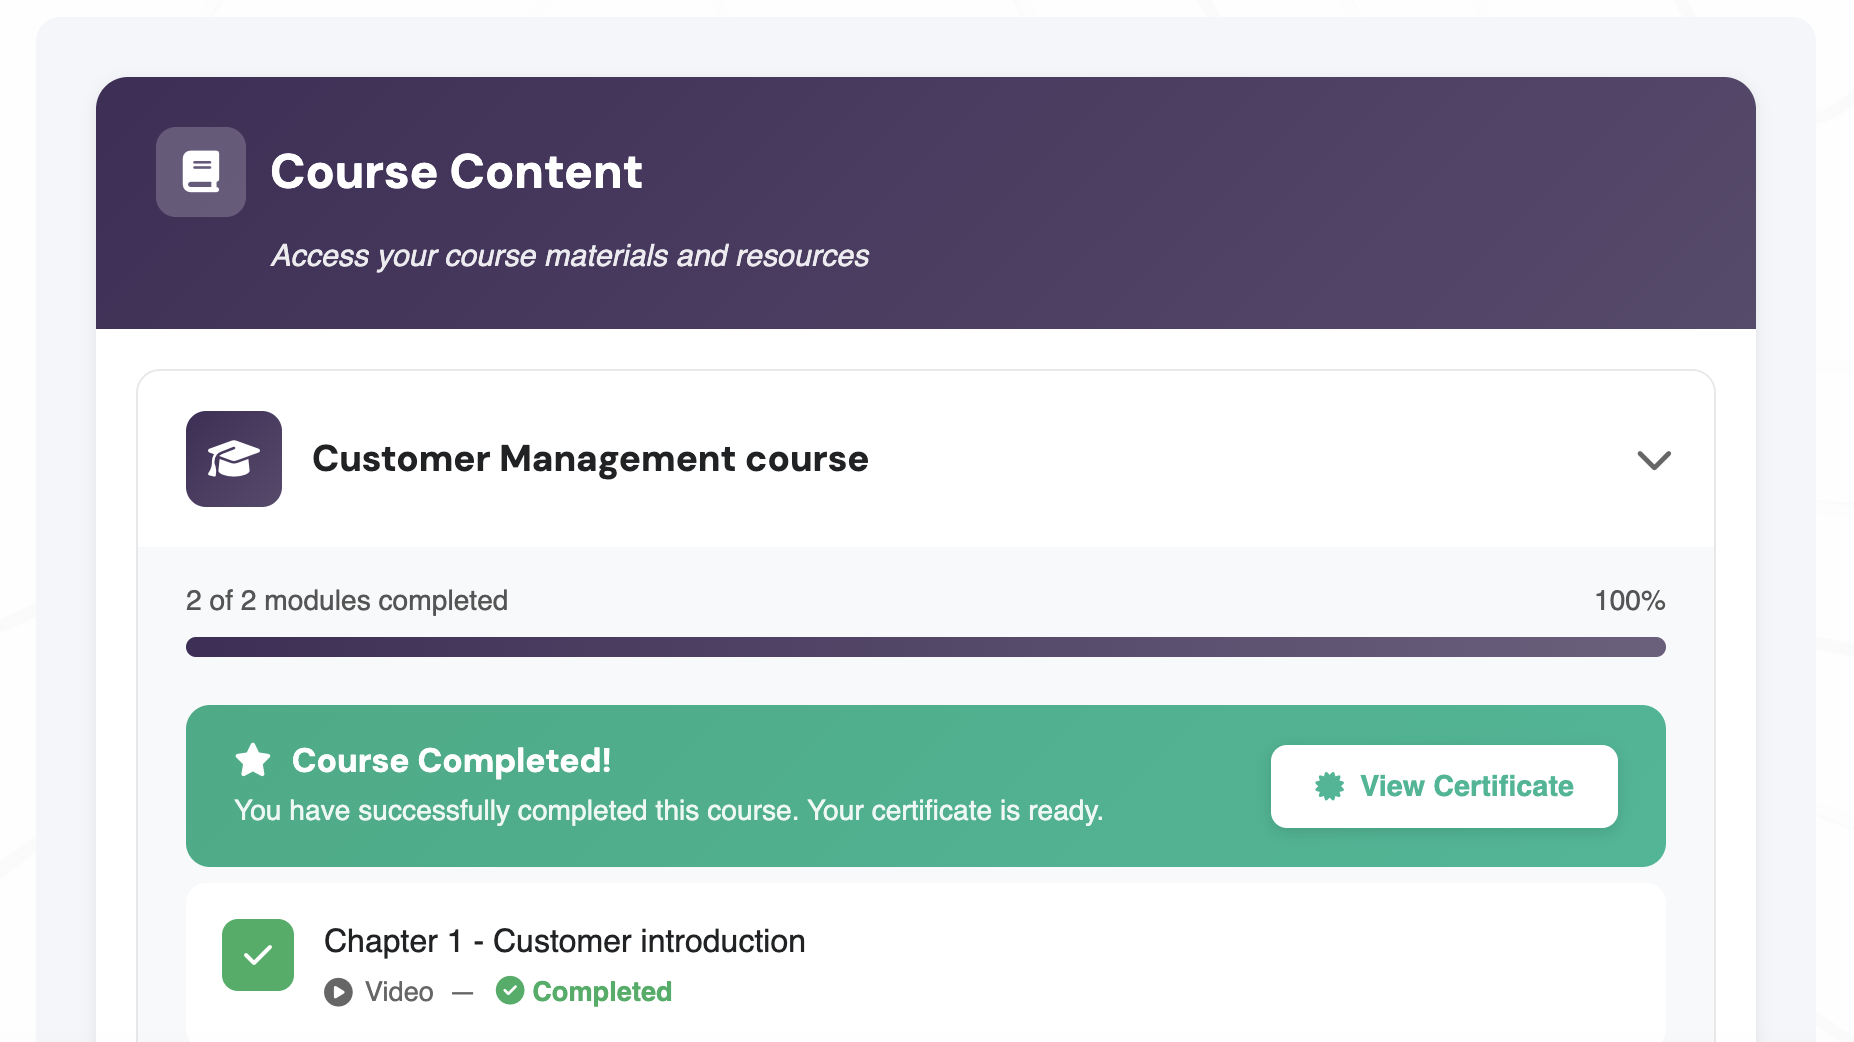
Once logged in, students can see all courses they are enrolled on. Each course shows the number of modules completed, a progress bar, and each chapter listed by title and content type. Students work through the modules at their own pace. When all modules are complete, a Course Completed banner appears with a View Certificate button.
6. Completion Certificates
When a student completes all modules, a certificate is generated automatically, no action is required from you. The student accesses it directly from their portal by clicking View Certificate. Each certificate includes the student's full name, the course title, the issuing organisation, the date of completion, and a unique certificate number. Students can download the certificate as an image or a PDF, and switch between portrait and landscape orientations. The organisation name and logo on the certificate reflect your portal settings.

7. Courses and Homework
The Course Manager supports two independent but complementary features: courses and homework. You can publish homework to students via the Homework —>Out menu, and review submissions via Homework <- In. When publishing homework, assign it to the group or list the student is enrolled on so the correct students can see and access it. You can publish courses without homework, and if your training is delivered offline you can publish homework without building course content. It is however recommended to have at least a basic course set up, so you have a registration page to capture and track enrolments.
8. Automated Messages and Discount Codes
From the Automated Messages tab on any course, configure emails that send automatically at key moments, for example, a welcome message on enrolment or a reminder when a student has not engaged for a set number of days. From the Discount Codes tab, create codes that students can apply at registration to reduce the course price.
Key things to remember
- A student must be enrolled on a course via course registration to access its content in the portal
- Students log into the portal using their email address and 4-digit PIN (or if you enable the use of passcode via the Hub Settings) — no separate account is needed
- Videos must be hosted on YouTube before adding them to a module. Unlisted videos are supported
- Individual modules can be set to free or paid access, allowing you to offer a preview chapter
- Certificates are generated automatically when all modules are completed
- Your course appears in the MyCo Store automatically once it is active and priced
- Always test the student experience before going live by logging into the portal as a test contact
Course Manager : publish, sell, and manage your courses entirely within MyCo