Part 1: Agreement Templates
1. What is an Agreement Template?
An agreement template is the master version of a contract that you create once and reuse as many times as you need. When you send a contract to a contact, MyCo takes a copy of the template, personalises it with the contact's details, and sends it as a unique contract instance. The original template is never changed. You can have as many templates as you need, for example a service contract, an NDA, a membership agreement, and a terms of engagement document, each saved and ready to send.
2. Creating a Template
Navigate to Documents from the main menu and click Agreement Templates. Click the plus icon to create a new template. Give it a title and write the contract body in the editor. You can use merge tags throughout the title and body to personalise the contract automatically when it is sent. The available merge tags include {{firstname}}, {{lastname}}, {{email}}, {{telephone}}, {{mobile}}, {{organisation_name}}, {{company}}, {{title}}, and {{today}}, which inserts the current date. You can also use your custom additional fields using {{field1}} through {{field24}}.
Each template also has a Confirmation Email and Confirmation Subject field. This is the email that is sent to the contact once they have signed the contract. You can personalise it with the same merge tags.
3. Business Signature
The template includes a Business Signature field. This is the text block that appears on the left side of the signed PDF representing your organisation, for example your name, title, and company name. If you leave it blank when sending, MyCo will auto-populate it from your account's admin user name and organisation name.
Part 2: Sending a Contract
4. Sending a Contract to a Single Contact
Navigate to Documents and click Send Agreement. Select the contact you want to send the contract to, then choose the agreement template. The contract title pre-fills from the template but you can edit it before sending. Click Send Agreement and MyCo will generate a unique contract instance for that contact and send them an email with a secure sign link. The link is unique to them and should not be shared.
5. Sending a Contract with Multiple Signatories
If your contract requires more than one person to sign, toggle on Multiple Signatories when sending. This reveals a panel where you can add as many additional signatories as needed. For each additional signatory enter their full name, role or job title, email address, and side. Side determines which column they appear in on the signed PDF. Choose your organisation name if they are signing on your behalf, or Client if they are signing on the other side.
The primary contact selected at the top always receives their sign link via the standard contract email. Each additional signatory receives their own separate email with their own unique sign link pointing to their own signing page. Every signatory must sign before the final PDF is generated. The contract tracks progress in real time and the signed PDF is only produced once the last person has signed, regardless of the order in which people sign.
6. The Signing Experience
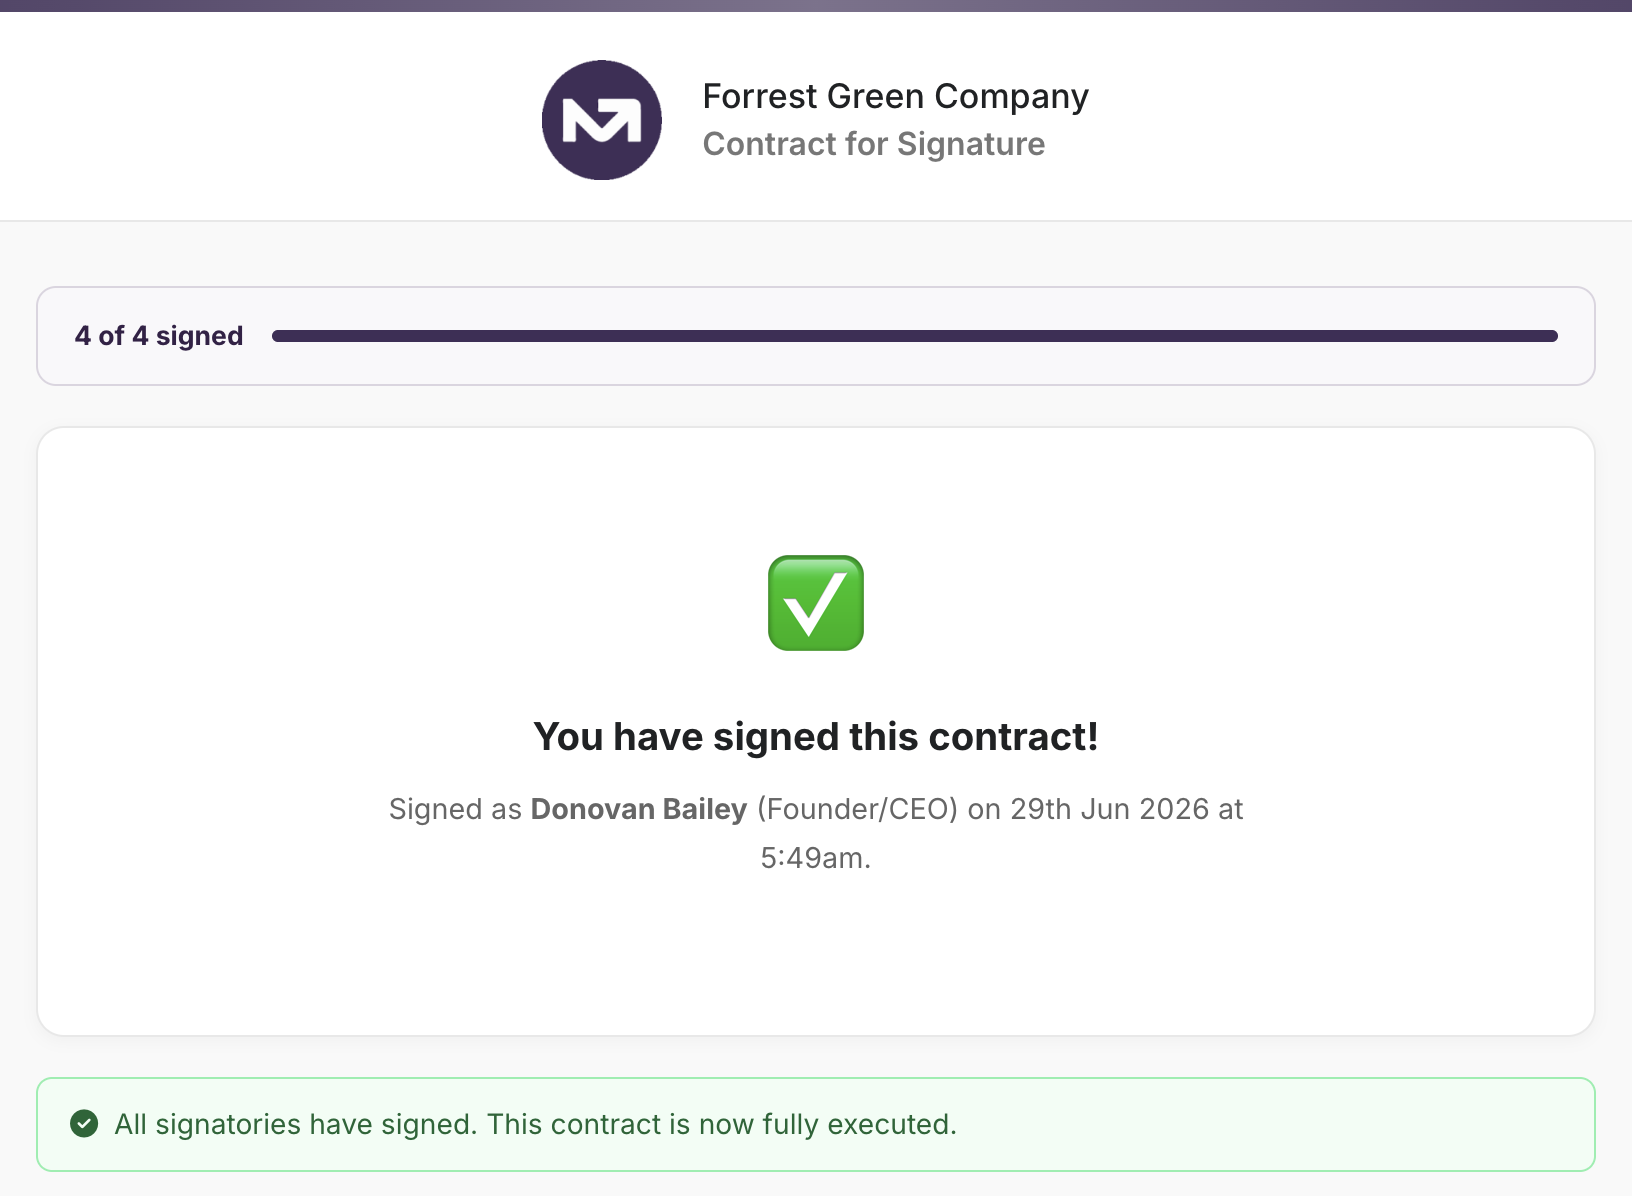
When a contact clicks their sign link they are taken to a secure signing page showing the full contract. They confirm their email address, draw their signature in the signature pad, and click Accept and Sign. For additional signatories on a multi-signatory contract, the page also shows a progress indicator showing how many of the total required signatures have been collected so far.
Once the primary contact signs on a multi-signatory contract, they see a message confirming their signature has been recorded and telling them the contract will be complete once all parties have signed. They do not receive the confirmation email or see the signed PDF until everyone has signed.
7. The Signed PDF
Once all parties have signed, MyCo generates the signed PDF automatically. The PDF includes the full contract body, followed by a signature block. On a single-signatory contract the signature block shows your organisation's signature on the left and the contact's signature image on the right. On a multi-signatory contract, the left column shows your organisation's business signature alongside any signatories from your side, and the right column shows the client and any signatories from their side, each with their signature image, name, role, and signing date.
The confirmation email with the signed PDF attached is sent to the primary contact and to your MyCo account email once the contract is fully complete.
Part 3: Managing Pending Agreements
8. Viewing Pending Agreements
Navigate to Documents and click Pending Agreements to see all contracts that have been sent but not yet fully signed. Each row shows the contact's name, company, the date sent, due date, and a live status badge showing where the contract stands.
Status badges you will see:
Awaiting signature — a single-signatory contract that has not yet been signed.
Awaiting all (0/2) — a multi-signatory contract where no one has signed yet. The names of all pending signatories are shown below the badge.
1/2 signed — a multi-signatory contract in progress. The badge shows how many have signed and lists the names of those still outstanding below.
All signed (2/2) — all parties have signed and the PDF has been generated.
Rejected — the contact has rejected the contract and provided a reason.
9. Resending a Contract
Click the envelope icon on any row to resend the contract email to the primary contact. This is useful if they have lost or not received the original email.
For multi-signatory contracts where some signatories have not yet signed, a clock icon button also appears. Clicking it sends a reminder email to every signatory whose signature is still outstanding in one action. Each pending signatory receives their own reminder with their unique sign link. You do not need to resend to signatories who have already signed.
10. Editing a Pending Contract
Click the pencil icon to edit a pending contract. You can update the contract title, body, due date, and business signature before it has been signed. Use this if you need to make a correction after sending.
11. Deleting a Contract
Click the trash icon to permanently delete a pending contract. This removes the contract record and its sign links. Signed contracts stored as documents on a contact's profile are not affected.
Part 4: Viewing Completed Contracts
12. Finding a Signed Contract
Once a contract has been signed and the PDF generated, it is stored on the contact's profile. Go to Contacts, search for the contact by name, open their profile, and click the Documents tab. You will see all signed contracts listed there and can download or view them at any time.
13. Contracts in Workflows
The Issue Contract and Collect Signature action is available in both standalone Workflows and Stage Automations. When used in a workflow, you can choose whether the action marks itself complete when the contract is sent, or waits until the contact signs. When set to wait for signature, the next action in the sequence fires automatically the moment the contract is fully signed by all parties, with no manual intervention required. This makes it straightforward to chain a contract signature into a larger onboarding or sales sequence, for example sending an invoice automatically once the contract is signed.
Agreements in MyCo — from send to signed PDF, every step handled for you