How it works, a quick overview
1. Create an Election
An admin creates an election, giving it a name, description, and a voting window (start and end date). Elections start in Draft status, meaning members cannot vote yet.
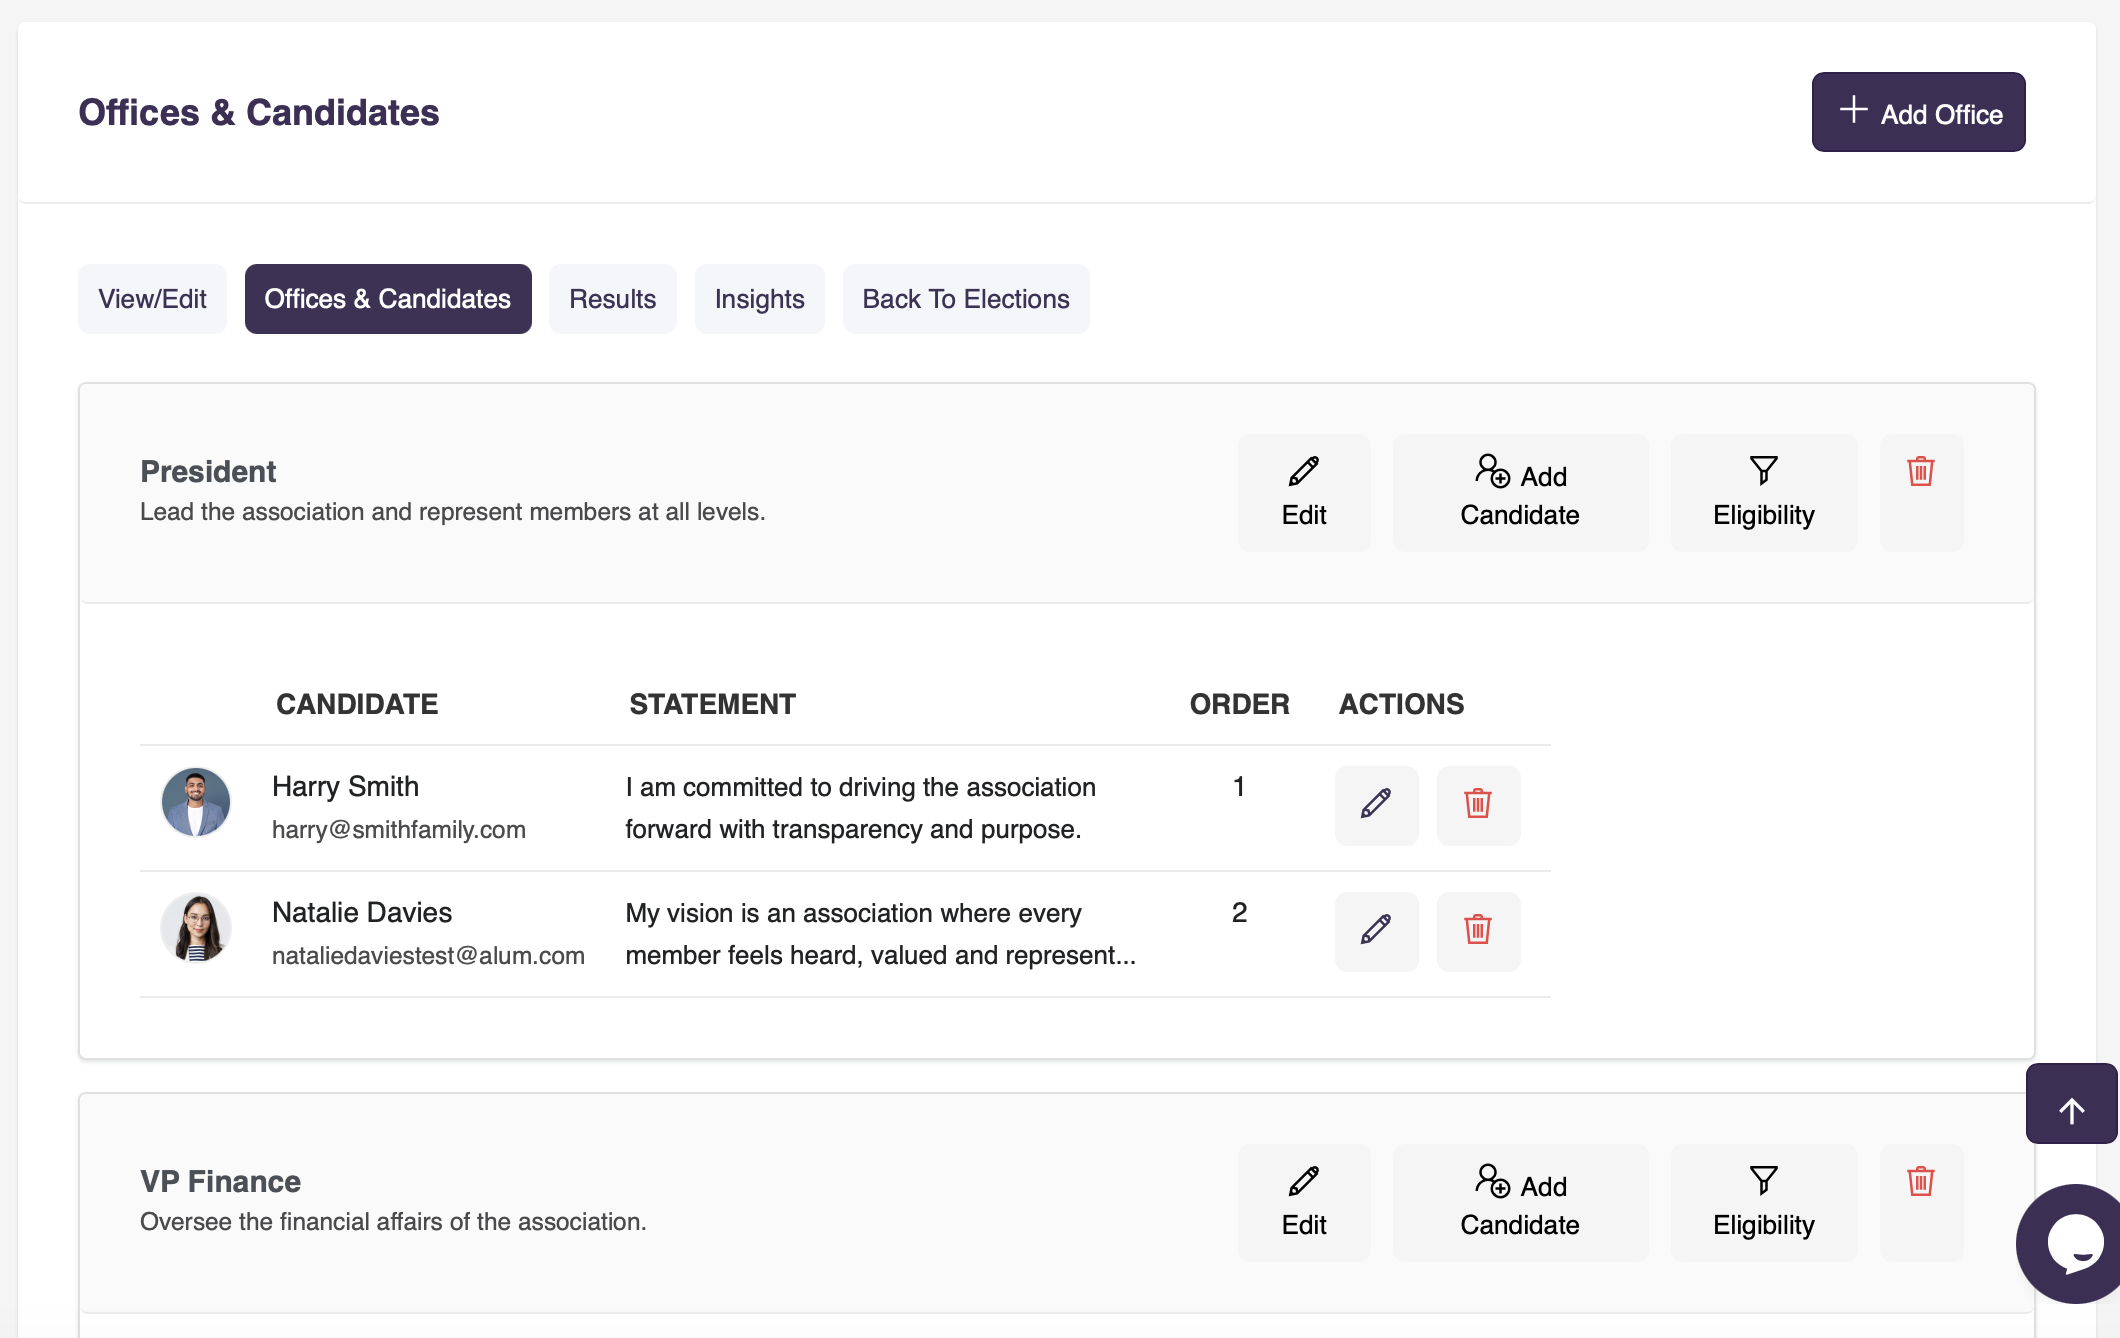
2. Set up Offices and Candidates
Within the election, you define the offices being contested — for example, President, Treasurer, or Board Member. For each office, you add the candidates who are standing. You can also upload a candidate photo and add a candidate statement that members will see on the ballot.
3. Set Eligibility Rules (Optional)
If only certain members should vote for a particular office, you can add eligibility rules — for example, members in a specific country, city, or membership category. Members who do not meet the criteria for an office will simply not see that office on their ballot. An example is if you have a regional office such as 'United Kingdom Lead'. You can set eligibility rules such that only those who have 'United Kingdom' as their address, are eligible to vote for the office.
4. Open Voting
When you are ready, set the election status to Active. Eligible members will see the election in their member portal and can cast their vote. Each member gets one ballot. Voting is completely anonymous — a member’s identity is never linked to their individual selections. Only contacts in your Members contact category have access to the voting portal.
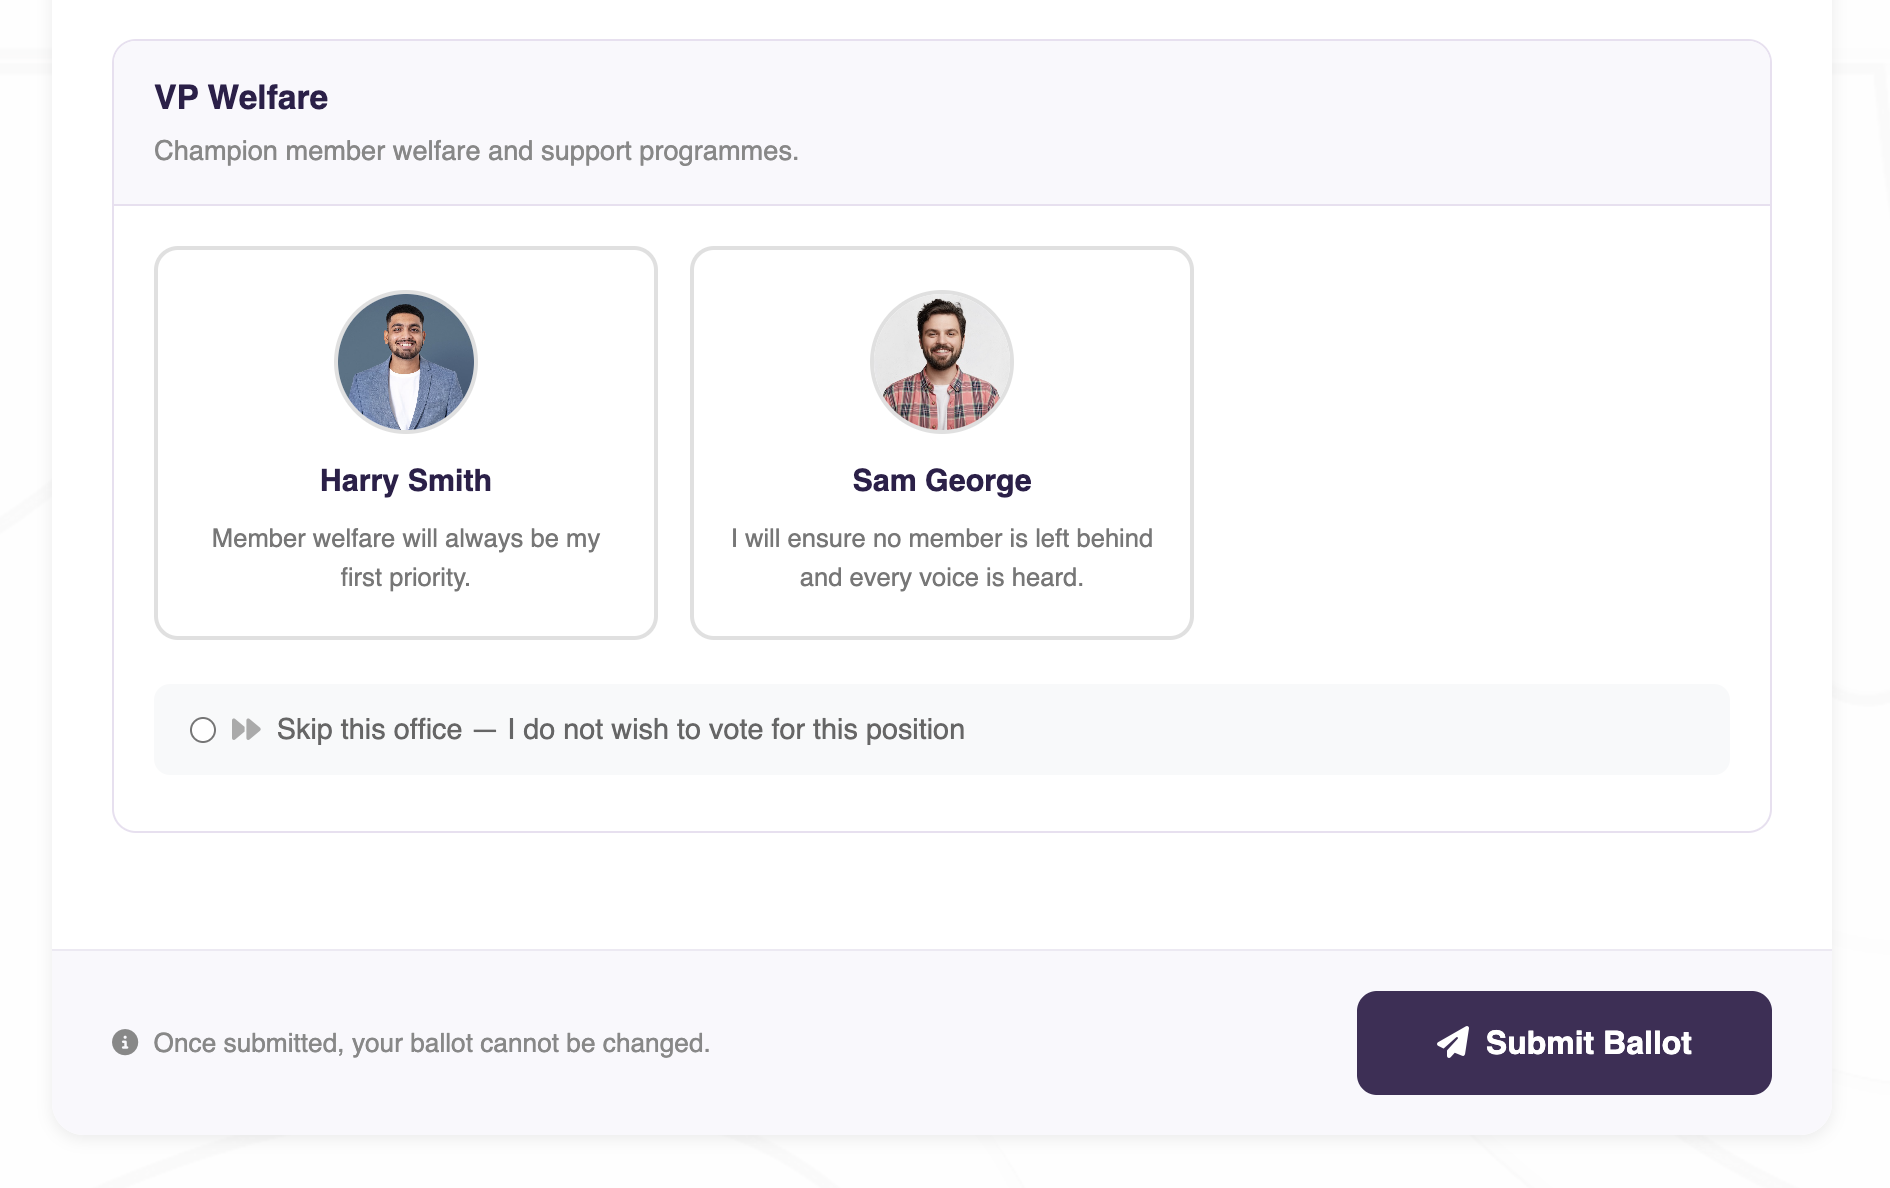
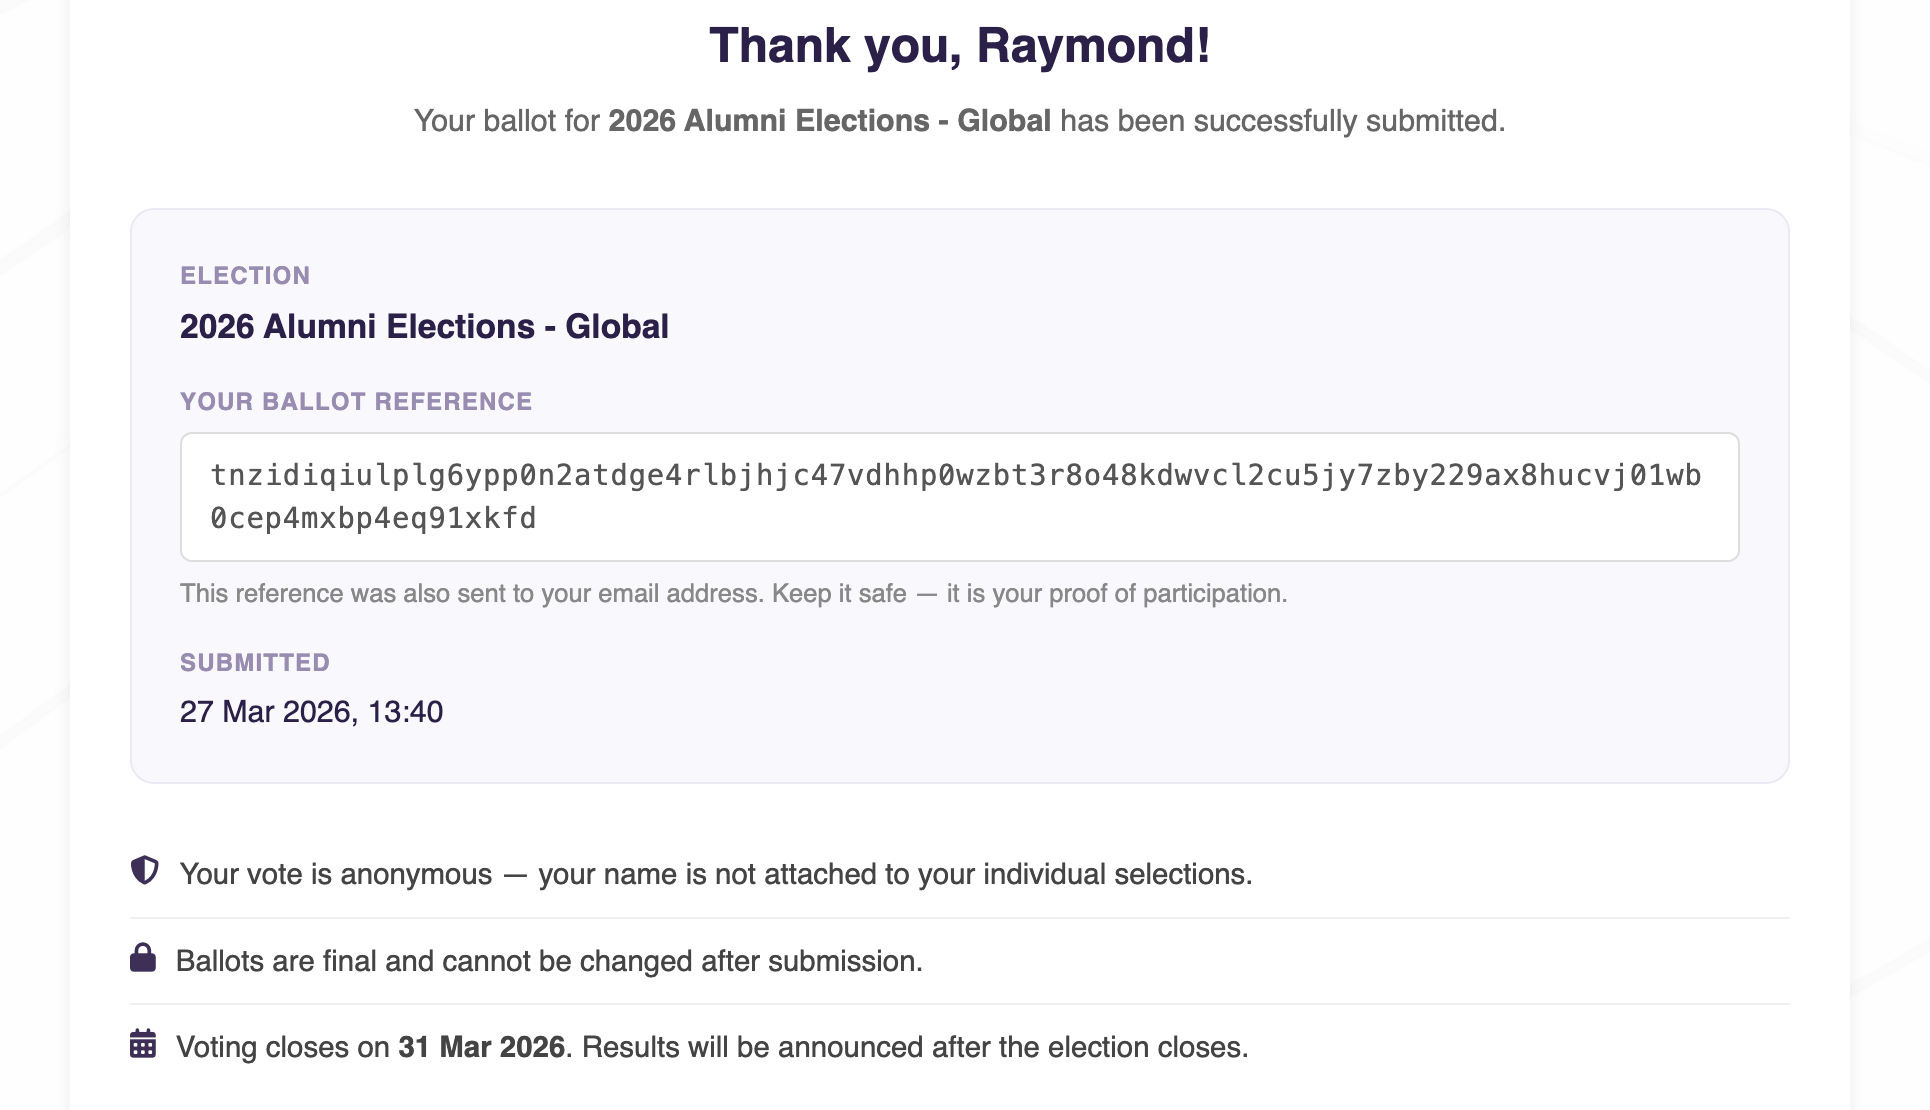
5. Members Vote
Members log into the portal, select their preferred candidate for each office, and submit their ballot. Once submitted, the ballot cannot be changed. Members receive a receipt reference by email as proof of participation. Members may skip an office if it is configured to allow skipping — submitting a ballot counts as participation even if some offices are skipped.
6. Track Voter Participation
While the election is active, and after it closes, admins can view the Voters tab to see exactly who has submitted their ballot and who has not yet voted. Both lists can be searched by name and exported as a CSV file. This is particularly useful for sending targeted reminders to members who have not yet participated (see Step 8).
7. Close the Election
When voting closes, set the election status to Closed. Once closed, an election cannot be re-opened or edited. Results and insights become available to admins immediately.
8. Email Voters or Non-Voters
From the Email module, you can target election participants directly as recipients. Three options are available when composing an email:
- Election — All — all eligible members for the election
- Election — Voted — members who have submitted their ballot
- Election — Yet to vote — members who have not yet submitted their ballot
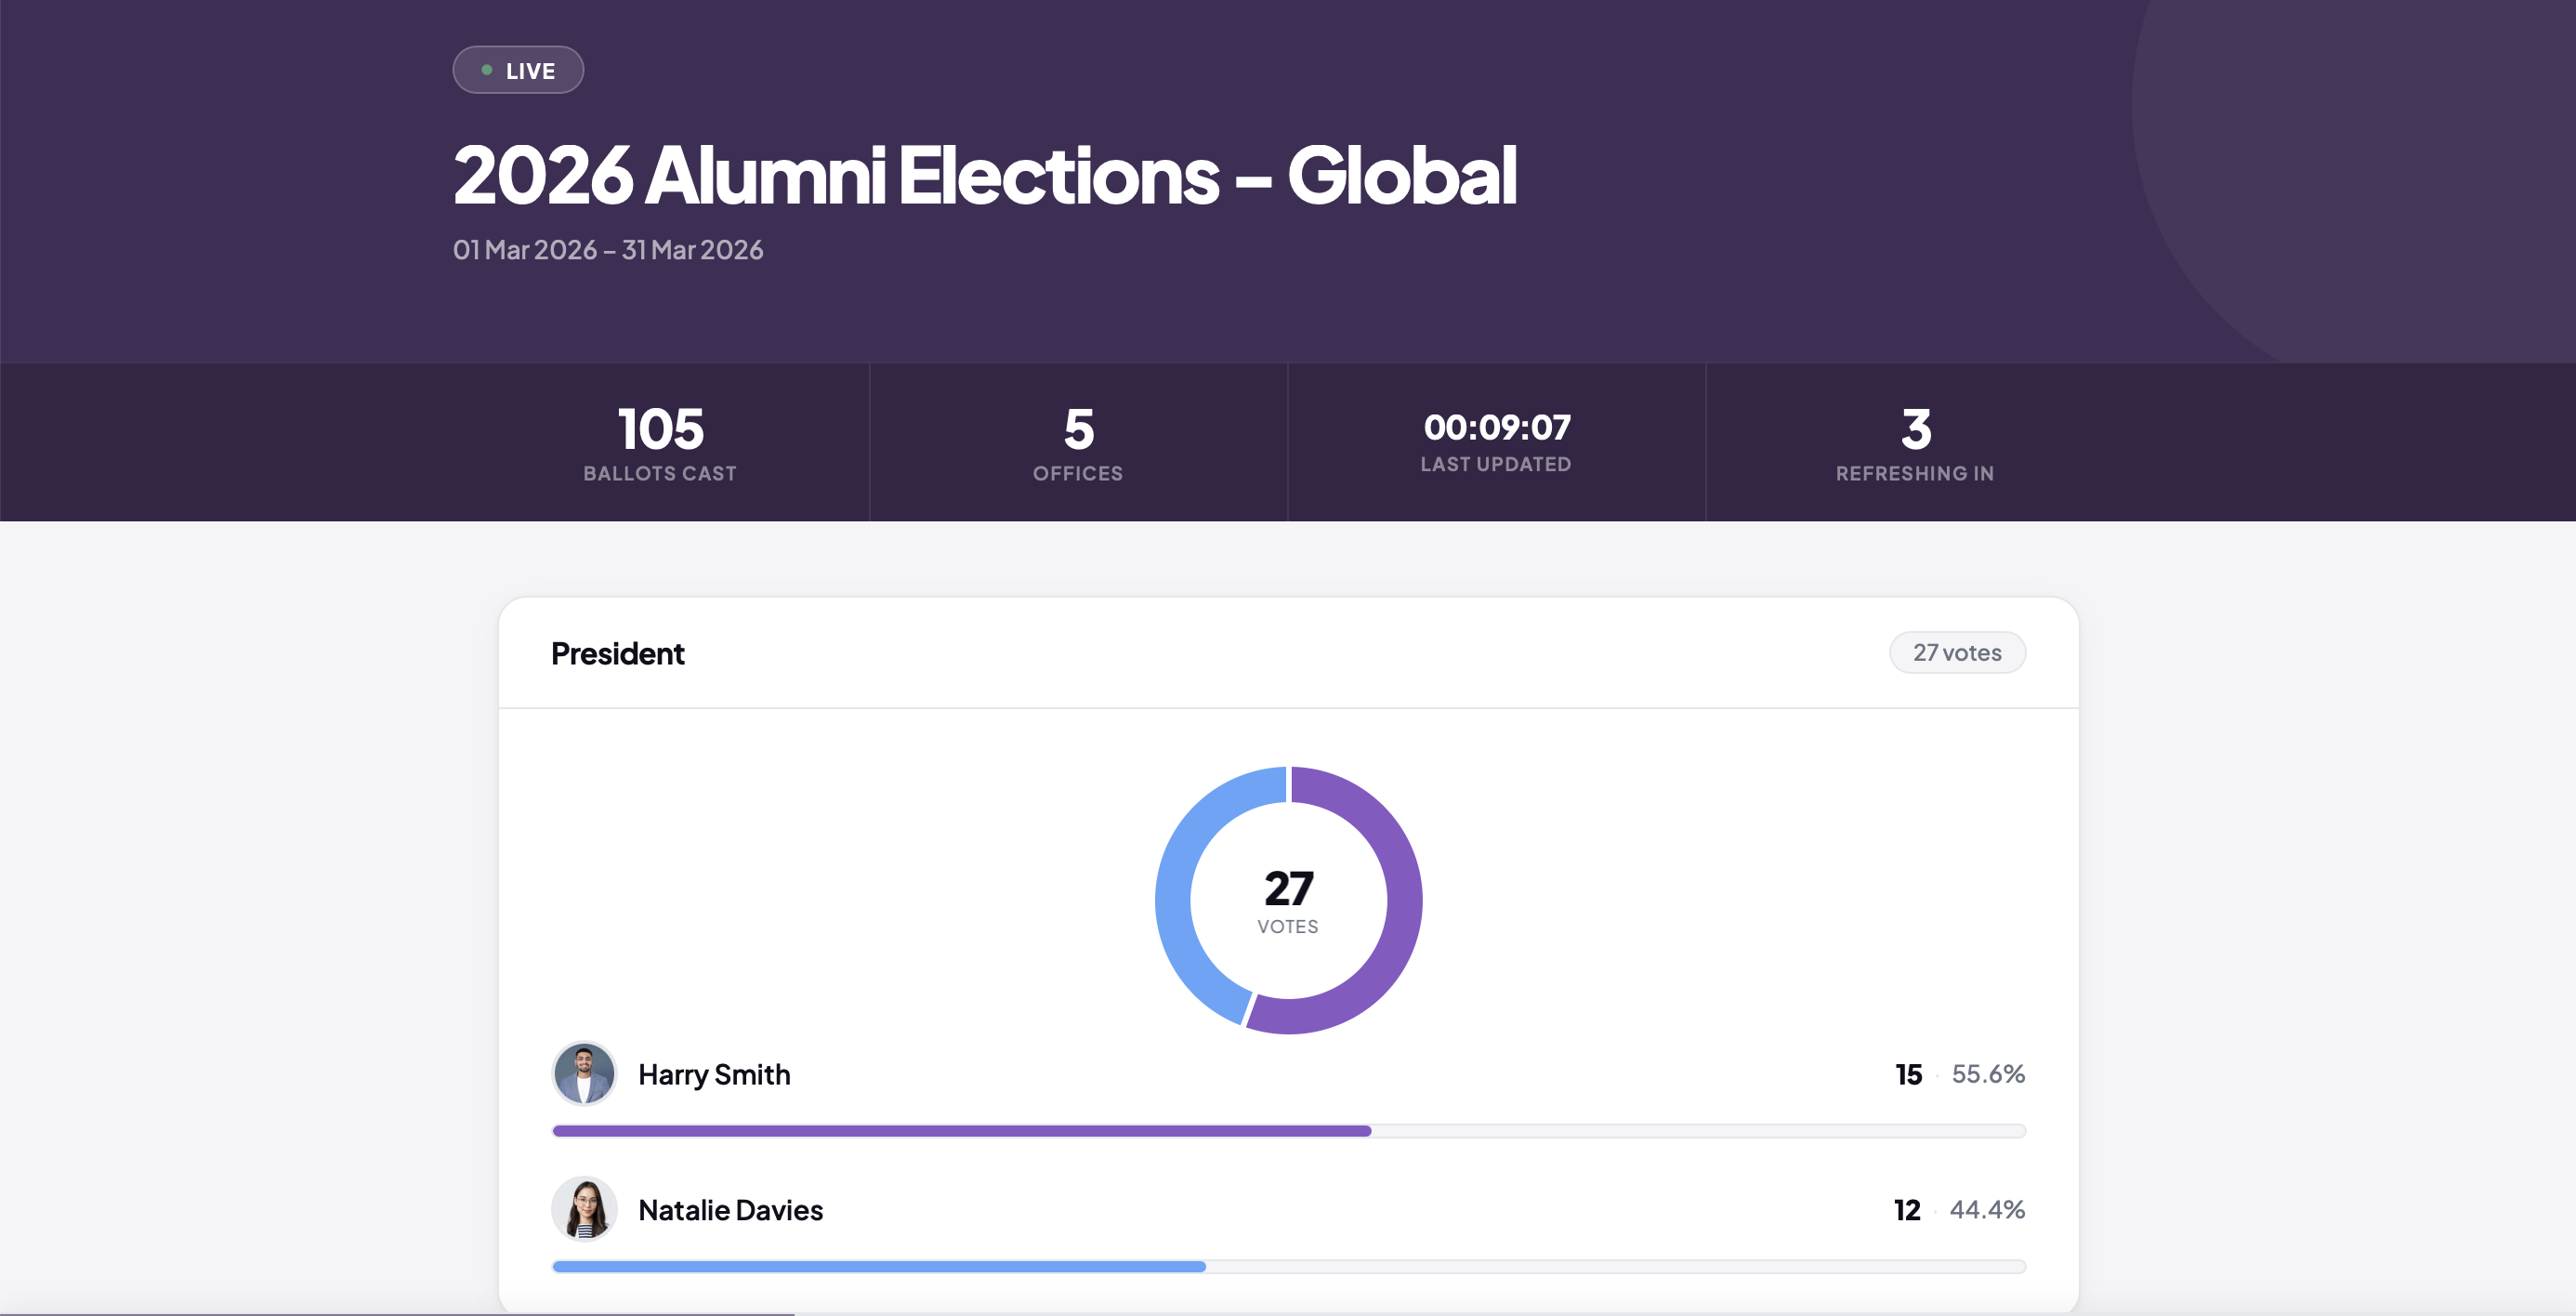
9. Publish a Live Public Results Page
Each election has an optional public results page — a branded, publicly accessible page that displays live results in real time, updating automatically every 10 seconds. The page shows vote counts, percentage share, and a doughnut chart for each office.
Admins control visibility via the Publish Results Page setting on the election. Set it to Yes to make the page live and share the public URL with members, stakeholders, or the wider community. Set it to No to hide results — visitors will see an “Election in Progress” holding page instead. The toggle can be switched at any time, giving you full control over when results become public.
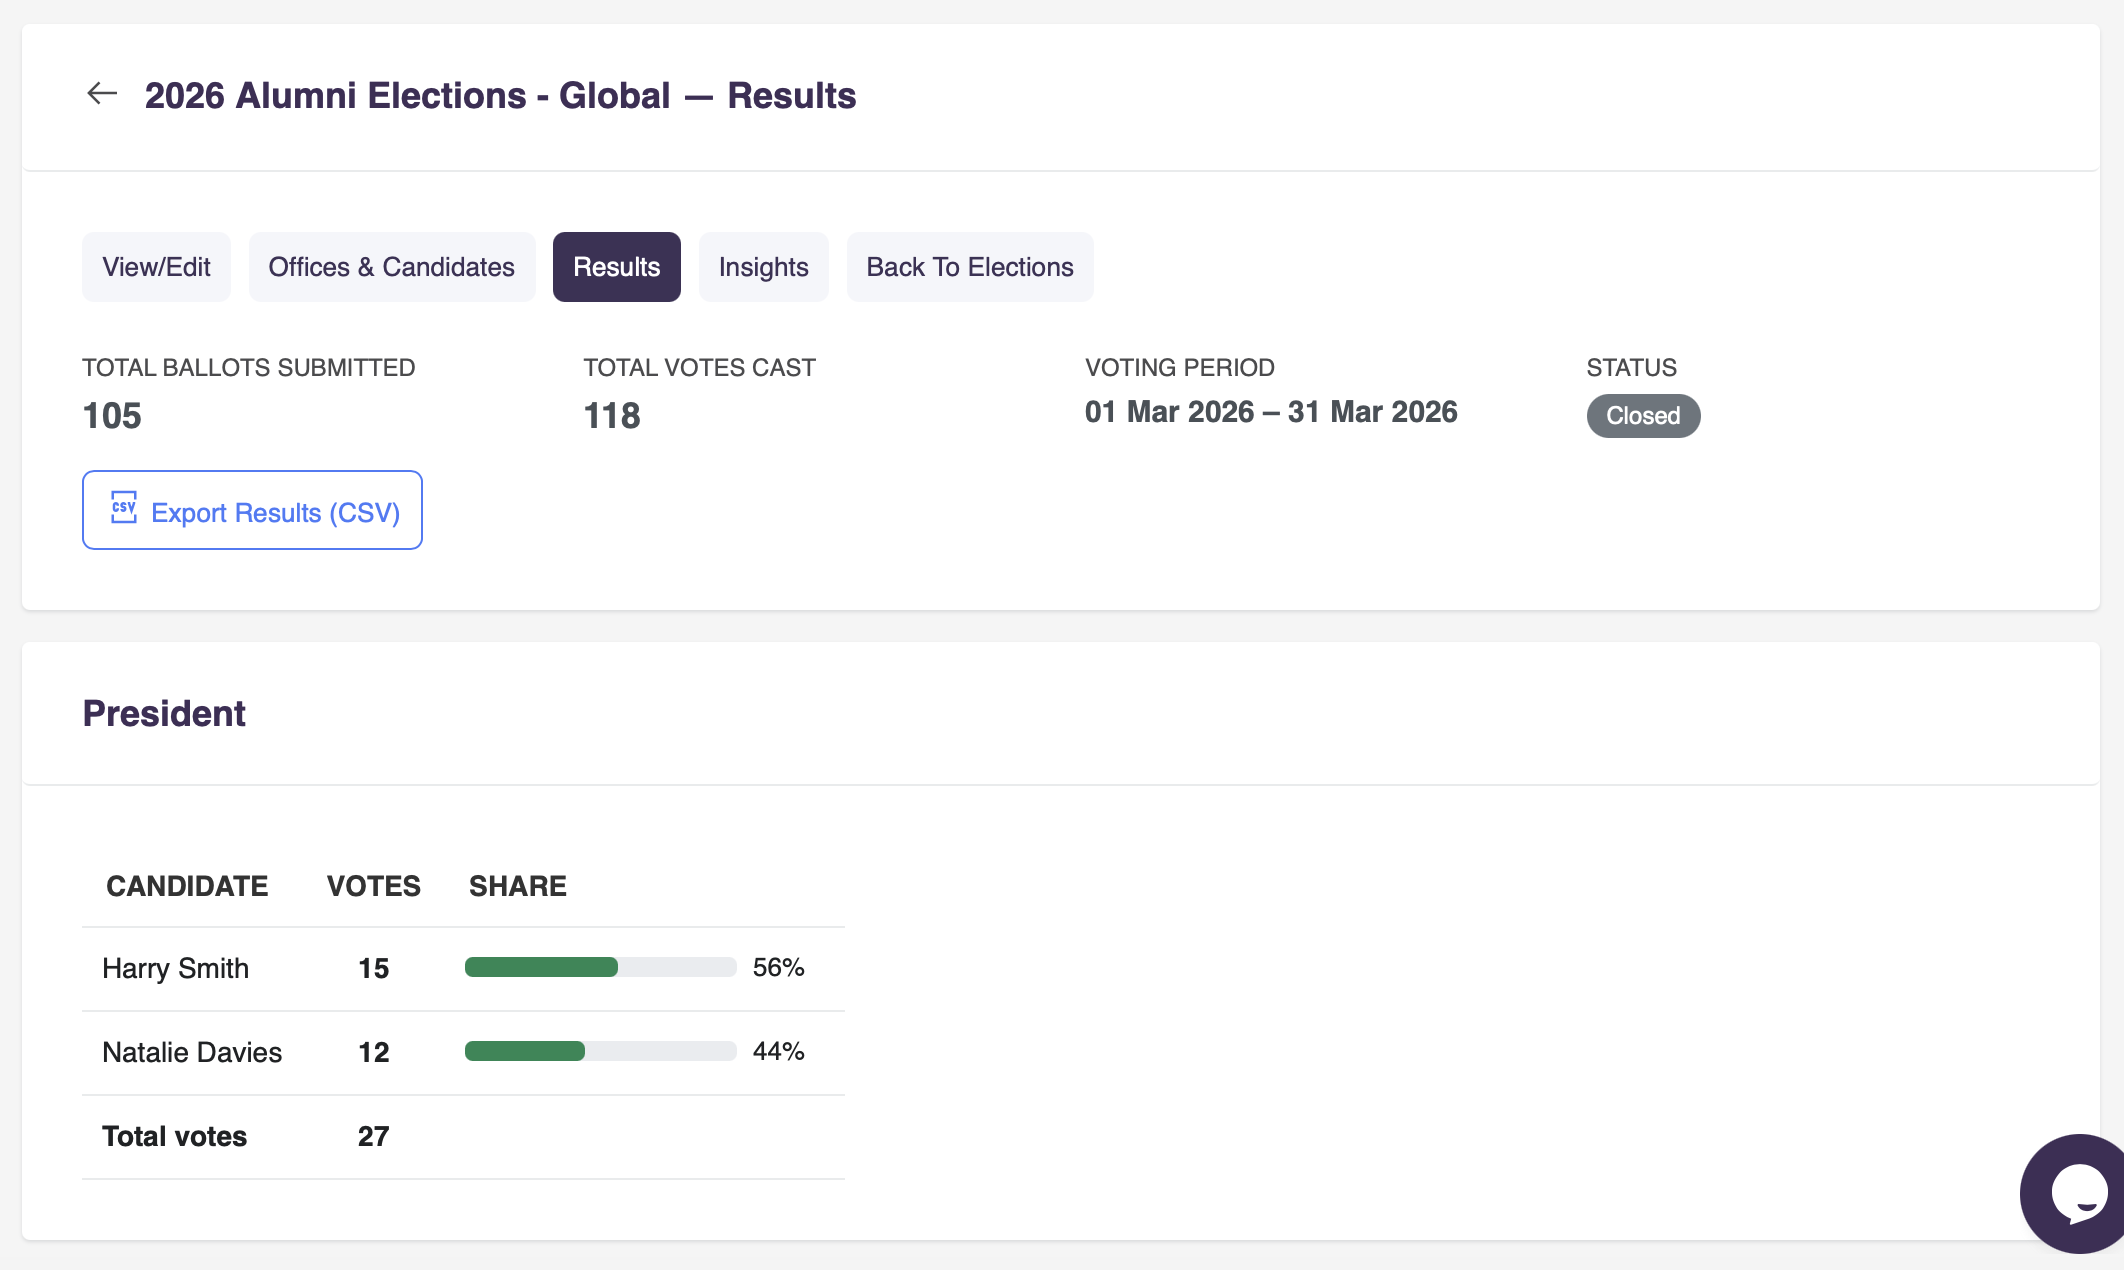
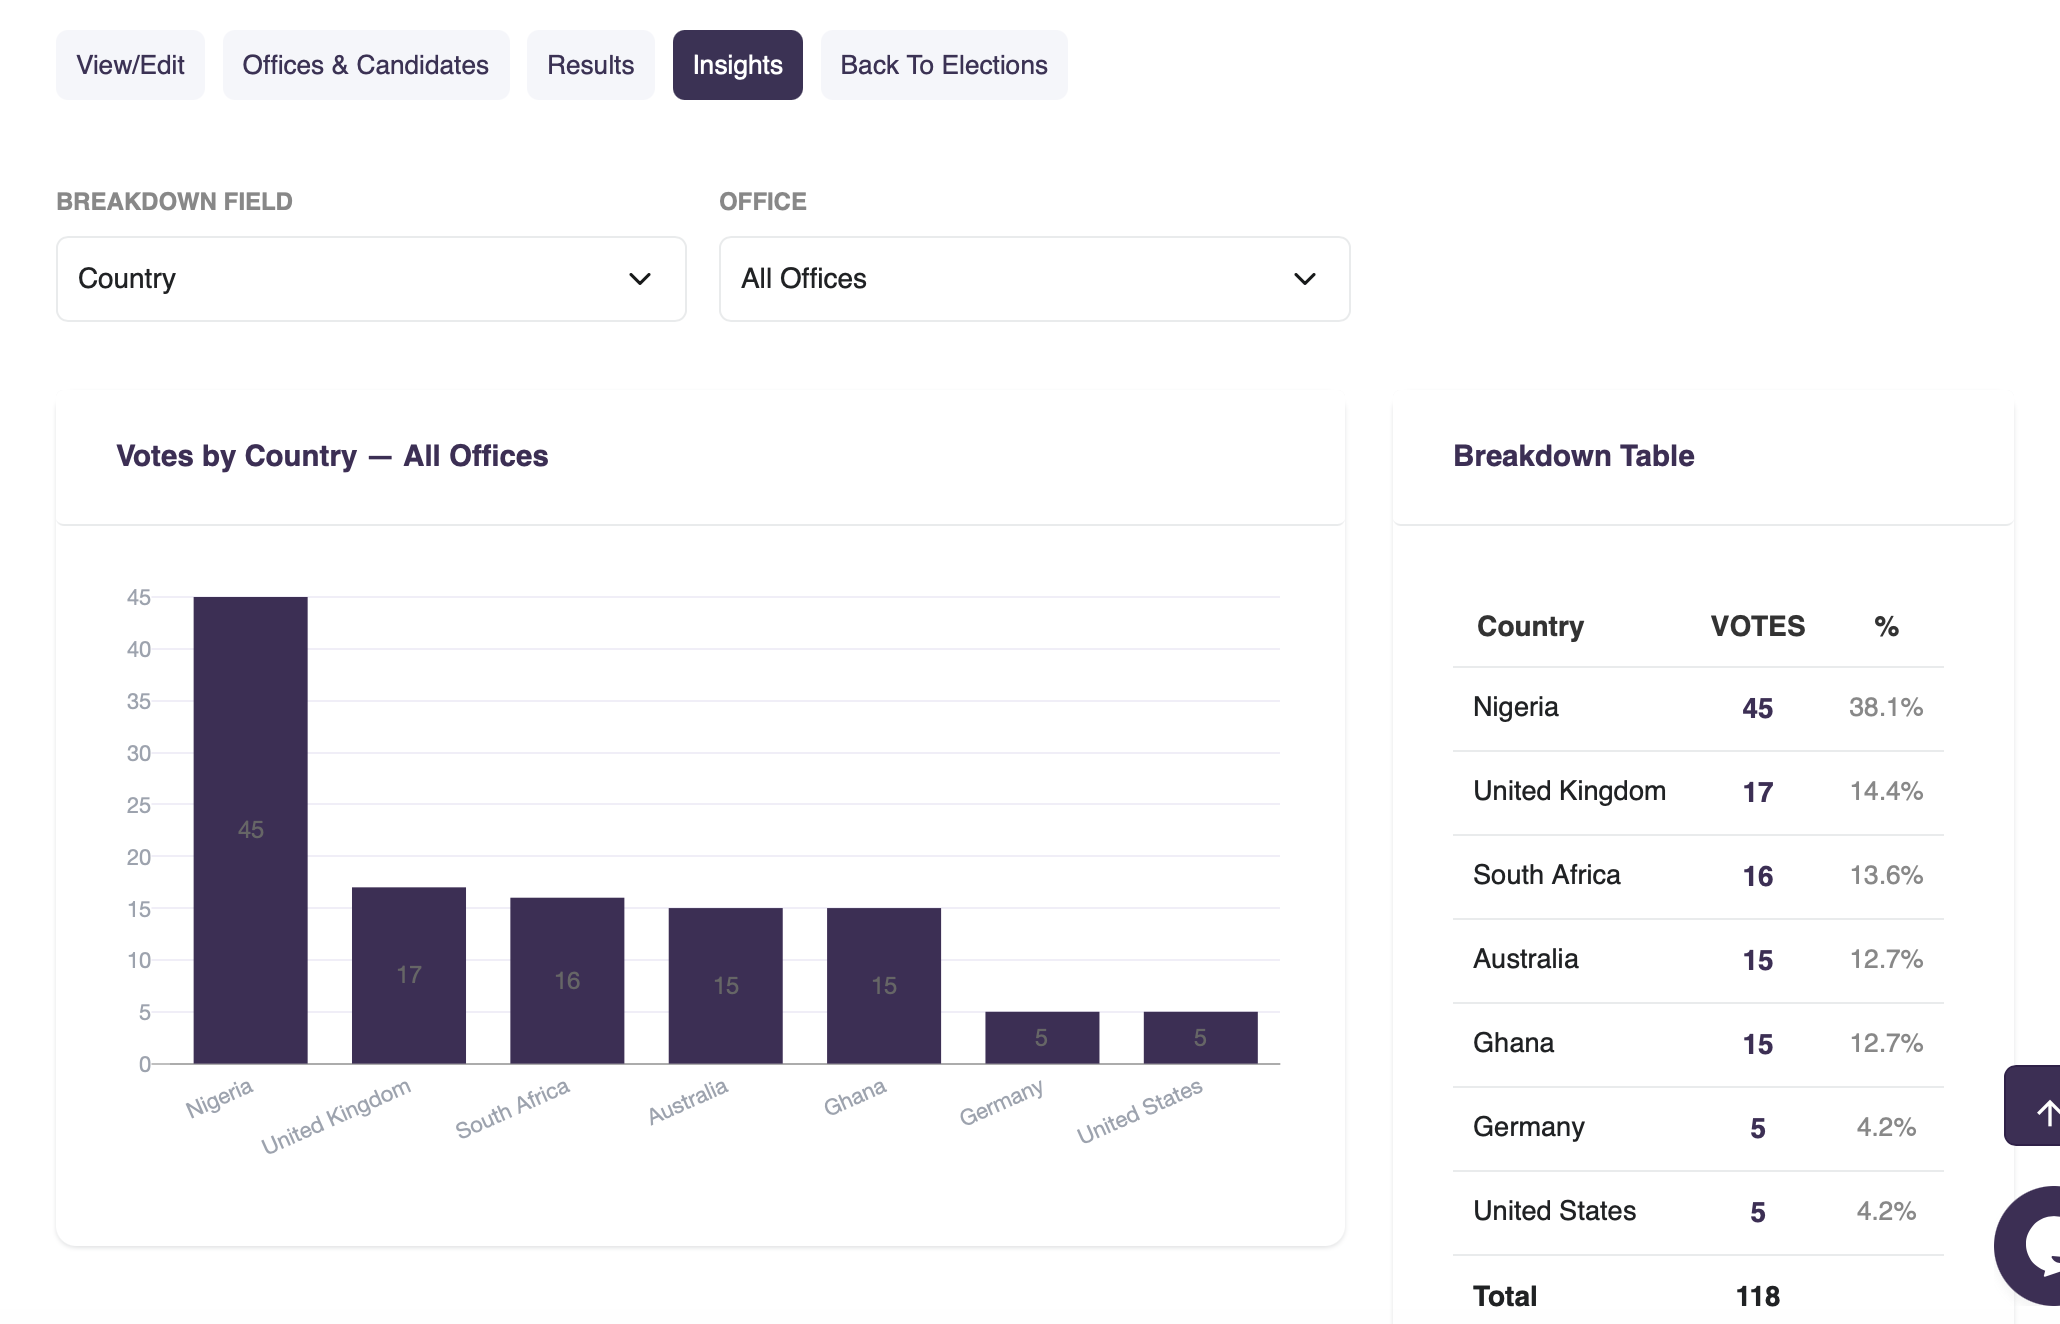
10. View Results and Insights
After closing, admins can view the full results, votes per candidate per office, with percentage share. Results can be exported as a CSV file. The Insights tab allows you to analyse how votes were distributed across countries, cities, or any other member profile fields you have configured.
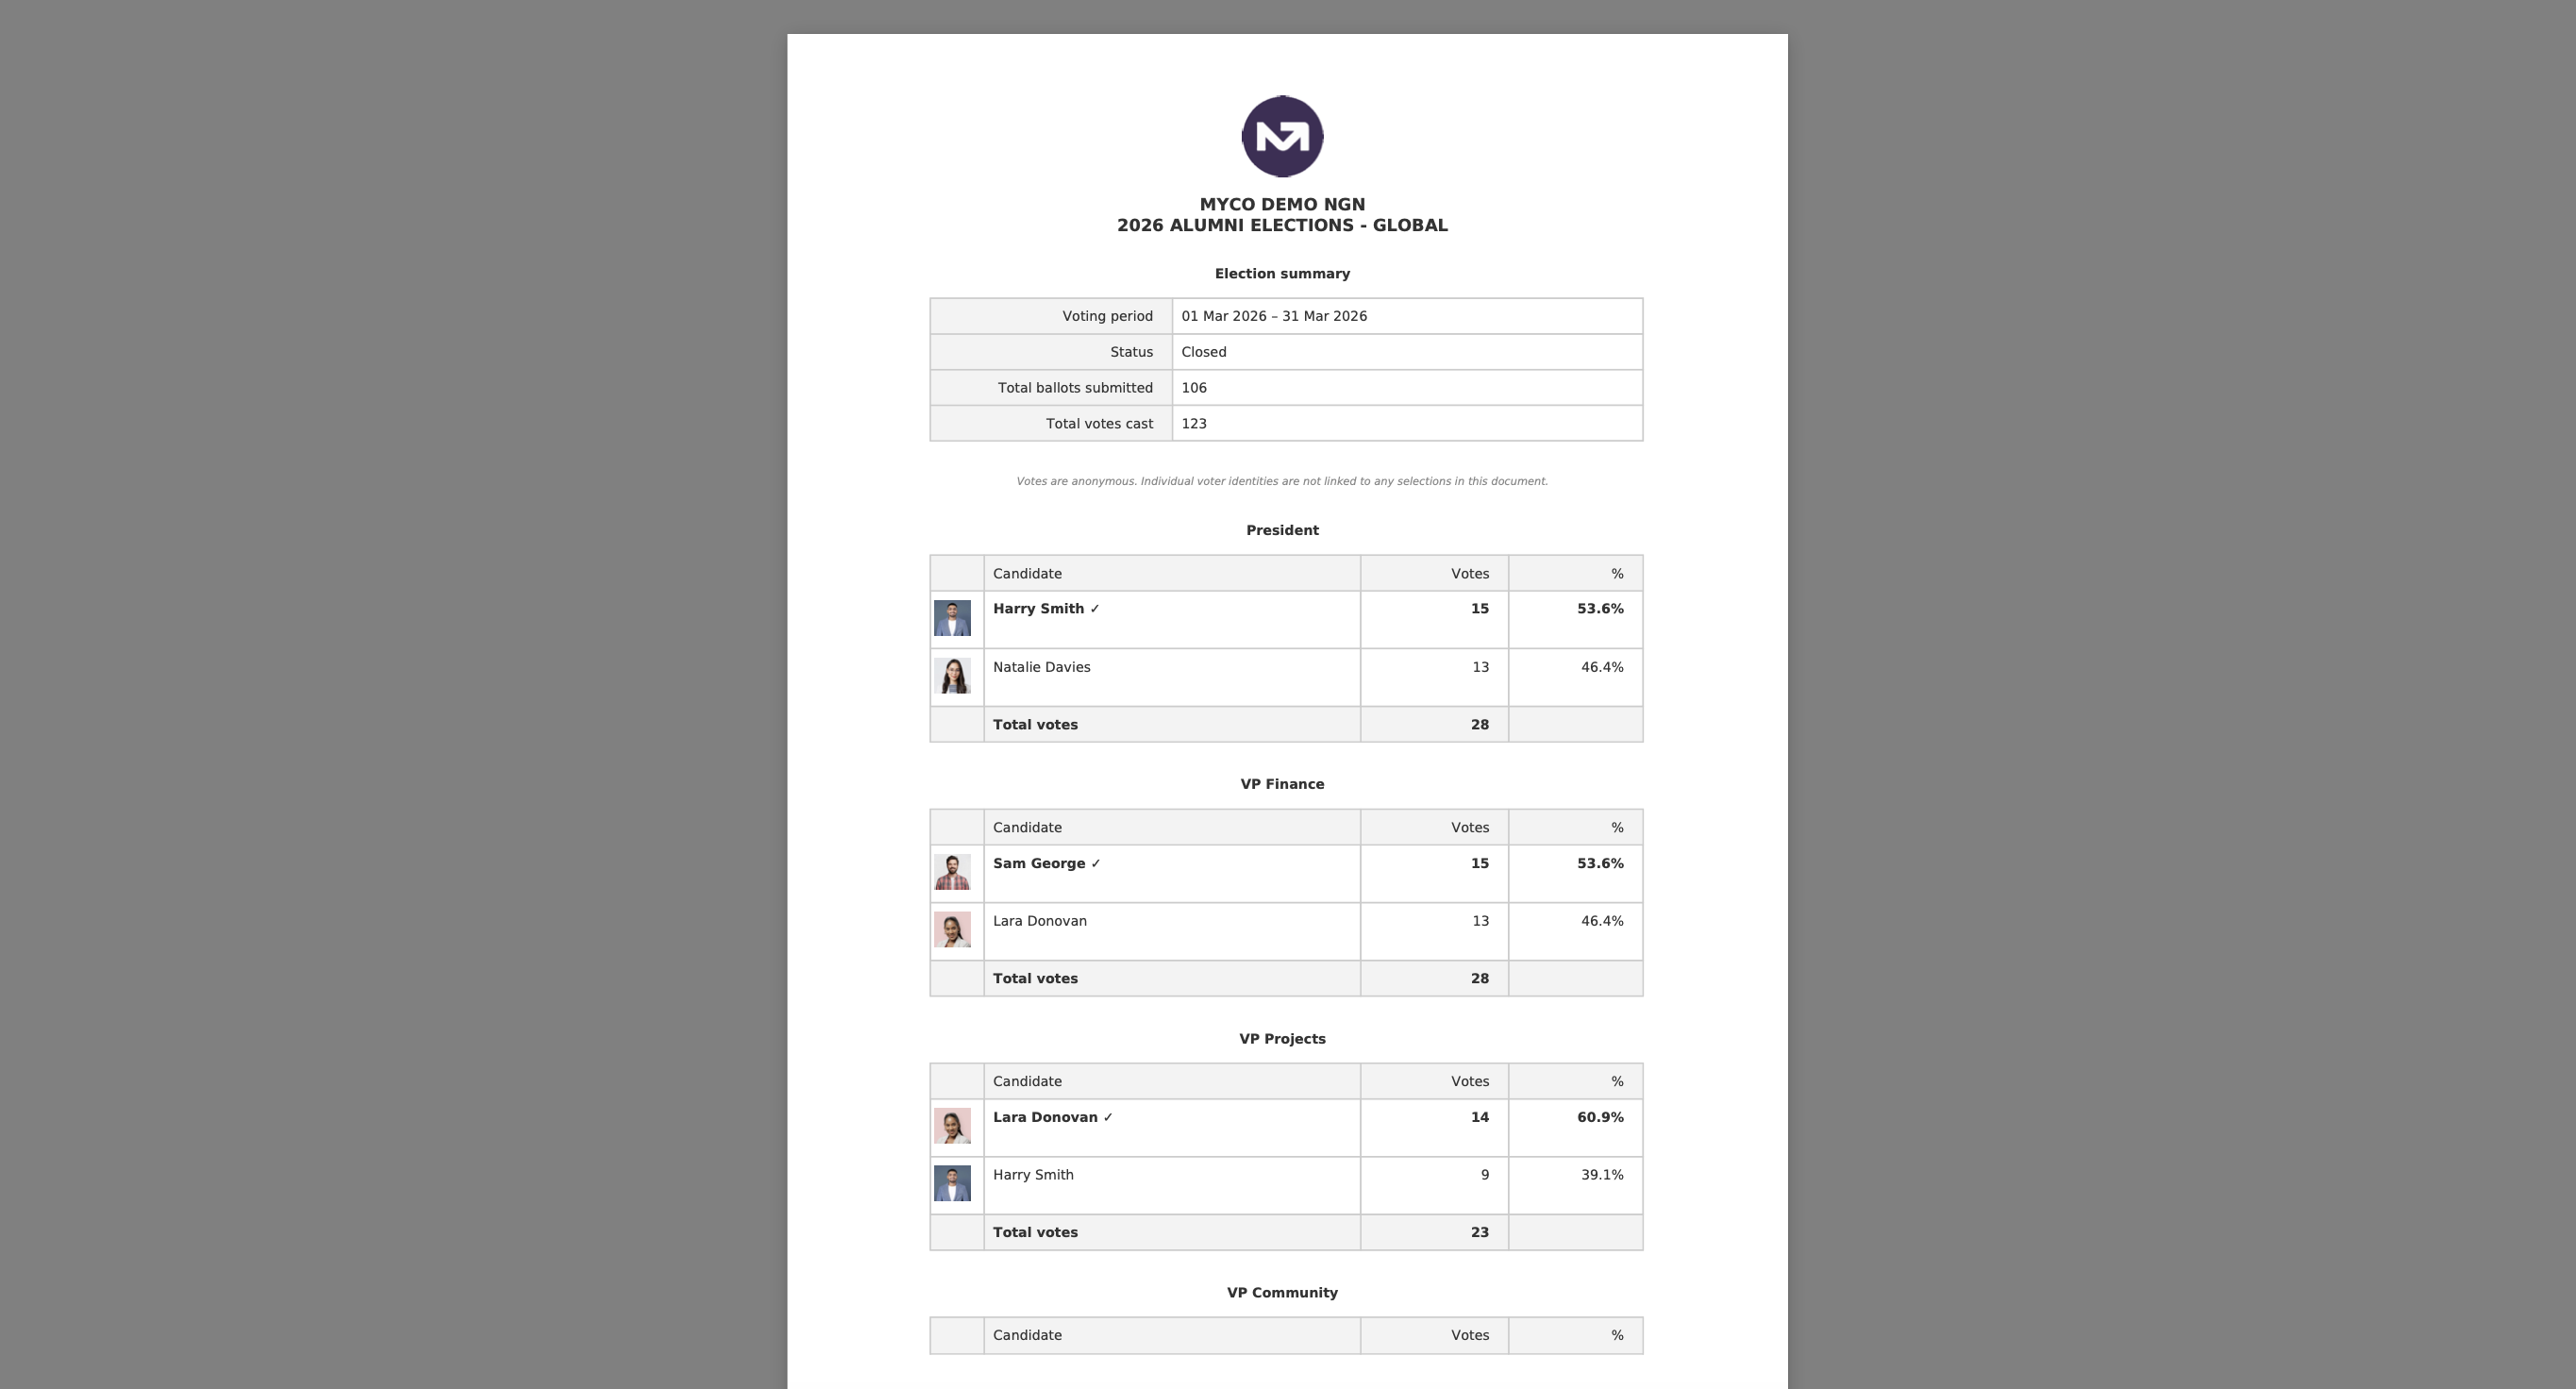
11. Export the Election Report
Admins are able to export the election report into a PDF document for distribution with necessary stakeholders e.g. your electoral committee and alumni leaders.
Elections : secure, anonymous, and fully managed within MyCo