Sometimes the form is somewhere else. A signup box on your website, an order on your online shop, a booking widget your developer built, another system that already collects the details. API Access lets that other place send the details to MyCo, and MyCo treats them exactly as if somebody had filled your form in by hand.
There are two ways in, depending on who is doing the connecting:
- Your website is on WordPress. Install the free MyCo plugin and connect it yourself in a few minutes. No developer needed. It works with WPForms and Ninja Forms forms, and WooCommerce shops.
- Anything else. A developer sends the details to MyCo using the Form API. Everything they need is on one screen.
This is the part worth understanding, because it saves you setting anything up twice.
A submission that arrives from outside runs down the same path as one typed into the form. The contact is created the same way, matched against your existing contacts the same way, added to the same list, and every trigger, workflow and confirmation email you have already set up on that form runs exactly as it does today.
So you do not build anything new. You set the form up once, the way you always would, and API Access is simply another door into it.
What you need before you start
- A form, set up and working. If you can fill it in yourself from its public link and the submission looks right in your queue, it is ready.
- A form that does not take payment. See below for why, and how online shop payments are still recorded.
- For WordPress: access to your website's WordPress admin, and WPForms, Ninja Forms or WooCommerce installed.
- For anything else: whoever looks after the other system. They do not need to know MyCo; they need a key and the details on the Developer API tab.
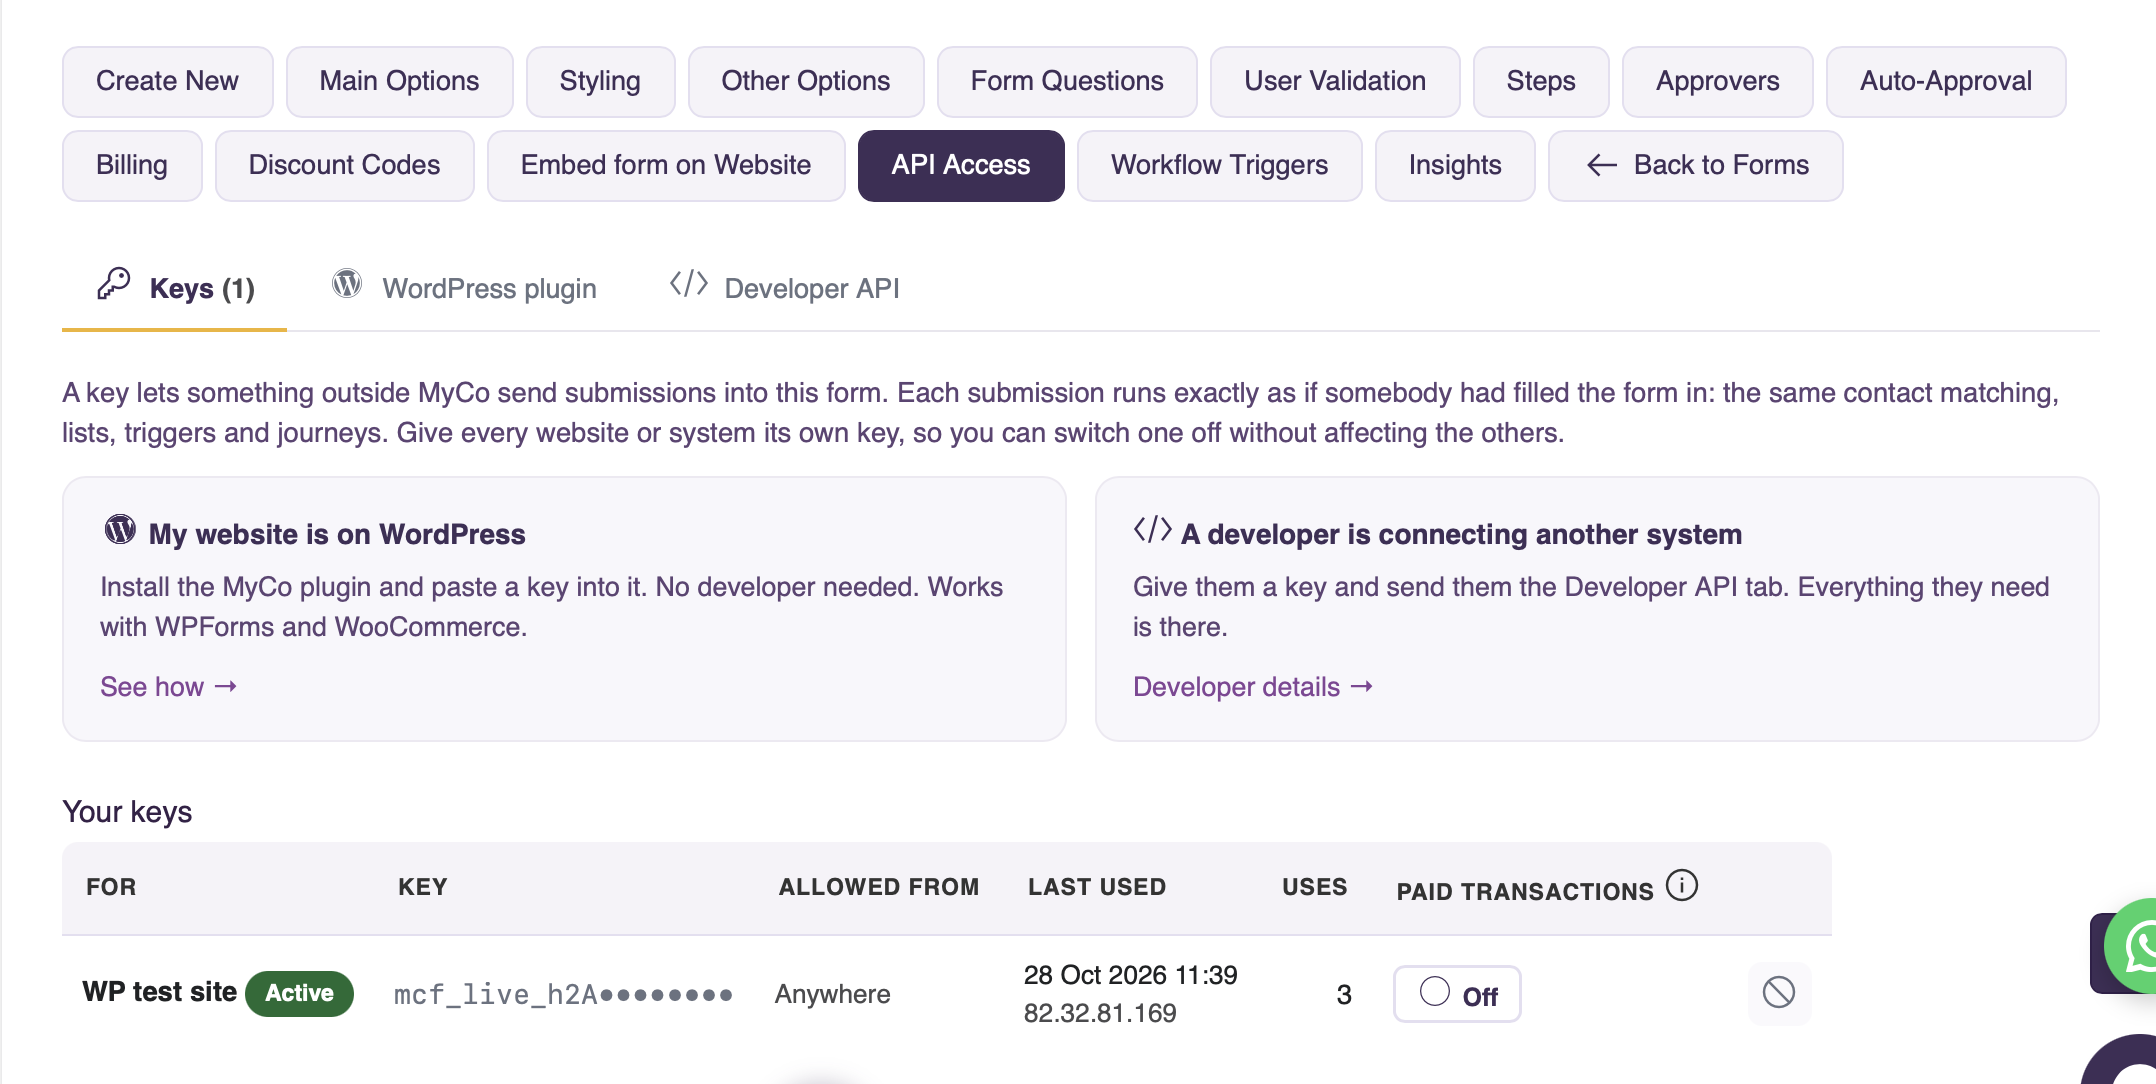
Open your form and click API Access in the form menu, just after Embed form on Website. The screen has three tabs:
- Keys: create and manage the keys that let something outside MyCo send to this form. Everybody starts here.
- WordPress plugin: download the plugin and follow the setup steps.
- Developer API: the web address, the fields this form accepts and examples, ready to send to a developer.
Setting it up
1. Decide which questions can be filled in from outside.
The contact details (first name, last name, email, mobile, address and so on) work straight away with no setup at all.
Your own questions are different. Each one needs an API name: a short label for it, like nickname or heard_from or newsletter. Open the question on the Form Questions screen, type a name into the API name box, and save.
A question with no API name cannot be filled in from outside at all. That is deliberate. It means an internal note, or a question only your team should answer, stays out of reach without you having to do anything.
2. Check which fields your form makes compulsory.
Whatever your MyCo form insists on, a submission from outside must include too. That covers the contact details you set to Mandatory on the form's Main Options (a mobile number, say), every question marked as required, and privacy consent if the form asks for it.
You do not need to keep a list. The Developer API tab shows required fields in red, and the WordPress plugin shows them as a checklist. If the website does not collect something your form requires, either add it to the website's form or set it to Optional in MyCo.
3. Create a key.
On API Access, open the Keys tab. Give the key a name saying who it is for, such as "Company ABC website", and press Create key. Leave the address boxes empty for now.
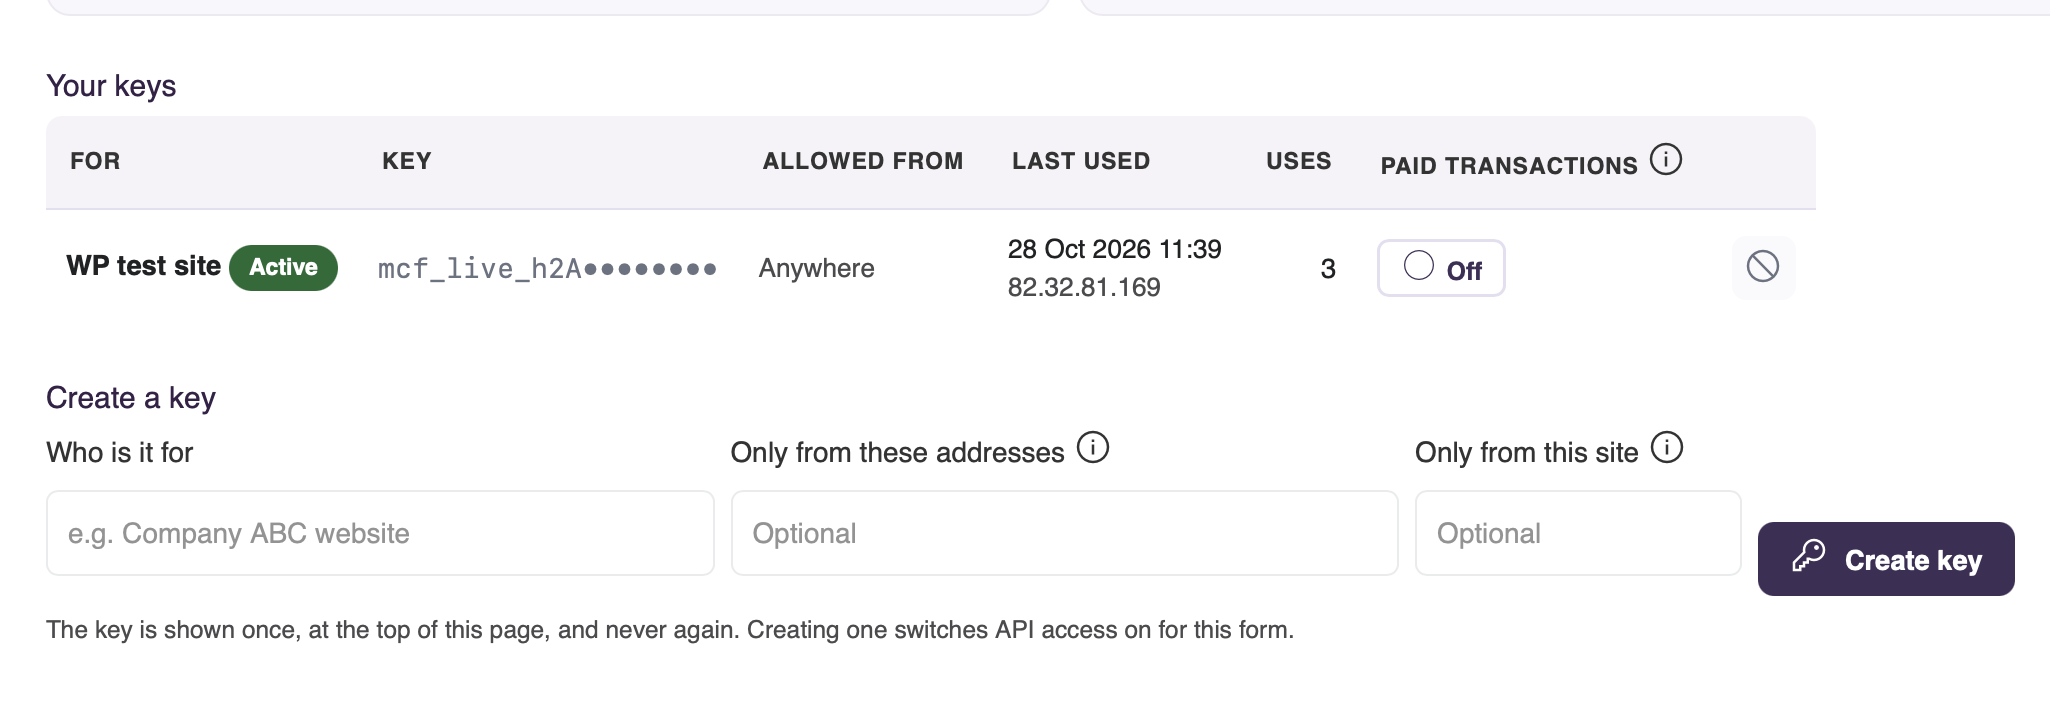
The key appears once, at the top of the screen. Copy it immediately. It is never shown again anywhere, by anyone, including us. If it is lost, revoke it and create another; that takes a few seconds and nothing is harmed.
4a. On WordPress: install the plugin and paste the key.
- Open the WordPress plugin tab and click Download the plugin.
- In WordPress, go to Plugins → Add New Plugin → Upload Plugin. Choose the file you downloaded, without unzipping it, then click Install Now and Activate. If the file cannot be chosen, drag it onto the Choose File button instead.
- MyCo now appears in the WordPress menu. Open it and go to the Forms tab. Your WPForms and Ninja Forms forms are listed there.
- Click Connect beside your form, paste the key and save. The plugin shows a green message naming your MyCo form.
- Click Suggest matches, then check each WordPress field goes to the right MyCo field, changing any that do not.
- Look at the checklist above the table. It lists everything your MyCo form requires, with a tick against each one that is matched. A cross tells you exactly what to add to your WordPress form. The plugin also warns you if a field MyCo requires is optional on your WordPress form, because a visitor could leave it blank.
- Tick Send every new submission of this form to MyCo and click Save connection.
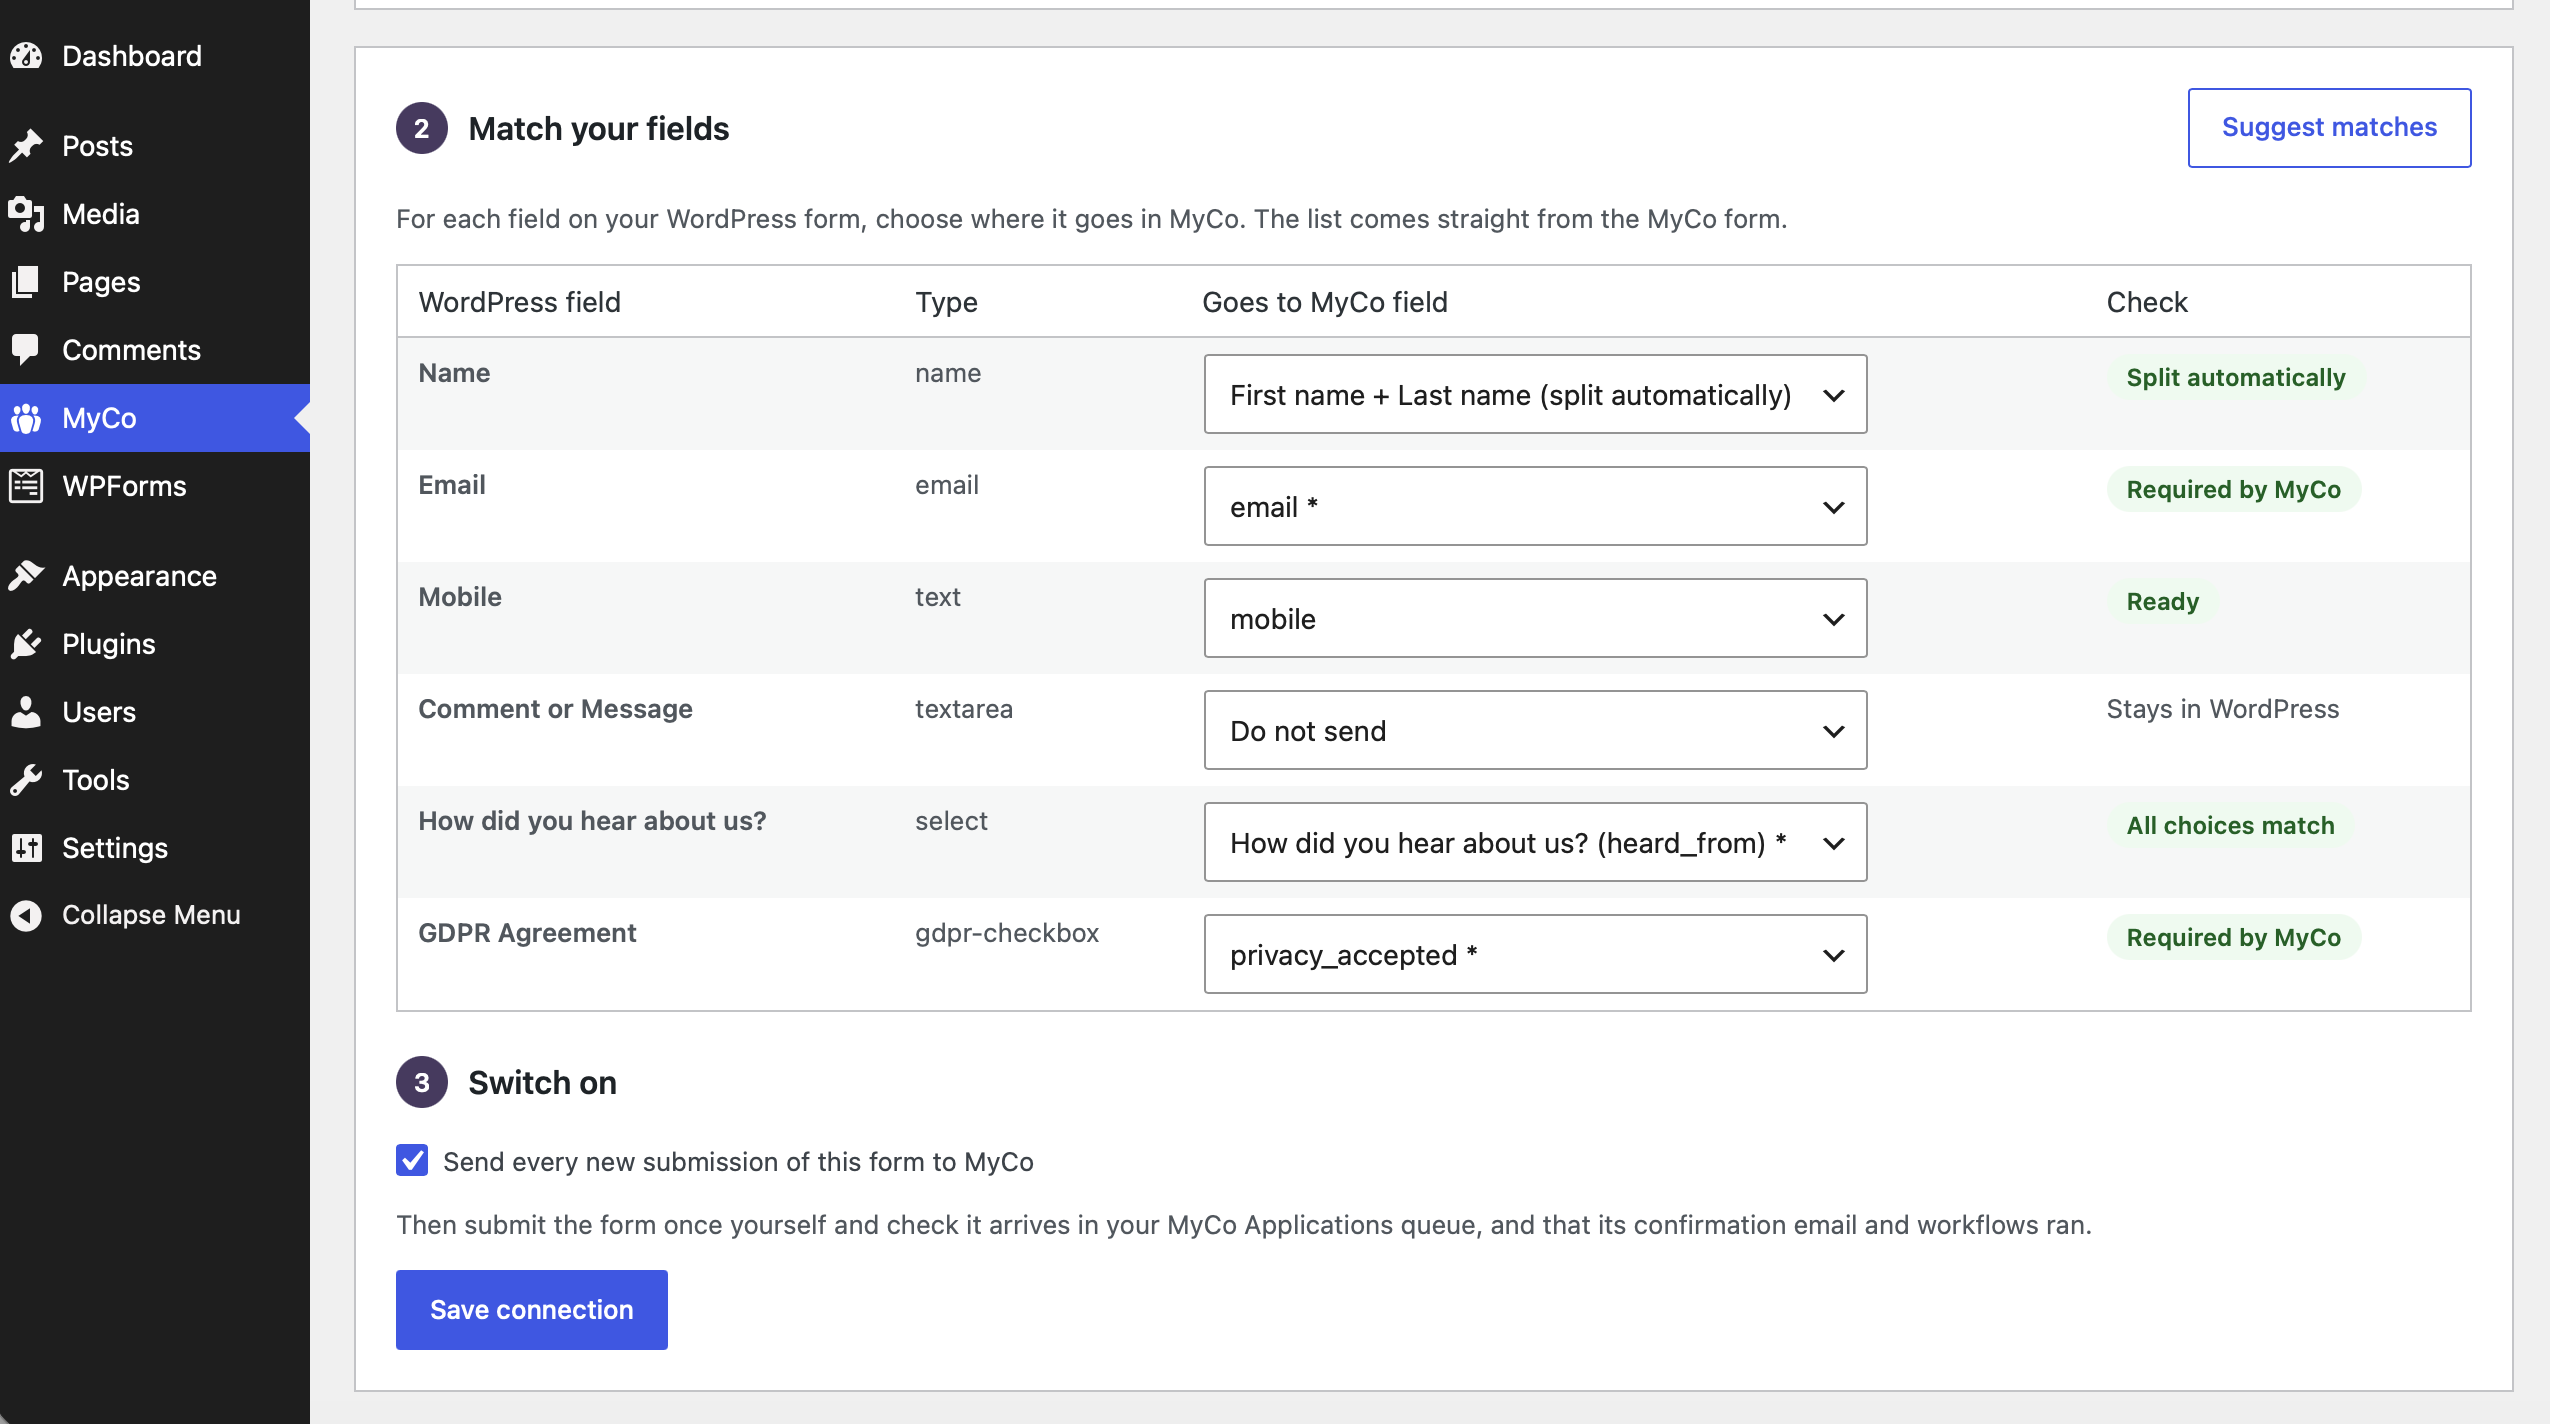
A few things the plugin handles for you:
- WPForms: the Name field is split into first and last name, and the Address field into its parts, automatically.
- Ninja Forms: First Name, Last Name, City, Zip and Country are separate fields, so each one is matched on its own. Answers to dropdowns, radio buttons and checkbox lists are sent as the wording people chose, so MyCo recognises them.
- Both: the plugin checks that your dropdown choices match the ones on the MyCo question, and tells you if any differ. Keep the wording identical on both forms.
Everything they need is on that tab: the web address to send to, the field names with the required ones shown in red, examples, and a link they can call to check the field list themselves, so they never have to guess or ask you.
Forms that take payment cannot be used
If your form charges for something, raises an invoice, or has a product question on it, it cannot receive submissions from outside MyCo, and the API Access screen will tell you so.
The reason is straightforward. Payment in MyCo happens in a browser, with somebody present to pay. A submission arriving from another system has nobody at the other end, so an invoice would be raised that nobody ever sees and nobody ever pays. Rather than leave you with a pile of those, the form is simply not allowed to accept outside submissions while it takes payment.
Free forms (signups, enquiries, registrations, feedback, expressions of interest) are exactly what this is for.
Recording payments taken somewhere else
An online shop is different: the customer has already paid on your website. MyCo does not need to ask for the money, only to record that it was received.
A key can be allowed to do this. Each payment is recorded against the contact as a paid transaction, with what they bought, and shows in your bookkeeping like any other income. No invoice is raised, and the same order is never recorded twice, however many times it is sent.
- Use a free form for it, such as one called "Website customers". Keep its compulsory fields to what a checkout collects (name, email, phone, address); a shop order cannot answer your own questions.
- On the Keys tab, set Paid transactions to Allowed for the key that will send payments. It is off for every key until you switch it on.
- WooCommerce: paste that key on the plugin's WooCommerce tab in WordPress and choose which order statuses to send. Paid orders then arrive automatically. The tab warns you if your MyCo form requires something an order cannot provide.
- Anything else: the Developer API tab shows your developer how to include the payment.
A key is like a password for that one form. Anybody holding it can send submissions to it, and nothing else. It cannot read your contacts, see other forms, or reach anything else in your account.
- Send from a server, never from a web page. Anything in a web page can be read by anyone who views its source, including the key. The WordPress plugin always sends from your website's server, so this is taken care of for you.
- Once it is working, restrict it. On the Keys tab you can enter the addresses the sending server uses. After that the key only works from there, so a copy that gets out is useless anywhere else. Leave this blank while testing and fill it in afterwards: a wrong address looks exactly like a broken integration, and you do not want to be fixing both at once. For WordPress, ask your web host for your server's outgoing IP address.
- Use a separate key for each system. If your website and a partner both send to the same form, give them a key each. Then if one gets out you revoke that one and the other carries on.
- Only allow paid transactions where they are needed. A key that can record payments is more powerful than one that can only send a form, so switch it on only for the key your shop uses.
If your form asks people to accept your privacy policy, that acceptance still has to be given. We do not tick it on anybody's behalf.
So the website or system sending the details needs to ask for it on its own form, the same way ours asks for it on the MyCo form, and send the answer along with the details. Submissions are refused until it does.
- WPForms: turn on GDPR Enhancements in WPForms → Settings, add a GDPR Agreement field to your form and match it to privacy_accepted.
- Ninja Forms: add a Single Checkbox field asking people to agree to your privacy notice, make it required, and match it to privacy_accepted.
- WooCommerce: switch on the consent tickbox on the plugin's WooCommerce tab, or use a MyCo form that does not ask for consent.
Checking it works
Send one test submission and watch it appear in your Applications queue within seconds. It will look like any other submission, because it is one.
Two things to look at on the first one:
- Does it look right in the queue, with the details in the right places?
- Did whatever the form normally does actually happen: the confirmation email, the list it adds people to, the workflow it starts?
Keeping an eye on it afterwards
- The Keys tab shows every key on the form, when each was last used and how many submissions it has sent. A key that has never been used means the setup is not finished. A key that stopped being used is worth asking about.
- On WordPress, the plugin's Activity log shows everything it sent, what MyCo said, and lets you send anything refused again once it is fixed. You can also have refusals emailed to you.
- If you change the MyCo form later (make a field compulsory, add a question), the plugin picks up the change within a few minutes and its checklist shows anything that now needs matching.
- Revoking a key stops it immediately. The record of what it was and what it did stays, so you can still see what happened afterwards, which matters most when you are revoking because something went wrong.
- A submission is refused. The refusal always says why, in the plugin's Activity log or in the reply your developer receives. The common reasons are a required field that is not filled in, missing privacy consent, a key that has been revoked, or a form that has since had a payment or product question added.
- "The mobile field must be entered" (or another contact field). That field is set to Mandatory on your MyCo form's Main Options. Add it to the website's form and match it, or set it to Optional in MyCo.
- "Question ... must be answered". The question is required in MyCo, but the website did not send an answer. Check it has an API name, is matched in the plugin, and is required on the website's form too.
- An answer arrives but does not match a choice. The wording of the choices differs between the two forms. The plugin's Check column shows which ones; make them identical.
- A question is not being filled in. It almost certainly has no API name, or the name being sent does not match the one on the question. The field list on the Developer API tab is the definitive answer, and the WordPress plugin reads it for you.
- A shop payment is not recorded. Check Paid transactions is set to Allowed for that key on the Keys tab.
- Nothing arrives at all. Check the key has not been revoked and, if you set address restrictions, that the sending server is still using those addresses. On WordPress, check the form is switched on in the plugin and look at its Activity log.
One form, set up once. Every door into it leads to the same place.