
Forms have had a lot of attention recently. The way people fill in your forms has changed, you can now rename the statuses a submission moves through, you can restrict a form so only the people you invite can open it, and you can mark a form as sensitive so its answers are handled with extra care.
Nothing you have already built needs redoing. Every existing form, link, QR code, trigger and workflow carries on exactly as before. Everything below is optional, so you turn on only the parts you want.
1. The new form experience
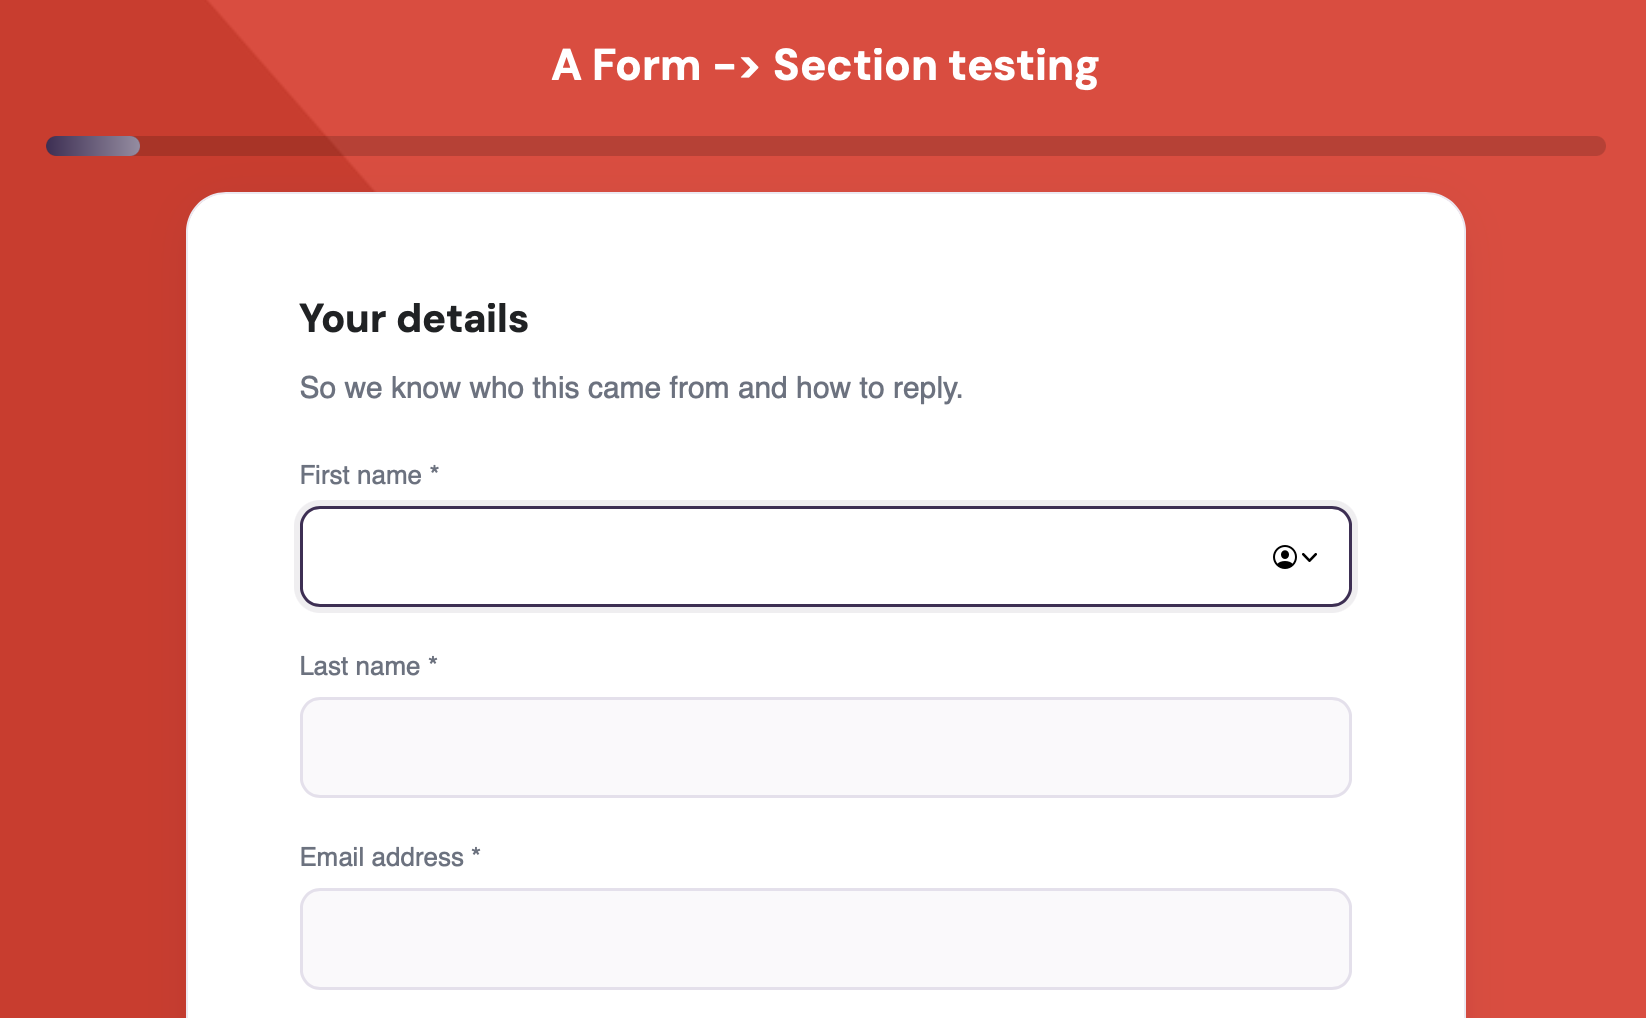
The biggest change is what the person filling your form actually sees. Instead of one long page with every question stacked on it, the form now asks one question at a time. A progress bar sits at the top so people can see how far through they are, and a Back button lets them change an earlier answer.
Why this matters: long forms get abandoned. When somebody opens a page and sees forty questions, a good number of them close it. When they see one question and a Next button, they start, and once they have started they tend to finish.
Check your answers
Before anybody submits, they see a review screen listing every answer they gave, each with an Edit link beside it. They can jump back to any question, fix it, and return to the review. Fewer mistakes reach you, which means fewer emails asking people to correct something.
Save and finish later
If your form is a long one, you can let people save what they have done and come back to it. They click 'Save and finish later', we email them a link, and we send a short code to that same address which they enter before their answers are put back on screen.
That second step matters. A saved form holds somebody's personal details, and an email can be forwarded or sit in a shared inbox, so holding the link alone is not enough to open it. Note that attachments are not kept in a saved form, and when somebody returns they are told plainly which files still need adding.
How to add help text to a question
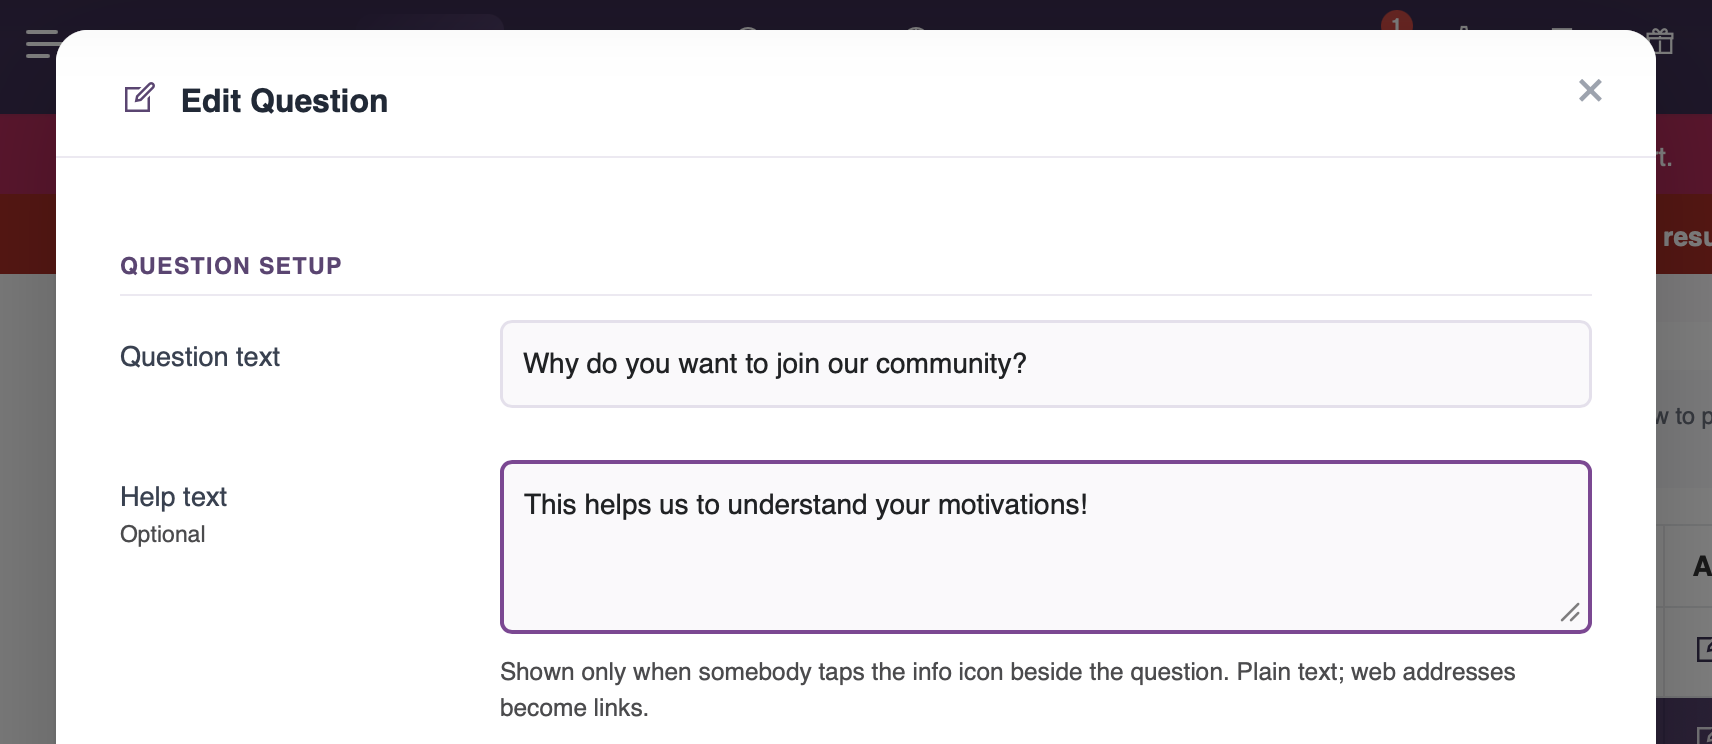
Every question can now carry help text, which appears behind a small green information icon next to the question. Use it for the explanation that would otherwise clutter the question itself, for example telling somebody where to find their reference number, or what you will accept as proof of address.
Simply follow the instructions below:
1. Sign into MyCo
2. Navigate to your form and open the Questions tab
3. Add a new question, or click the edit icon on an existing one
4. Enter your wording in the 'Help text' box
5. Click the 'Save' button to save/update
Note - there is an 'API name' box on that same screen. That is a separate feature and only matters if another system sends data into this form, so leave it blank unless you are using it.
How to ask a whole section on one screen
One question at a time is right most of the time, but not always. If you are asking somebody to choose a starter, a main and a dessert, making them click Next three times is annoying.
Simply follow the instructions below:
1. Sign into MyCo
2. Navigate to your form and open the Questions tab
3. Add or edit a question of type 'Section heading'
4. Tick 'Ask this section's questions on one screen'
5. Click the 'Save' button to save/update
Every question under that heading will now appear together on a single screen, under the section name. Everything else about them is unchanged: conditions still work, mandatory answers are still enforced, and each answer still appears separately on the review screen and in your Applications queue.
2. Statuses in your own words
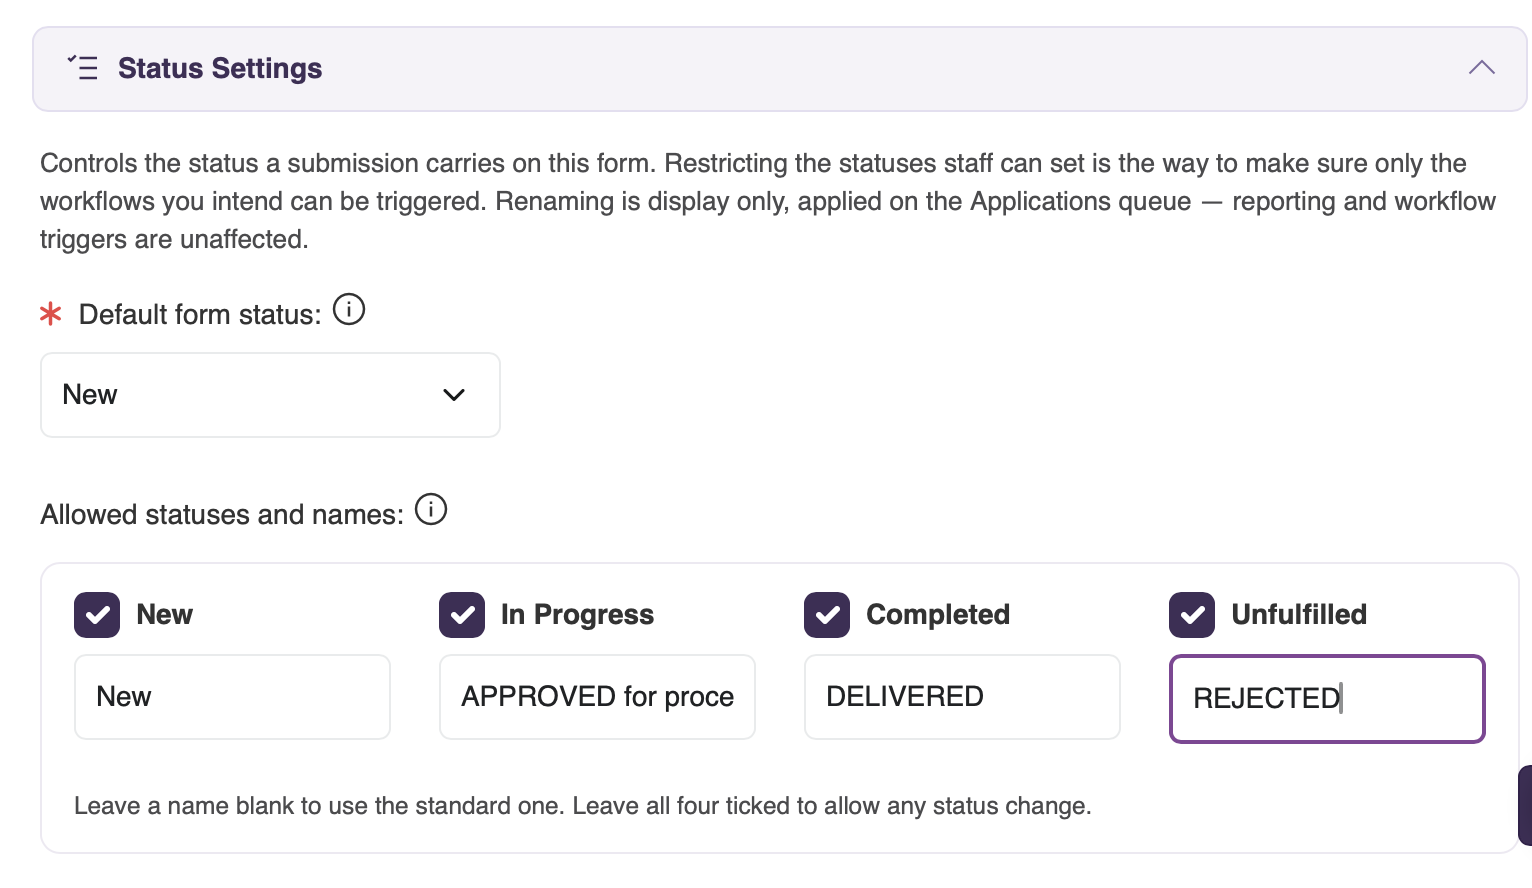
Every form submission carries a status. Out of the box these are New, In Progress, Completed and Unfulfilled.
Those four names do not suit everybody. A membership application is more naturally Received, Under Review, Approved and Declined. A volunteer signup might be Applied, Shortlisted, Confirmed and Not Required. You can now rename all four, per form.
Simply follow the instructions below:
1. Sign into MyCo
2. Navigate to your form and open the 'Other Options' tab
3. Open the 'Status Settings' section
4. Type the name you want beside each status, leaving a box blank to keep the standard name
5. Untick any status your team should not be able to set on this form
6. Click the 'Update' button at the bottom of the screen to save/update
Why the tick boxes matter
Statuses often have workflows attached to them. Moving a submission to Completed might send a welcome email or issue a membership card. If a status on this form should never be used, unticking it means your team cannot set it, so that workflow can never fire by accident. Leave all four ticked and your team can set any status, exactly as before.
What the names change, and what they do not
The names you choose follow the submission everywhere your team sees it: the Applications queue, the submission itself and the contact's Forms tab. Underneath, nothing changes. Your reporting, workflows and triggers all still key off the same four stages, so renaming is completely safe and you can change your mind later.
Note - when somebody changes a status from the queue, the confirmation now names the person, the status they are moving from and the status they are moving to. If that change is going to fire a workflow, the confirmation says so in red before they commit to it.
3. Restricting a form to people you invite
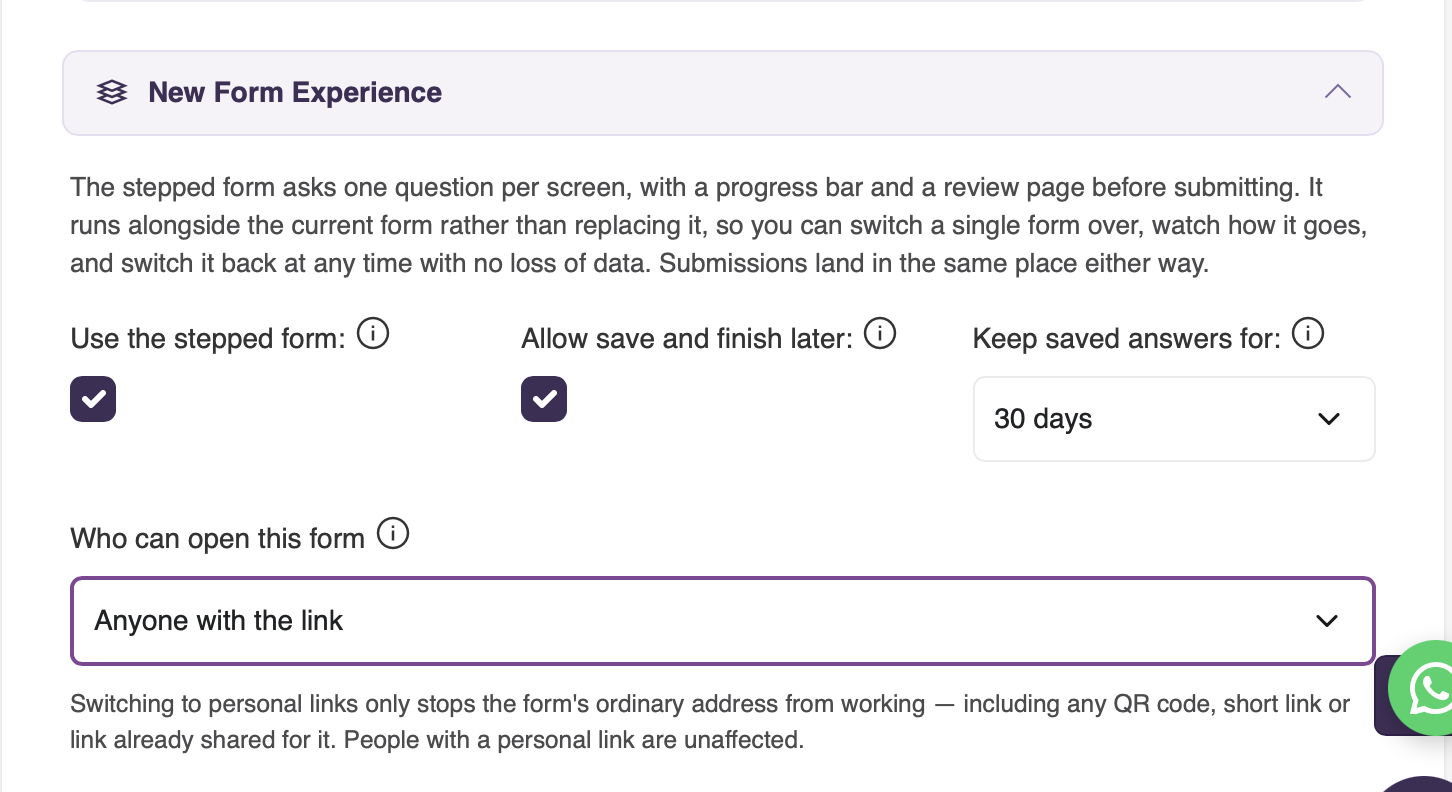
Some forms should be open to the world, such as a contact form or a public event registration. Others really should not be, and until now the only thing standing between a private form and a stranger was that nobody had shared the link.
Simply follow the instructions below:
1. Sign into MyCo
2. Navigate to your form and open the 'Main Options' tab
3. Under 'Who can open this form', tick 'Personal links only'
4. Click the 'Update' button at the bottom of the screen to save/update
The general form link now stops working, and the only way in is a personal link generated for a named contact.
Please read this before you turn it on
It takes effect immediately and applies to every link that already exists. Your public link stops working, any QR code you have printed stops working, and any short link you have shared stops working. If your form is live and people are part way through finding it, they will hit a closed door. Turn it on when you set a form up, not in the middle of a campaign.
How to confirm who somebody is before they start
Separately, you can ask somebody to prove who they are before they see a single question.
Simply follow the instructions below:
1. Sign into MyCo
2. Navigate to your form and open the 'Main Options' tab
3. Set 'When to confirm who they are' to 'Before starting'
4. Click the 'Update' button at the bottom of the screen to save/update
When a personal link is opened, the form asks for one detail you already hold for that contact, usually their email address, and compares what they type against that contact's own record. Nothing is emailed and there is no code to wait for.
This is a comparison rather than a lookup, which is the important difference. The confirmation at the end of a form only asks whether a value exists somewhere in your database, so any address on file would satisfy it. This asks whether it is that person's.
Note - if you hold nothing to compare against for that contact, they are let through rather than locked out of something they were invited to.
How to invite people to a form
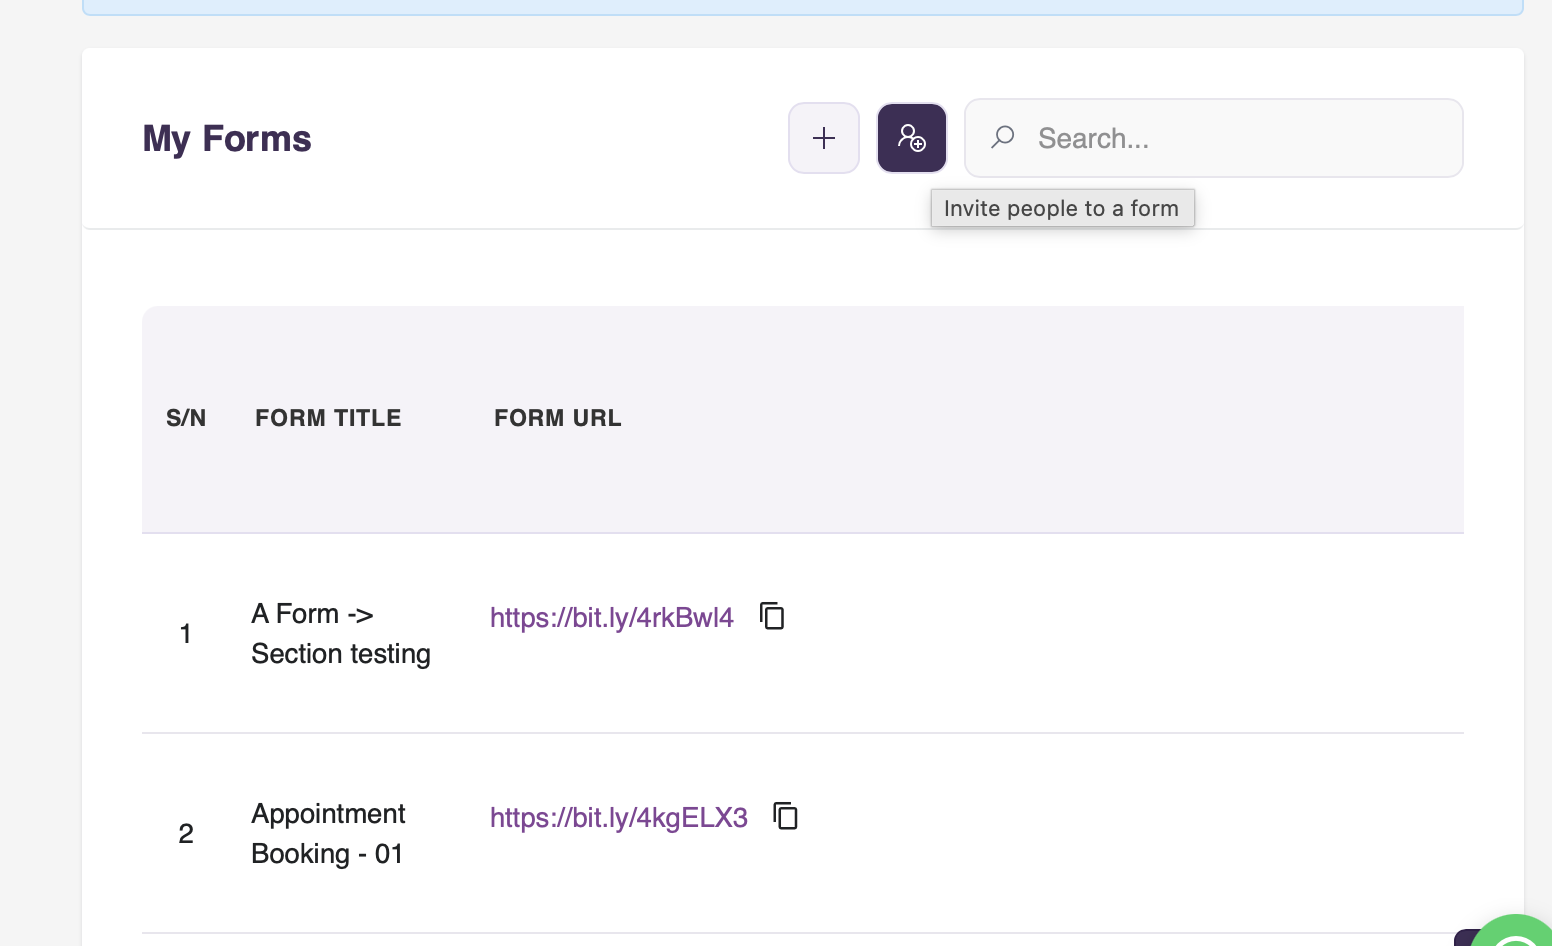
Once a form is invitation only, you need a way to invite. There is now an Invite button in three places:
1. On the Applications queue for that form, so you can invite while looking at who has already responded
2. On the forms list, against each form
3. On a contact's Forms tab, when you are looking at one person and want to send them something
Pick the people you want from your contacts and each one gets their own personal link. If somebody is not in your contacts yet, choose 'Add someone new', enter their name and email, and they are created and invited in one go.
4. Sensitive forms
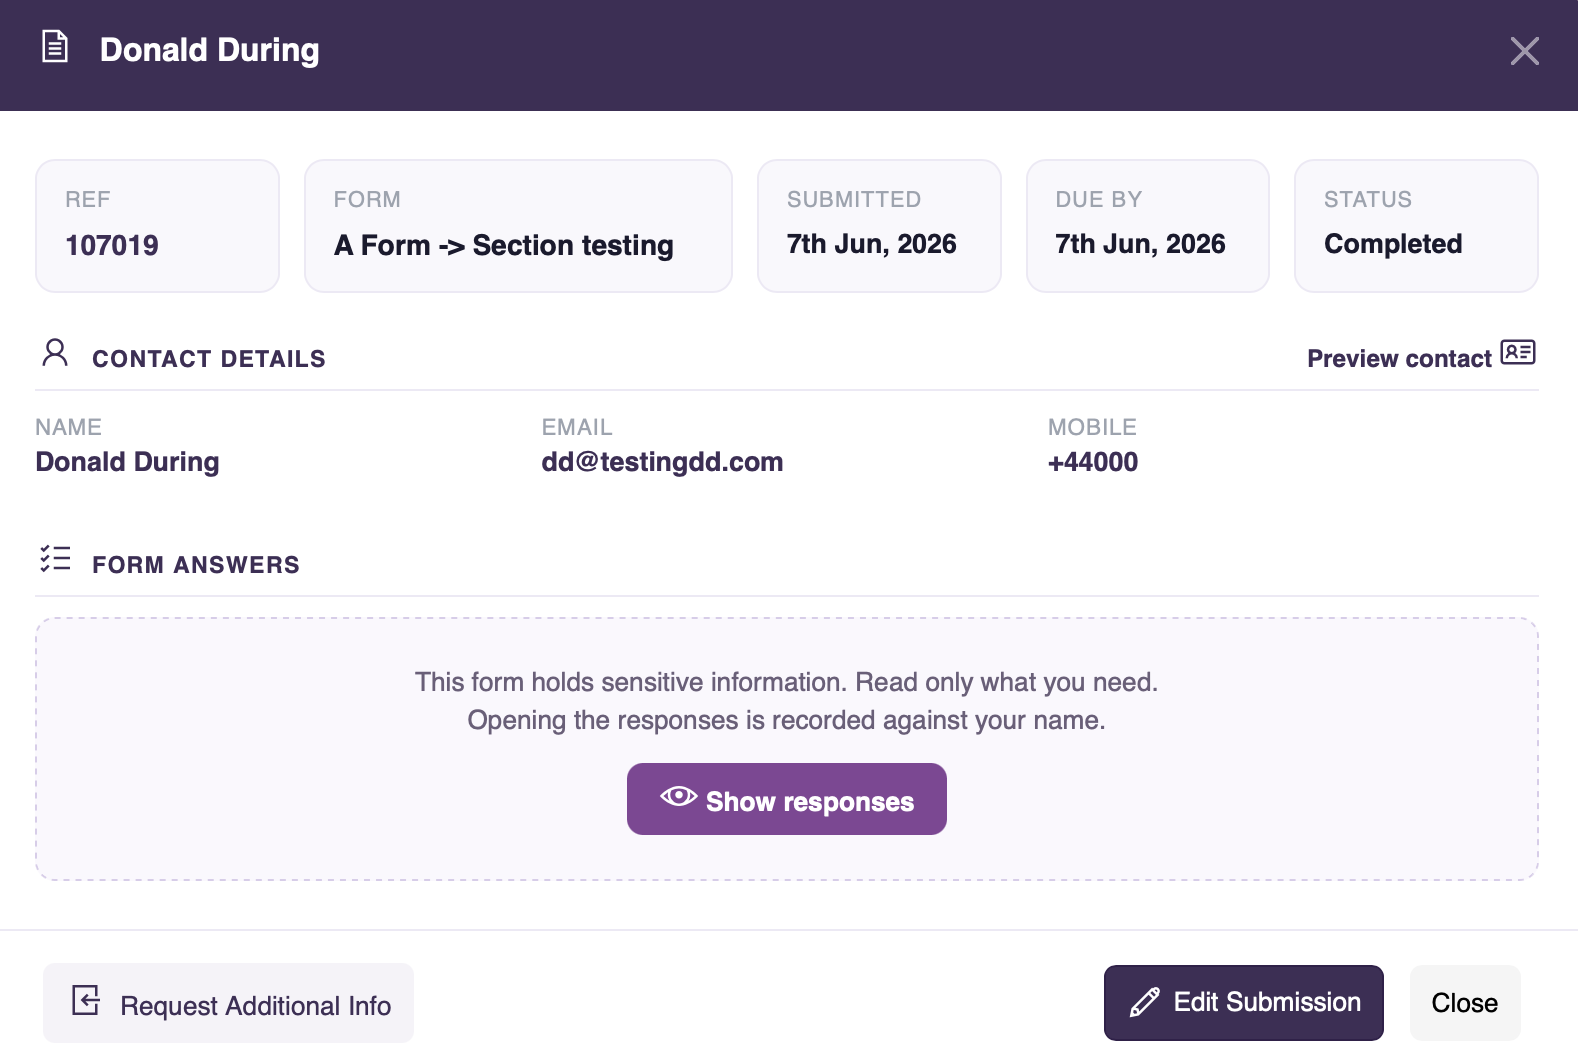
 Some forms collect things that should not be casually readable, such as prayer requests, safeguarding concerns, medical information, disclosures or grievances.
Simply follow the instructions below:
1. Sign into MyCo
2. Navigate to your form and open the 'Other Options' tab
3. Tick the sensitive setting
4. Click the 'Update' button at the bottom of the screen to save/update
Who can see it
Only administrators, and anyone you have given the Sensitive Forms privilege to. Everybody else sees that a submission exists, and who it came from, but not a single answer inside it.
What stops working, on purpose
A sensitive submission cannot be opened as a PDF and cannot be exported. Search stops looking inside the answers, so a sensitive disclosure can never surface in a results list next to somebody's phone number. The public approval link, which shows a whole submission to anybody holding it with no login at all, is not offered.
Please take that list seriously before you tick the box. If your team currently exports these submissions to a spreadsheet, or prints them as PDFs for a meeting, marking the form sensitive will stop that, and it is meant to.
Reading is recorded
For somebody who is allowed in, the answers sit behind a 'Show responses' button rather than appearing as soon as the page loads. That is deliberate: opening a record to check its status, or with a colleague standing at your desk, should not put a disclosure on screen by itself.
Clicking the button records who read it and when, against their name, before the answers appear. The page says so plainly, and it tells you how many people have opened that record in the last thirty days.
Note - marking a form sensitive does not delete anything and there is no automatic purge. The submissions stay exactly where they are, for as long as you keep them, with tighter control over who reads them and a record of who did.
Where to find all of this
Main Options on your form - personal links only, and when to confirm who they are
Other Options on your form - status names, which statuses are allowed, and the sensitive setting
The question screen when adding or editing a question - help text
A section heading - ask this section's questions on one screen
The Applications queue, the forms list and a contact's Forms tab - invite people to a form
If you would like a hand setting any of this up on a particular form, get in touch and we will walk through it with you.