
MyCo Forms allow you to create custom web forms you can share with your contacts and customers. Whether you need an enquiry form, event registration, membership application, booking form, or a mailing list sign-up — Forms gives you everything you need in one place.
Every form gets its own unique URL that you can share directly with your contacts. When they open the link, they complete the form, and you get notified of every submission.
Forms are accessible via Menu > Forms.
Creating a Form
To create a new form, go to Menu > Forms and click Add Form. You will be asked to give your form a title, select a contact category (the type of contact the form will create or update), and choose a form purpose.
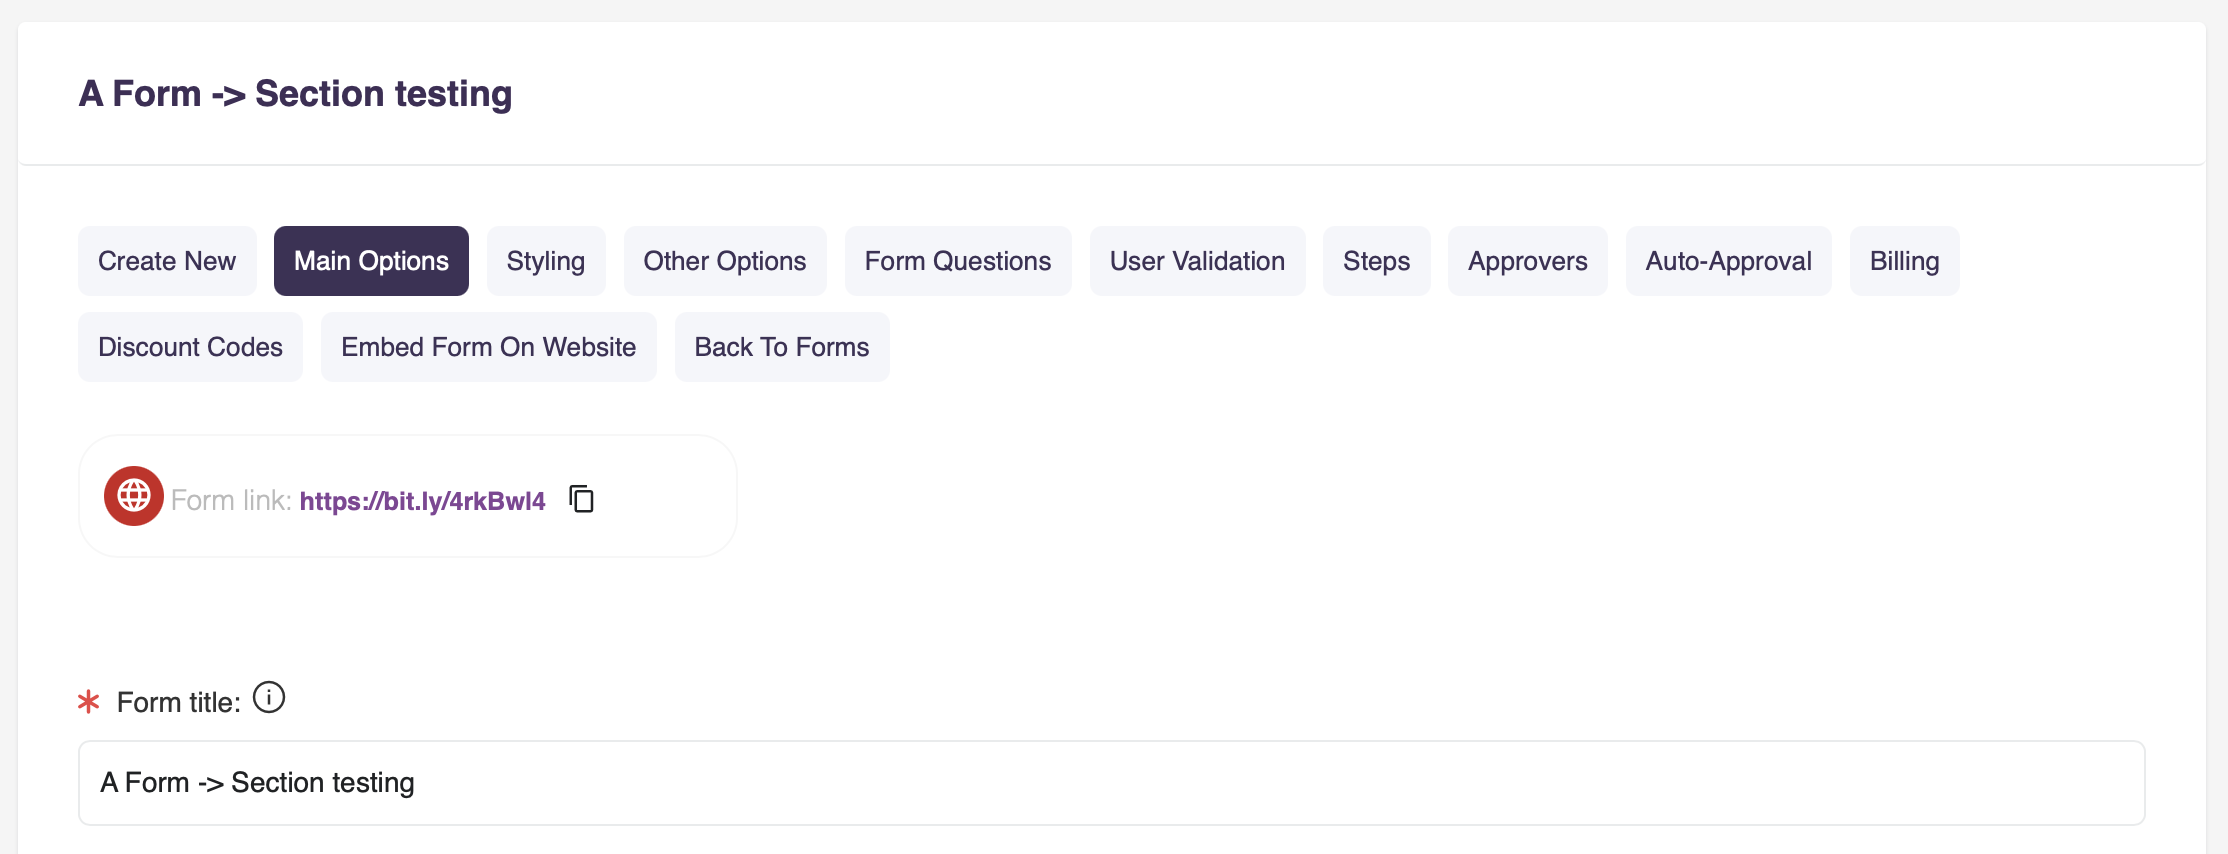
Once created, your form will have a unique URL ready to share. You can customise it further using the tabs available on the form edit page — Questions, Styling, Billing, Other Options, and more.
Personal & Business Details
Every form includes a built-in section for capturing standard contact information. On the Form Questions tab, you will see a Personal & Contact Details panel and a Business Details panel.

For each field (e.g. First name, Last name, Email, Mobile, Address), you can set it to:
- Mandatory — the contact must fill this in to submit the form
- Optional — the field appears but is not required
- Do not capture — the field is hidden from the form entirely
Adding Custom Questions
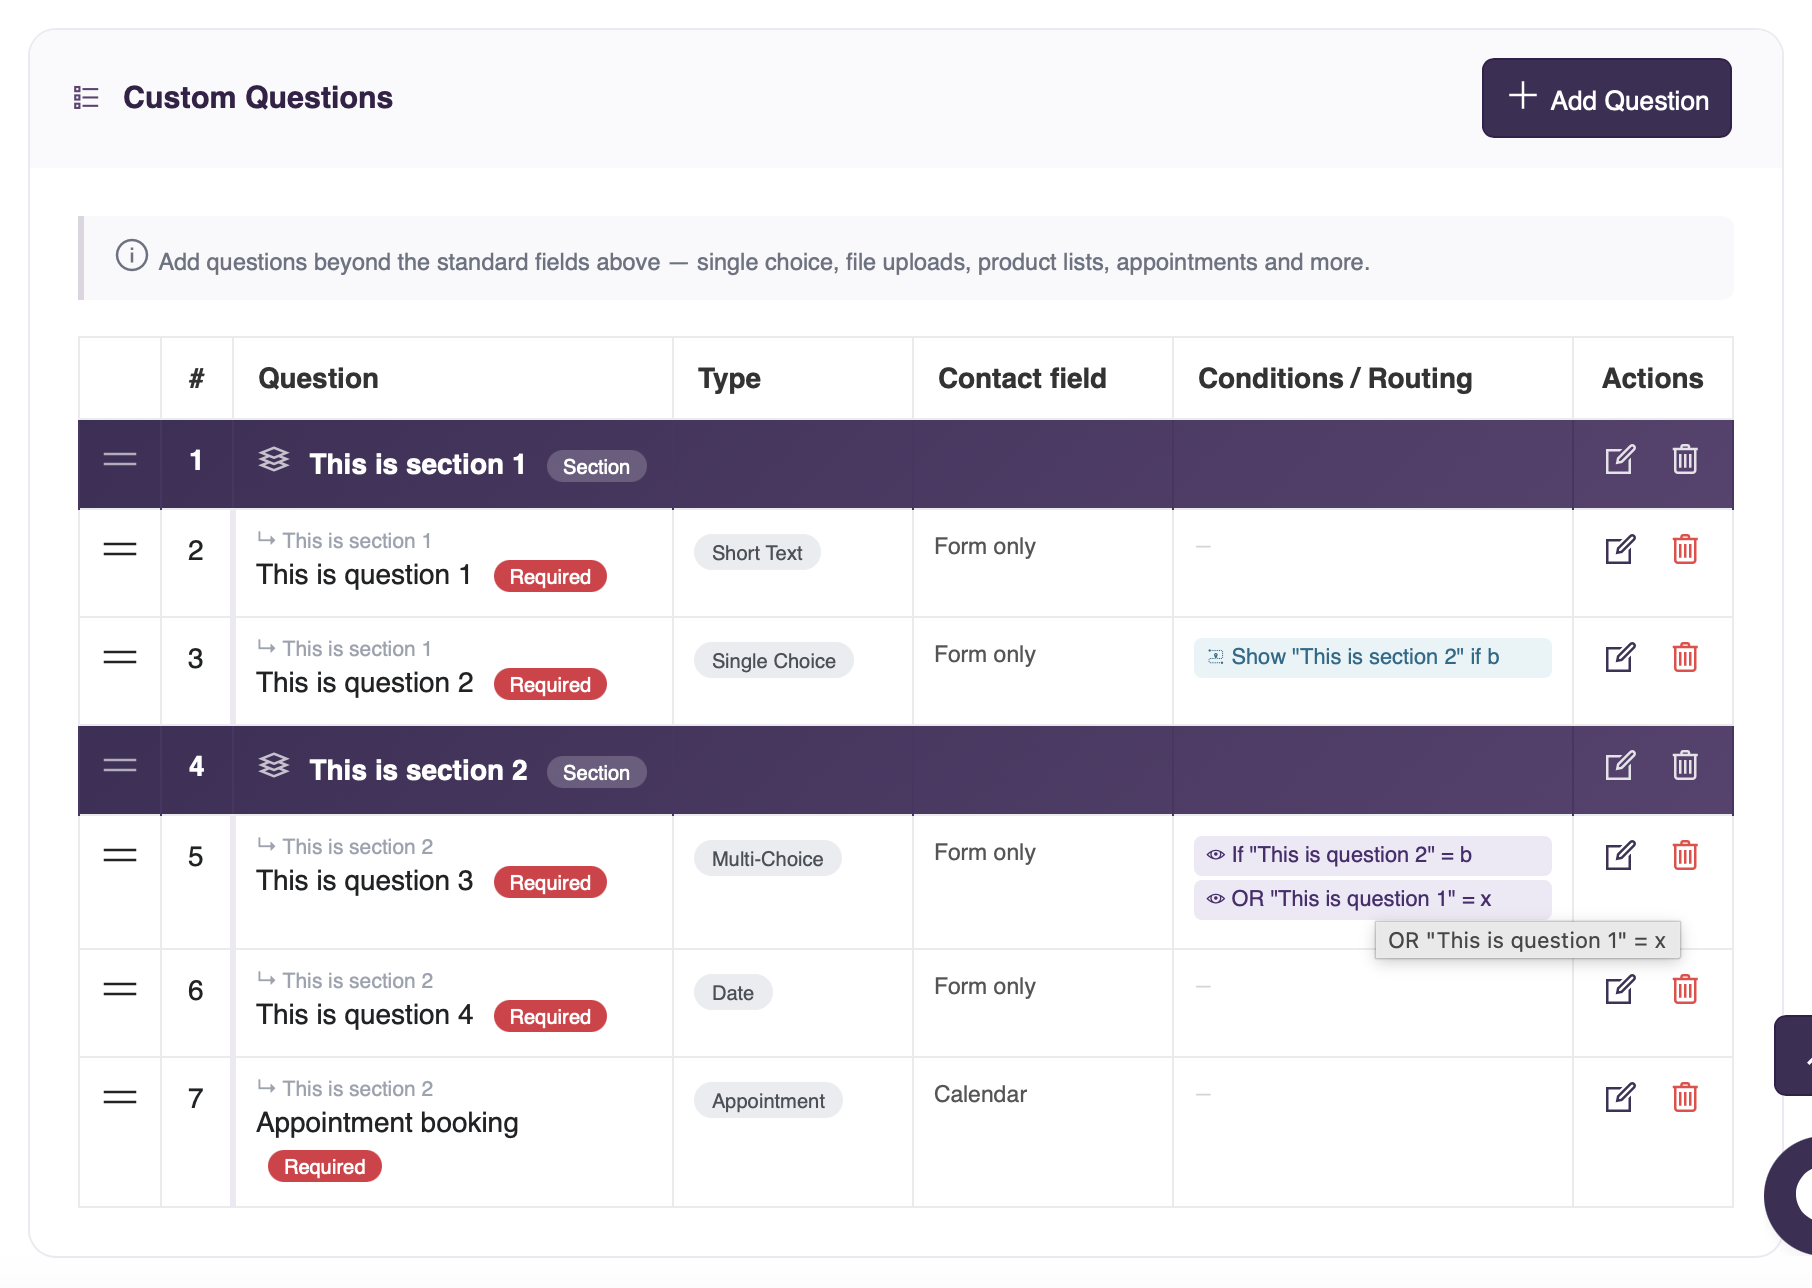
Beyond the standard personal and business fields, you can add your own custom questions. Click Add Question in the Custom Questions panel to get started.
The following question types are available:
- Short Text — a single line text input
- Long Text — a multi-line text area
- Single Choice — a dropdown where the contact selects one option
- Multi-Choice — checkboxes where the contact can select one or more options
- Date — a date picker
- Date + Time — a date and time picker combined
- Deadline — a date picker with configurable minimum and maximum days from today
- Money — a numeric input for currency values
- Range / Slider — a slider between a minimum and maximum value (e.g. 1–10)
- Document — allows the contact to upload a file
- Appointment Booking — links to your calendar for timeslot selection
- Load Product List — displays products from your MyCo product catalogue
- Info for Display — a coloured heading banner, used to separate or label sections visually
- Hidden — a field with a fixed value, not visible to the contact but stored with the submission
- Section Heading — a structural divider that groups questions into named sections (see below)
Sections
If your form has many questions, you can organise them into named sections using the Section Heading question type. A section heading acts as a visual divider — all questions below it are considered part of that section until the next section heading is reached.
Sections appear as bold coloured banners on your form, making it much easier for contacts to navigate longer forms.
Important: deleting a section heading only removes the heading itself. The questions inside that section are not deleted — they simply lose their section grouping.
Tip: if you only want certain questions inside a section, add a new section heading immediately after the last question that belongs to that section. Questions below the new heading will be treated as part of the next section.
Conditional Logic
Conditional logic allows you to show or hide a question based on how a previous question was answered. For example, you might only show a question about business type if the contact has selected "Business" as their enquiry category.
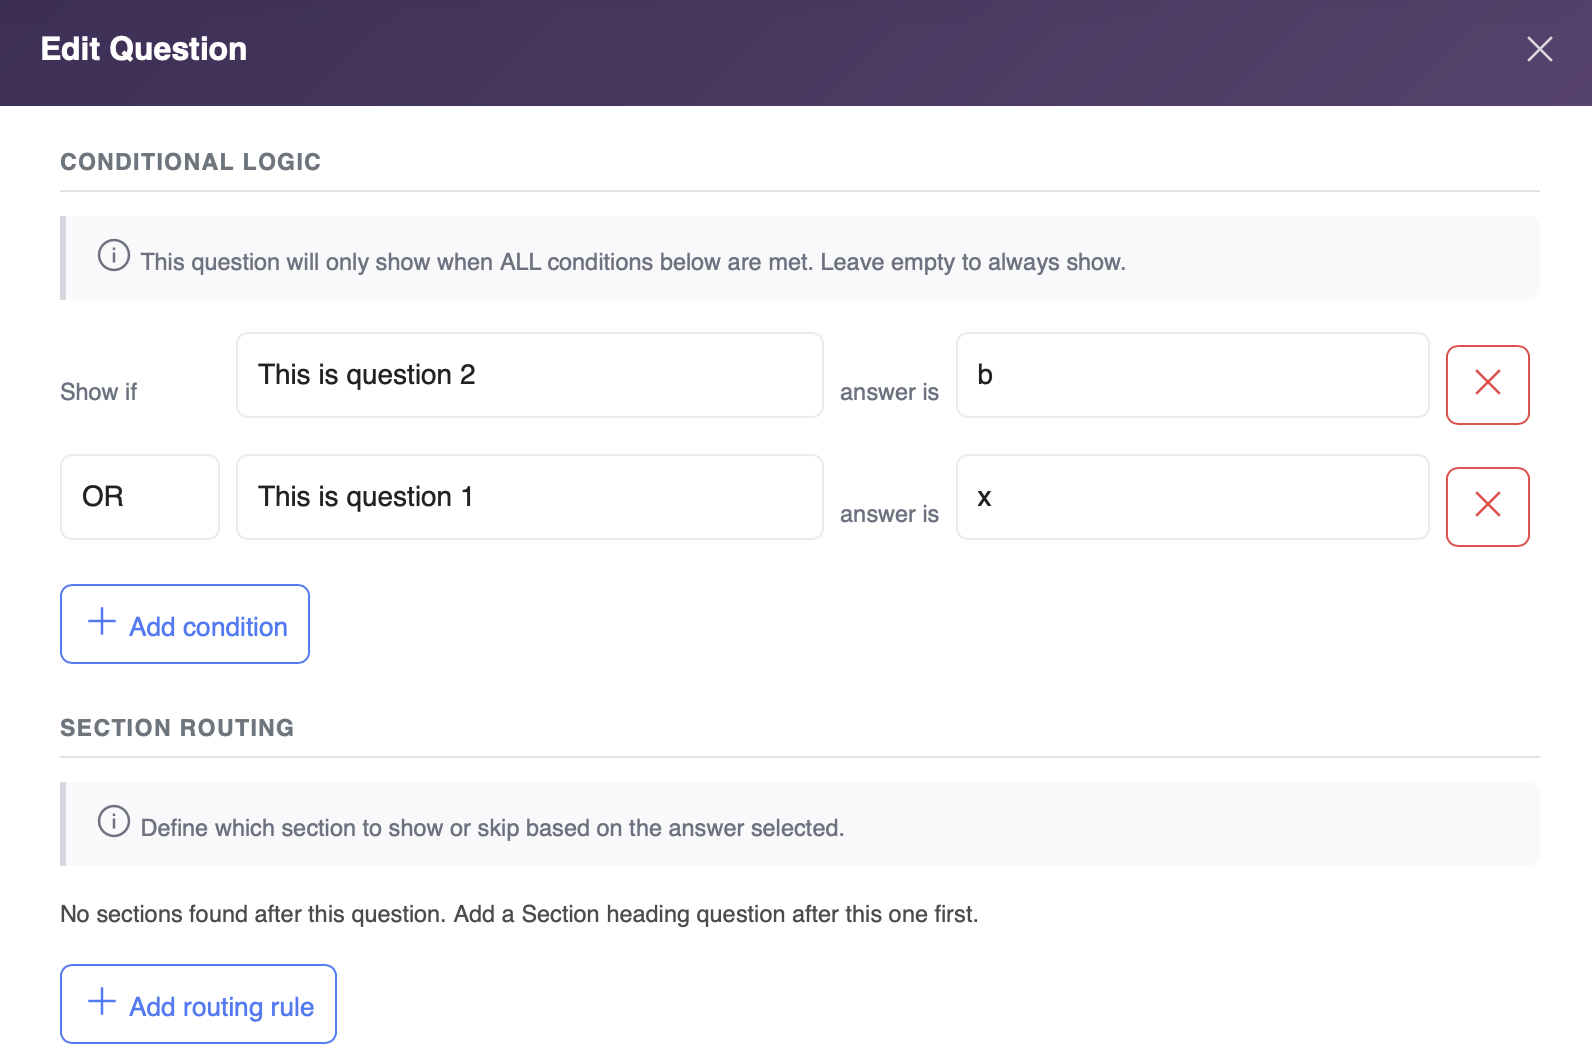
To set up conditions on a question:
- Save the question first
- Open the question in Edit mode
- Scroll to the Conditional Logic section
- Click Add condition and choose the parent question and the answer value that should trigger this question to appear
The question will remain hidden on the form until the condition is met. If a mandatory question is hidden because its condition is not met, it will not be required for form submission.
Note: conditions can only reference questions that appear before the current question in the form order.
Section Routing
Section routing is available on Single Choice and Multi-Choice questions. It allows you to show or skip an entire section based on the answer selected.
For example: if a contact selects "Yes" on a question about attending an event, you can automatically show a section with accommodation preferences. If they select "No", that section is skipped entirely.
To set up section routing:
- Open a Single Choice or Multi-Choice question in Edit mode
- Scroll to the Section Routing panel
- Click Add routing rule and choose the answer, action (Show or Skip), and target section
The Form Questions Table
The questions table on the Form Questions page gives you a clear overview of your entire form structure at a glance:
- Section rows appear in purple, making it immediately clear where each section starts
- Questions inside a section show a small label (e.g. ↳ Section name) so you always know which section each question belongs to
- The Conditions / Routing column shows a summary of any conditions or routing rules attached to each question — without needing to open it
- The Contact field column shows which contact field on your MyCo record is updated when this question is answered
Contact Field Updated
When a contact submits a form, their answers can automatically update fields on their MyCo contact record. This is configured per question using the Contact Field Updated setting in the question editor.
For example, if you have a question asking for the contact's LinkedIn handle, you can map it directly to the LinkedIn field on their contact record. This saves you from having to manually update contact records after every submission. Not all data from your form needs to be mapped to contact fields though. All captured data from forms is stored on the system regardless.
Viewing Form Submissions
Every form submission is stored in MyCo and can be viewed via Menu > Forms and clicking on the relevant form. Submissions are organised by status:
- New — recently submitted, not yet reviewed
- In Progress — being processed
- Completed — fully processed
- Unfulfilled — flagged for follow-up
Sharing Your Form
Every form has a unique URL displayed at the top of the Form Questions page. You can copy this link and share it anywhere — by email, on your website, via WhatsApp, or on social media.
Forms can also be embedded directly into your website using the Website Embed tab on the form edit page.
Other Form Settings
The form edit page includes several additional tabs for advanced configuration:
- Styling — customise the form's appearance, colours, banner image, and submit button label
- Billing — attach pricing and invoicing to form submissions
- User Validation — restrict who can submit the form, set submission limits, and add captcha
- Discount Codes — attach promotional codes to paid forms
- Approvers — set up an approval workflow for form submissions
- Auto-Approval — automatically approve submissions that meet specific criteria
- Steps / Workflow — define processing steps for submissions
- Other Options — configure confirmation emails, welcome emails, and notification settings