
There are two ways to use Workflows in MyCo. The first is standalone Workflows, where you build an automation that fires based on events such as a form submission, a product purchase, a course registration, an Eventbrite registration, or an appointment booking. The second is Stage Automation, which is part of the Pipeline Boards feature and fires when a contact moves into a particular stage on a board. Both use the same action engine and the same logic. This guide covers both, plus the Workflow Queue where your team picks up anything a workflow cannot decide on its own.
Part 1: Standalone Workflows
1. What is a Standalone Workflow?
A standalone workflow is an automation that fires based on a trigger event somewhere in your MyCo account. For example, you might create a workflow that fires whenever someone submits a particular form, whenever a product is purchased, whenever a course payment is confirmed, or whenever an appointment is booked. Once the trigger fires, the workflow runs a sequence of actions automatically for that contact.
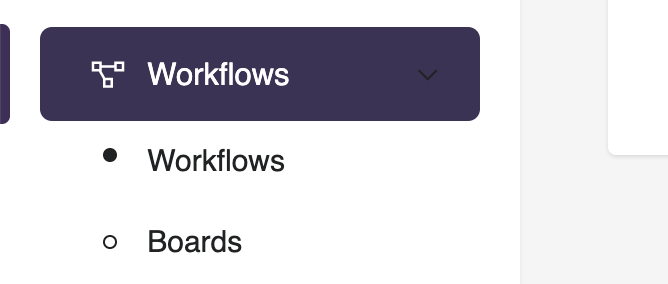
Standalone workflows are accessible from the Workflows item in the main navigation menu.
2. Creating a Workflow
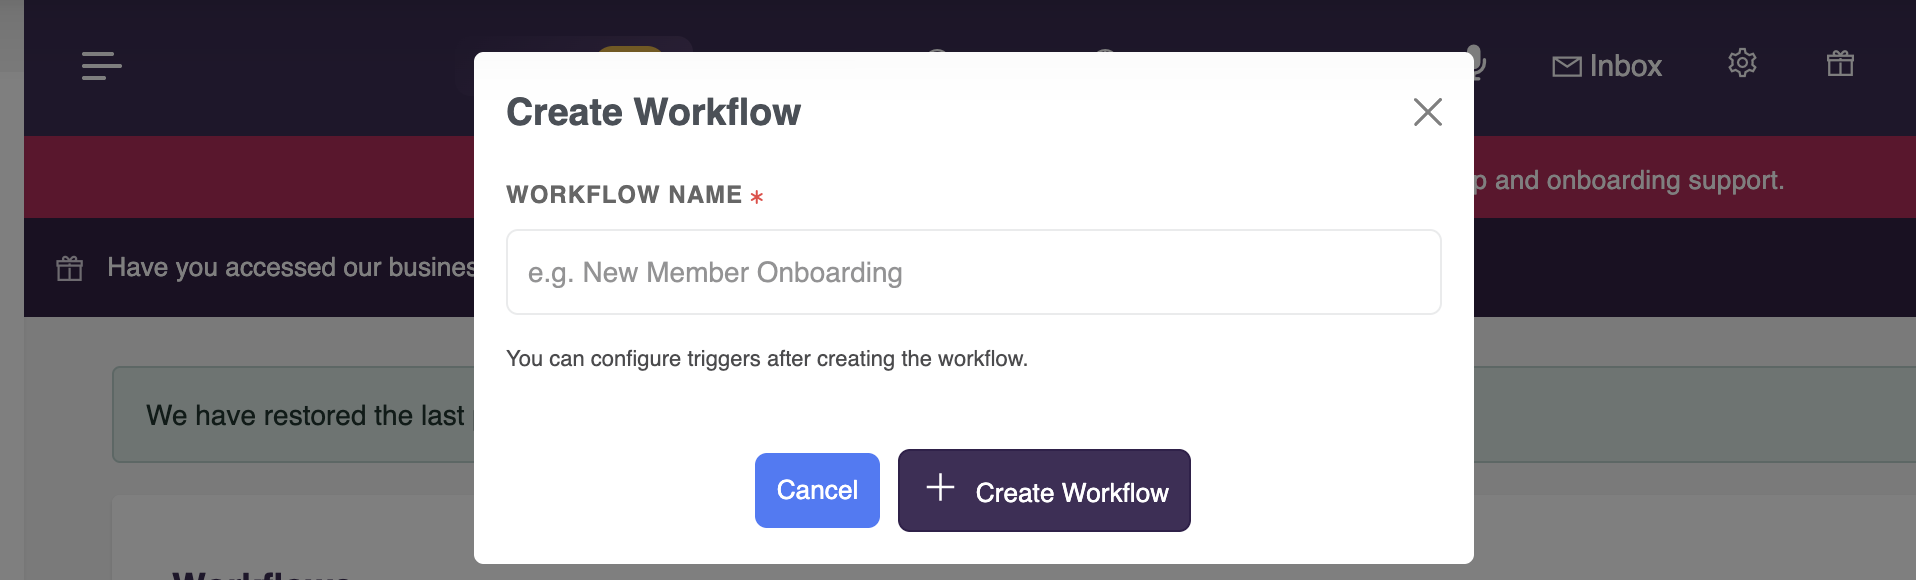
From the Workflows home screen, click New Workflow and give it a name that describes its purpose, for example New Enquiry Follow-Up or Course Purchase Onboarding. Once created you will be taken into the workflow builder where you configure triggers and actions.
3. Triggers
A trigger tells the workflow when to fire. Each workflow can have one or more triggers. Available trigger sources are:
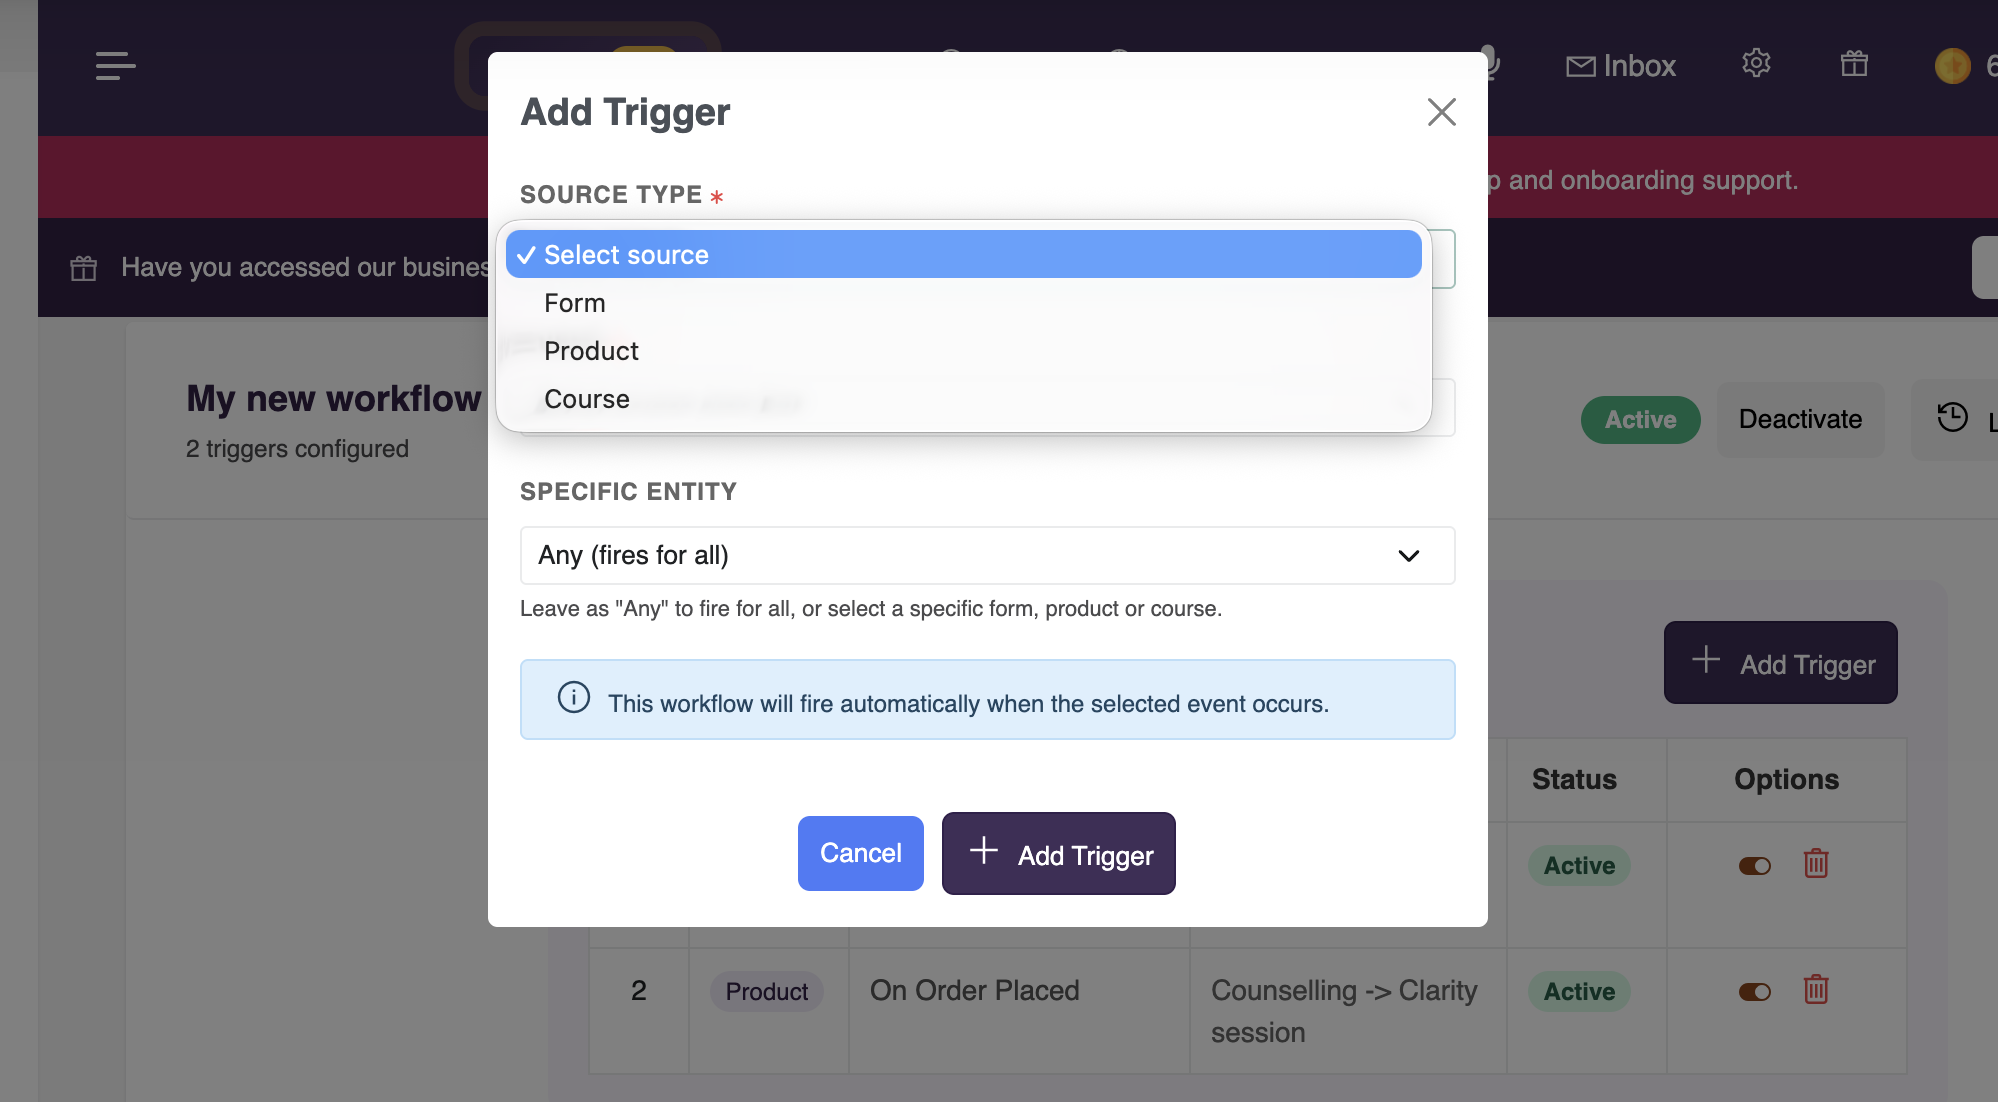
Form — fires when a form is submitted, or when the status of a form submission changes to In Progress, Completed, or Unfulfilled.
Product — fires when an order is placed for a product, or when a product payment is confirmed.
Course — fires when a contact registers for a course, when a course payment is confirmed, on the course start date, or on the course end date. For course start and end date triggers, you can set an offset of a number of days before or after the date, allowing you to send reminders ahead of time or follow-ups after the course concludes.
Appointment — fires when an appointment is booked through a product or a form that has an appointment calendar attached, or on the appointment date itself. For the appointment date trigger, you can set an offset of a number of days before or after the date. This is particularly useful for sending reminders before an appointment or follow-up messages after one.
Eventbrite — fires when somebody registers for one of your synced Eventbrite events. You can scope it to a specific event or leave it as any event. By default it only runs for people who are new to your contact list, so a welcome workflow does not run for someone who has been a contact for years and happens to buy a ticket. Untick that option to run it for every registration. Send Email and Send SMS actions can use date offsets against the event date, exactly as they do for appointments.
Each trigger can be scoped to a specific form, product, course, event, or appointment entity, or left as Any to fire for all events of that type across your account. A workflow with multiple triggers fires if any of its triggers match.
4. Date Offset Triggers
Some triggers are tied to a known future date rather than an immediate event. These are the course start date, course end date, and appointment date triggers. For each of these you can configure a direction and an offset:
On the day — the trigger fires on the exact date.
Before — the trigger fires a number of days before the date. For example, set 2 days before the appointment date to send a reminder two days ahead.
After — the trigger fires a number of days after the date. For example, set 1 day after the course end date to send a completion follow-up. Note that for the after case you can also achieve the same outcome by using the Time Delay clock action inside a workflow that fires on the event itself.
MyCo checks for due date offset triggers every hour in the background.
5. The Repeat Setting
Each workflow has a Repeat toggle in the header, and it decides what happens when the same contact triggers the same workflow twice.
Repeat off — a contact goes through the workflow once, ever. A second form submission from the same person starts nothing.
Repeat on — each new submission starts its own run, so somebody who applies twice is treated as two applications. The same submission can never start two runs, so a form status moved back and forth does not re-fire anything.
Leave it off for onboarding and welcome sequences. Turn it on for anything people legitimately do more than once, such as an annual renewal form or a recurring booking request.
6. Actions
Actions are the steps that run when the workflow fires. They run in sequence, one after the other, and each waits for the previous one to complete before it fires. You can add as many as you need and reorder them by dragging. A workflow can also split into routes at a Decision step, which is covered in section 8.
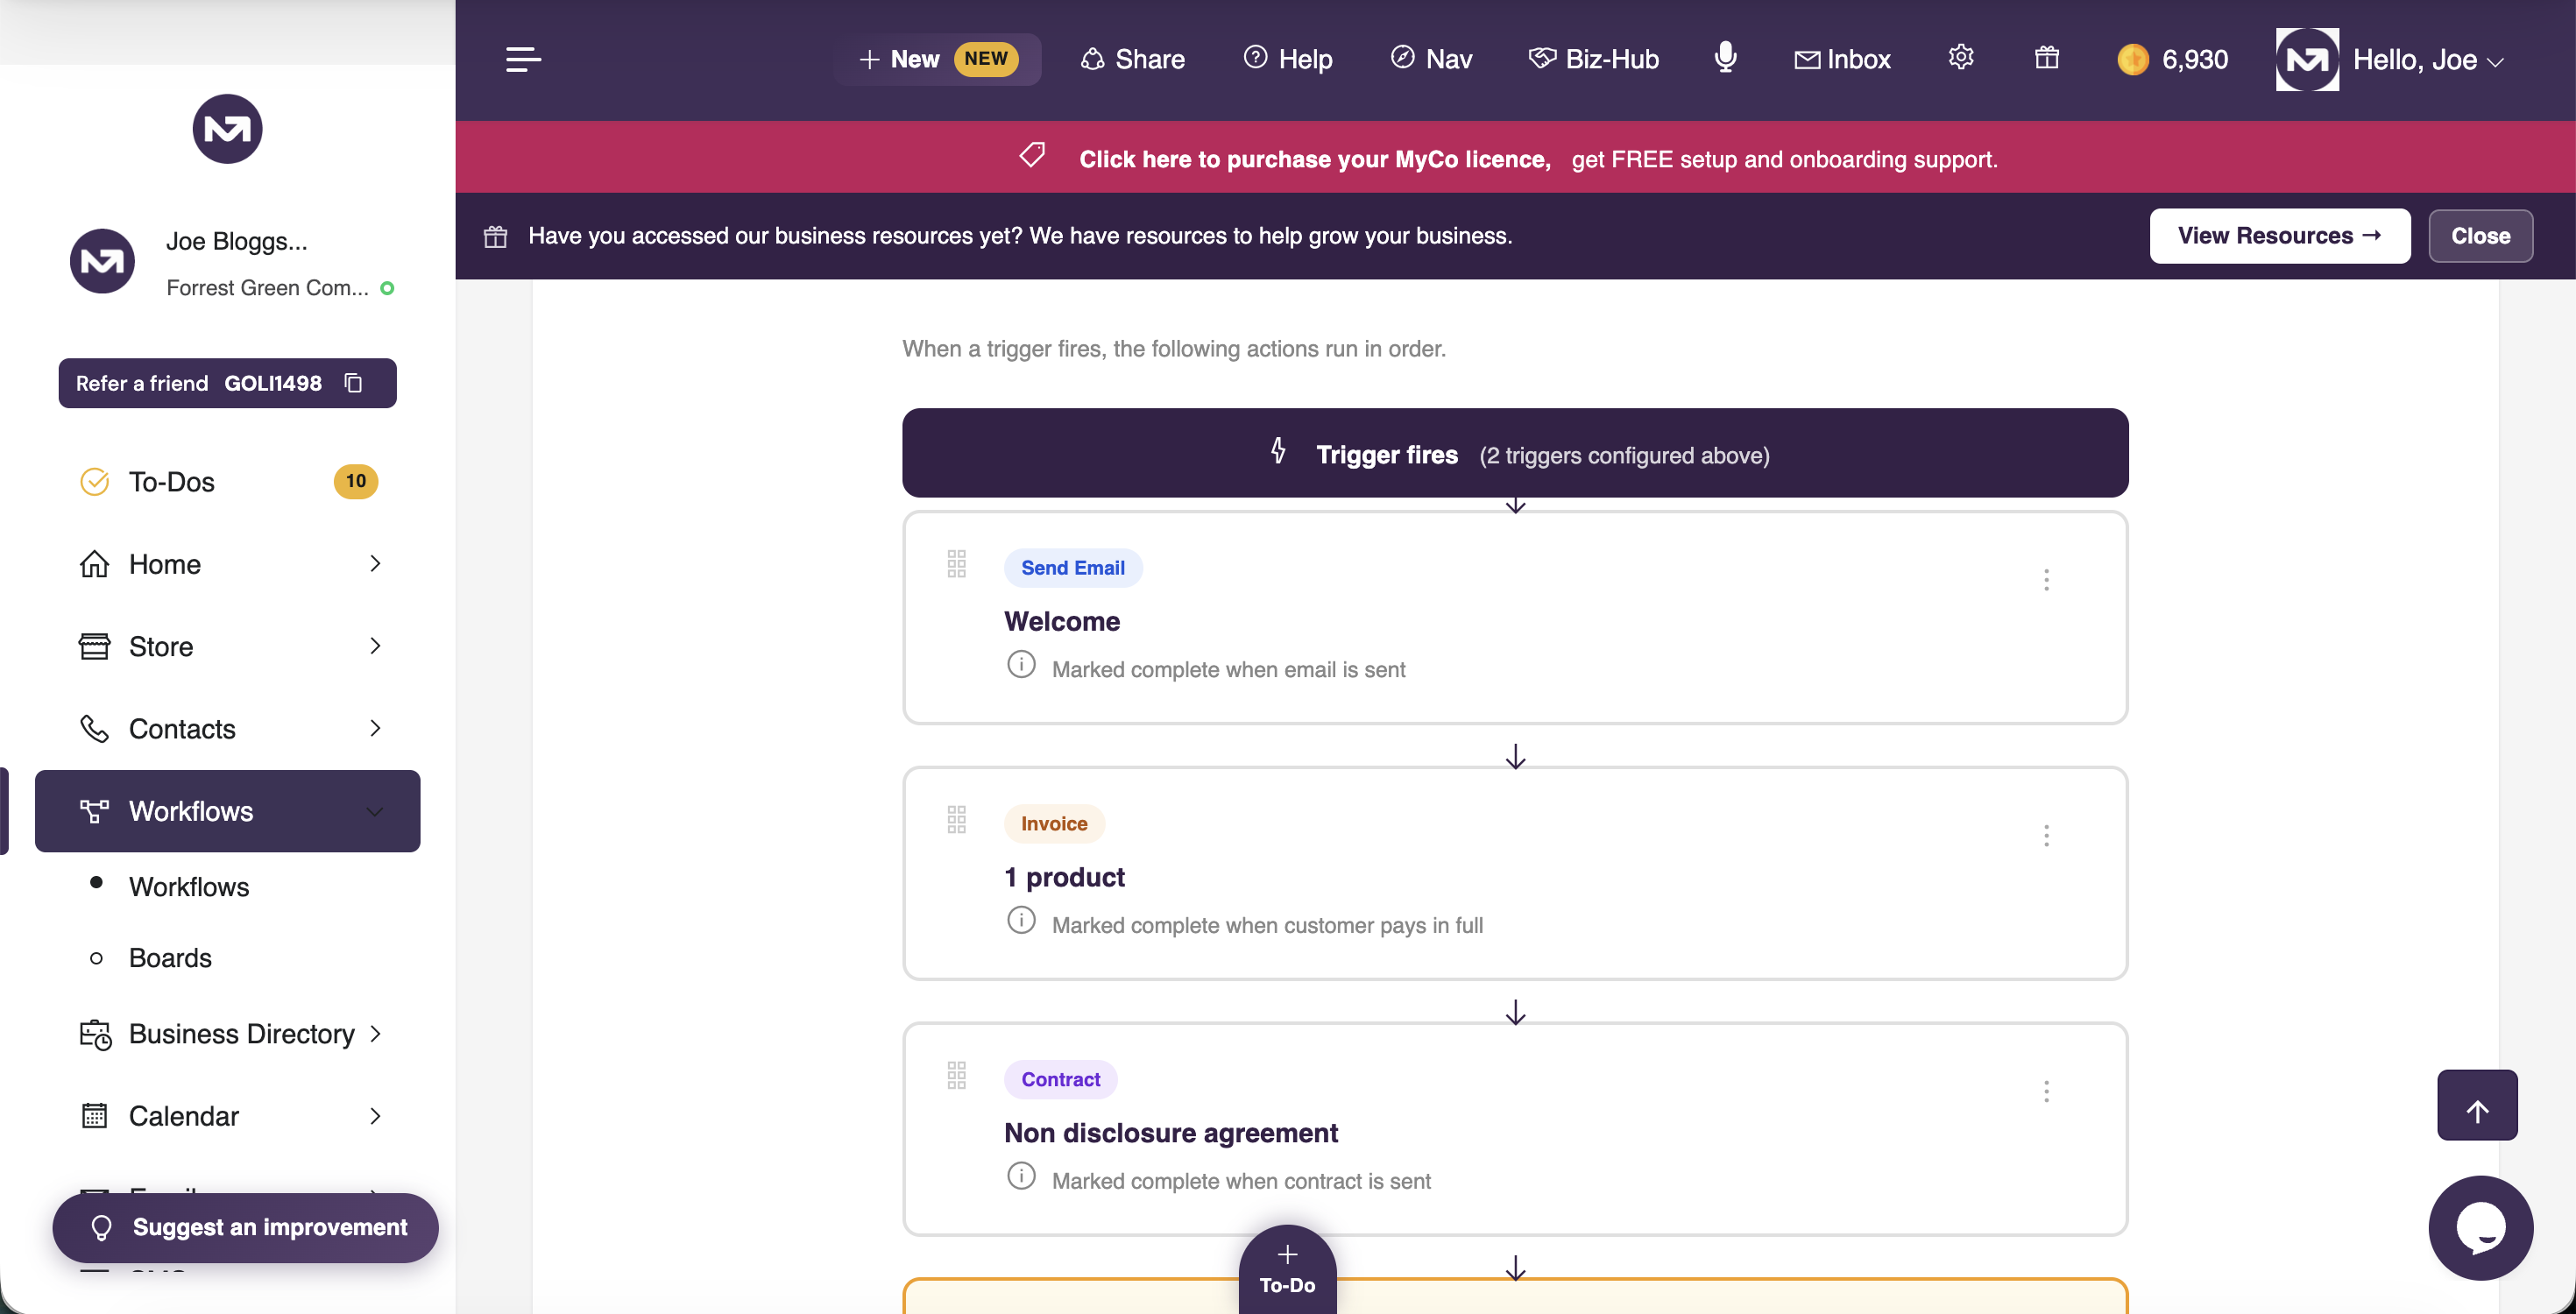
The available action types are:
Send Single Email — sends an individual email to the contact immediately when the action fires. You can choose whether the action marks itself complete as soon as the email is sent, or waits until the contact opens and reads the email. Marking complete when sent is the default. Waiting for a read is useful when the next step should only run once they have seen this one, but be aware the journey will sit in the Workflow Queue until they open it, and an email that is never opened stops the journey there. If no email address is on record for the contact, the action completes with a note and the sequence continues. You can also set a specific time of day for the email to be sent, useful if you want messages to arrive during business hours regardless of when the trigger fires. For workflows triggered by an appointment or event date, you can also set the email to send relative to that date, for example 2 days before or 1 day after.
Send SMS — sends an SMS to the contact immediately. Completes as soon as the message is queued. If no mobile number is on record, the action completes with a note and the sequence continues. For appointment and event date workflows, an SMS can also be sent relative to the date in the same way as email.
Add to Email Sequence — enrols the contact into one of your email sequences. The action completes immediately upon enrolment and the sequence runs on its own schedule independently of the workflow.
Update Contact Field — updates one of your custom contact fields to a value you specify. It can also set Membership start year and Membership stop year on the contact record. For those two you can either enter a specific year, or choose the year at the time this step runs, which is worked out when the step actually fires rather than when you built the workflow. That matters because a step can sit waiting for months, including across a new year, so this stamps the year they really joined or left. Completes instantly.
Add to Static List — adds the contact to one of your static lists immediately. If the contact is already a member, no duplicate is created and the action completes cleanly.
Remove from Static List — removes the contact from a static list. If they are not a member, the action completes cleanly with a note.
Set Contact Category — sets the contact's category to one of your account's categories. Skipped cleanly if it is already set to that category.
Create Invoice and Collect Payment — creates and sends an invoice to the contact for the products you select. You can choose whether the action marks itself complete when the invoice is sent, or waits until the customer pays in full. When set to wait for payment, the next action in the sequence fires automatically the moment the invoice is fully paid, with no manual intervention required.
Issue Contract and Collect Signature — issues and sends a contract to the contact using one of your contract templates. You can choose whether the action marks itself complete when the contract is sent, or waits until the customer signs. When set to wait for signature, the next action fires automatically the moment the contract is signed.
Wait for Product Purchase — pauses the sequence until the contact has a fully paid invoice containing a product you choose. If they have already bought it, the action completes immediately and the sequence carries on.
Enrol on Course — enrols the contact on a course of your choice with an access period you define, either a number of days from enrolment or a fixed end date. If the contact is already actively enrolled, the action is skipped cleanly and the sequence continues. You can choose whether the action marks itself complete immediately on enrolment, or waits until the contact completes the course. When set to wait for course completion, the sequence parks at that step and advances automatically the moment the contact finishes all modules and receives their certificate. This makes it straightforward to build processes such as enrol a contact, wait until they finish the training, then issue their membership card.
Issue Membership Card — issues a membership card to the contact using a card type of your choice, with an expiry method of either a number of days from issue or a fixed expiry date. The card is issued immediately with an approved status and sent to the contact by email. If the contact already has an active card of that type, their existing card details are resent instead.
Invite to Membership Application — emails the contact a personalised link to complete a membership application for a card type you choose. No application review is created, because whatever fired this workflow has already done the vetting. The contact completes any outstanding questions, pays, and passes verification before the card is issued. You can choose whether the step completes when the invite is sent, or waits until the application is approved and the card issued.
Update Form Status — updates the status of the contact's form submission for the form that triggered the workflow. You can set the status to In Progress, Completed, or Unfulfilled. Once updated, any workflows triggered by that status change will fire automatically for the contact. If the submission is already at the target status the action is skipped cleanly. This action is what connects a single workflow to a multi-stage process: for example, when a review is complete you can use this action to advance the form to Completed and kick off the next set of steps automatically.
Wait for Form Status — pauses the workflow sequence until the contact's form submission reaches a specific status. You choose which status to wait for: In Progress, Completed, or Unfulfilled. The sequence parks at this step and advances automatically within minutes of the status changing, regardless of whether the change was made manually by an admin, triggered by another workflow action, or set automatically by the form's auto-status setting.
Time Delay (Clock) — pauses the sequence for a number of days you specify. The countdown begins when the previous action completes. Once the delay has passed, the next action fires automatically. A background process checks for due clocks every five minutes. You can also complete a clock step early using Mark Complete if you do not want to wait. The clock is particularly useful as the first action in a workflow when you want to wait a number of days after a trigger fires before anything happens.
Manual Task — pauses the workflow until somebody on your team ticks it off. You write the instruction, for example Verify their ID document, and an optional note with anything they need to know. The task appears in the Workflow Queue with your instruction on the row, and the journey continues the moment it is ticked. MyCo records who ticked it and when. Nothing ticks itself and nothing happens on a schedule. Use a Manual Task when the answer is simply did you do it. If the answer changes which way the journey goes, use a Decision instead.
Decision — splits the workflow into routes. See section 8.
End Journey — stops the journey where it stands. See section 9.
7. Conditions — only run a step for some contacts
Every action can carry conditions about the contact. If they are not met, that step is skipped and the journey carries straight on to the next one. The run does not stop.
Conditions are set in the same window where you configure the action, under Only run this step if.... You can add several and choose whether all of them must match or any of them. Leave it empty and the step always runs.
You can write conditions against any of your named additional info fields, and against the contact's Email, Mobile, Country, City, Membership start year and Membership stop year.
The available comparisons are is, is not, is any of, is none of, contains, does not contain, has any value, and is empty. For is any of and is none of, separate the values with commas.
Three things worth knowing:
Conditions are checked at the moment the step fires, not when you built the workflow. A step can sit waiting for weeks, and if the contact's record changed in the meantime the current value is what counts.
Matching ignores upper and lower case and surrounding spaces, so Alpha and alpha are the same value.
An empty field is a real value. A rule of Team is not Alpha is true when the team field is blank, because blank is not Alpha. When you mean "they must have filled this in", use has any value; when you mean "they must have left it blank", use is empty.
Any step with conditions shows them on its card in the builder, so you can see at a glance which steps only run for some people.
8. Decisions and Routes
A Decision step splits the workflow into routes. Use it when a person has to decide which way a journey goes.
You write the question, for example Did they pass the interview?, and give it up to six routes, each with a name and a colour. After saving, the builder shows a column per route underneath the decision, and you add steps to each route the same way you add them to the main path.
When a journey reaches a decision it pauses. Nothing is decided automatically and nothing is picked on your behalf. It appears in the Workflow Queue where somebody chooses a route. Once chosen, the steps on that route run, and when the route finishes the journey rejoins the main path and carries on with whatever comes after the decision.
Two rules to be aware of:
Routes cannot contain another decision. You can have as many decisions as you like one after another down the main path, but you cannot fork a route into sub-routes. If you need two questions answered at once, put them on one decision as combined routes, for example Approve and pay now, Approve and pay later, Decline.
Routes rejoin unless you stop them. If the steps after a decision should only run for some routes, end the other routes with an End Journey step. Without it, everyone reaches those steps including the people the decision just turned down.
Decisions are available on standalone workflows only, not on stage automations.
9. End Journey
An End Journey step stops the run where it stands. Nothing after it runs for that contact.
Its main use is at the end of a route. For example: a decision asks whether somebody passed an interview; the No route sends a rejection email and then ends the journey; the Yes route carries on and rejoins the main path, where the next decision only ever sees the people who passed.
It works on the main path too, where it ends the journey for everybody who reaches it. You can add an optional reason, for example Did not pass interview, which shows on the card and in the log — worth filling in, because six weeks later it is what tells somebody why a run stopped without them having to read the whole workflow.
A journey ended this way counts as completed, not stopped. It did what the workflow was built to do.
10. How Completion Works
Every action has a completion condition. Some complete instantly, such as field updates, list membership, SMS, email sequence enrolment, and form status updates. Others wait for something before the sequence can continue:
A Send Email action set to wait for read stays pending until the contact opens the email. MyCo detects this automatically via the tracking pixel embedded in every sent email.
An Invoice action set to wait for payment stays pending until the invoice is fully paid.
A Contract action set to wait for signature stays pending until the contact signs.
An Enrol on Course action set to wait for course completion stays pending until the contact finishes all modules and a certificate is issued. Checked every five minutes.
A Wait for Form Status action stays pending until the submission reaches the target status. Checked every five minutes.
A Wait for Product Purchase action stays pending until the product is bought and paid for.
A Clock action stays pending until the specified number of days has passed.
A Manual Task stays pending until somebody ticks it off in the Workflow Queue.
A Decision stays pending until somebody chooses a route in the Workflow Queue.
If an automated completion may never happen — a contact who never opens an email, or never finishes a course — you can advance the journey by hand from the Workflow Queue at any time.
11. Editing a workflow that people are already running through
You can edit a live workflow, and MyCo handles the common cases for you.
Adding a step — journeys already in flight pick it up when they reach it.
Editing a step's settings — anyone who has not reached it yet gets the new wording or settings.
Deleting a step — anyone sitting on it is moved on to the next step automatically.
Reordering — journeys follow the new order from wherever they currently are. A step moved to before somebody's current position will not run for them.
The one thing to think twice about is deleting or reordering a workflow that has a lot of people mid-flight. Filter the Workflow Queue to that workflow first and see who is where before you change its shape.
12. Building Multi-Stage Processes in a Single Workflow
One of the most powerful patterns in MyCo Workflows is combining the Wait for Form Status action with form status trigger workflows to build a complete multi-stage process without managing multiple automations.
For example, a membership application process might look like this within a single workflow triggered on form submission: send the applicant a confirmation email and set their expectations, then park the workflow using Wait for Form Status set to In Progress. When a reviewer approves the application by moving the form to In Progress, the workflow automatically continues: enrol the contact on a required training course, wait for them to complete it, then issue their membership card.
With Decisions and Manual Tasks you can now keep the human steps inside the same workflow rather than depending on somebody remembering to change a form status. A recruitment process might be: send an acknowledgement, then a Manual Task to review the application, then a Decision asking whether they passed, with a Shortlisted route that invites them to interview and a Not proceeding route that sends a polite decline and ends the journey.
If you prefer to keep stages in separate workflows, you can still use the Update Form Status action at the end of one workflow to automatically trigger the next.
13. The Automation Log
Every workflow has a Log button in the header that takes you to the full automation log. The log shows every action that has fired for every contact through that workflow, including what happened, the current status, and when each step was triggered and completed. You can search it by contact name or email address.
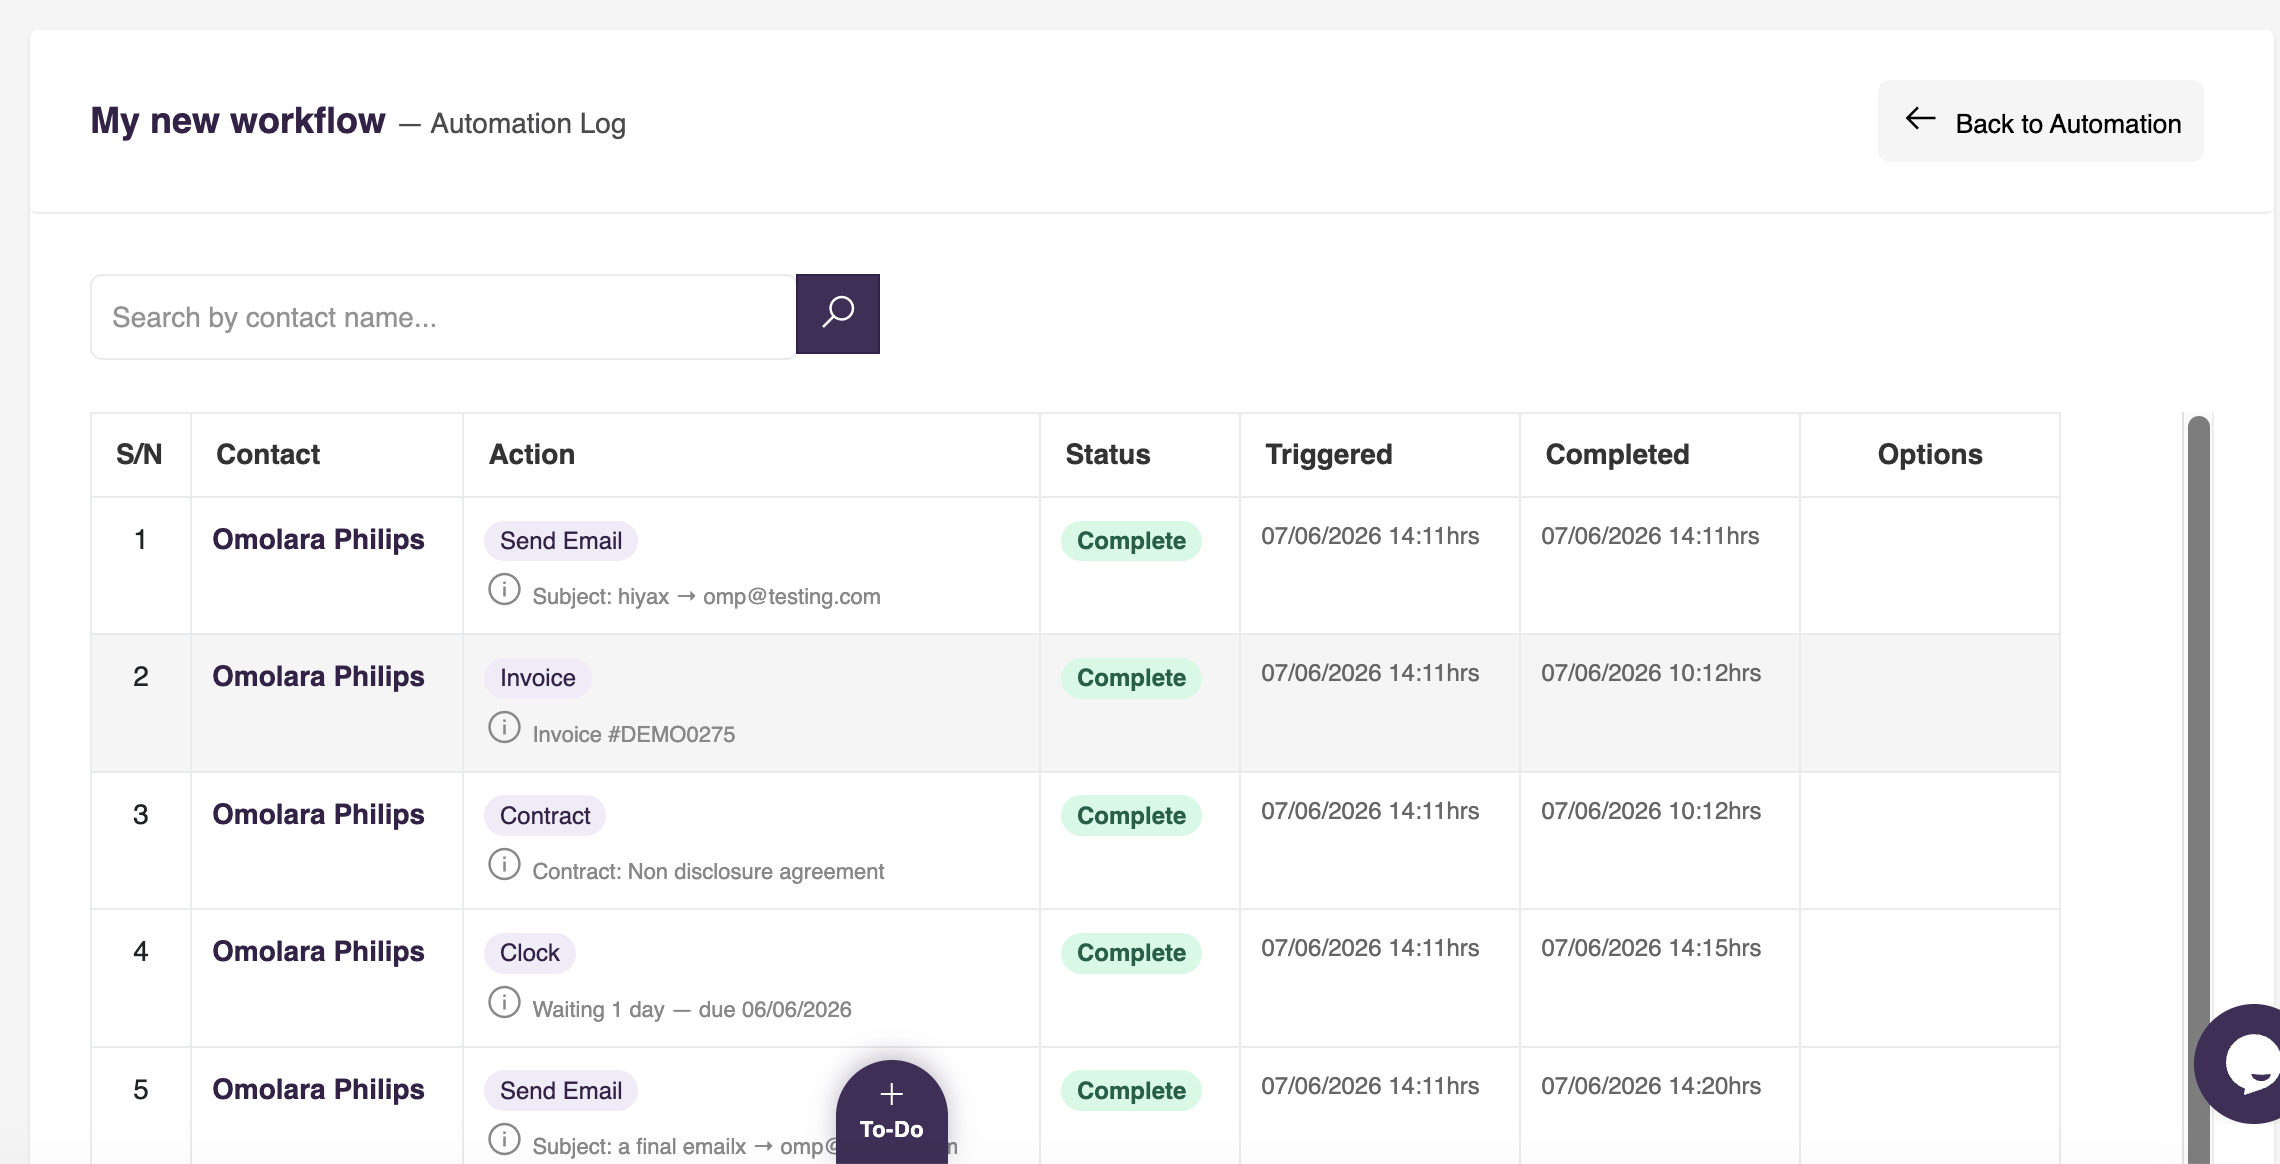
Statuses you will see in the log:
Waiting — the action is queued and will fire automatically once the action above it completes.
Awaiting Read — a send email action has been sent and is waiting for the contact to open it.
Awaiting Signature — a contract has been sent and is waiting for the contact to sign it.
Awaiting Payment — an invoice has been sent and is waiting for the contact to pay in full.
Awaiting Completion — an enrol on course action has enrolled the contact and is waiting for them to complete all modules.
Awaiting Status — a wait for form status action is parked and waiting for the form submission to reach the target status.
Awaiting Decision — a decision is parked, waiting for somebody to choose a route in the Workflow Queue.
Route chosen — a decision has been resolved. The log records which route was taken, when, and by whom.
Pending — the action has fired and is waiting for an external event such as a payment, a signature, or a clock delay to pass.
Scheduled — a send email action is queued and will send on a specific future date tied to an appointment, event, or course date offset.
Queued — a send email action is queued to send at a specific time of day.
Complete — the action has finished successfully and the next action in the sequence has been triggered.
Skipped — the action was bypassed. This covers a step whose conditions were not met, which shows the reason in full, and a step that had nothing to do, for example a contact already enrolled on a course.
Ended — an End Journey step stopped the run here.
Not reached — a step the journey never got to, because an End Journey step stopped the run before it.
Closed — somebody stopped this journey by hand from the Workflow Queue.
Failed — the action encountered an error. These now appear in the Workflow Queue as well, so a run stopped by an error is visible rather than sitting silently.
14. The Journey Tracker
When you toggle Show Journey on for a workflow, MyCo will display a visual journey timeline to the contact on the form confirmation page and in the contact portal. The timeline shows the steps in order, with clear friendly labels such as Expect an email from us, Complete a training, or Your membership card will be issued. Completed steps are shown in green with the date they were completed. Pending steps are shown in grey.
On a workflow with routes, the contact sees the main path plus only the route they were actually sent down. A route that has not been chosen yet shows nothing, and a route they were not sent down is never shown to them. The decision itself is never displayed — contacts are not told that a decision was made about them.
If a form has multiple workflows attached, for example one that fires on submission and another that fires when the form moves to In Progress, the journey tracker combines them into a single unified timeline and shows a stage divider between groups of steps.
You can also pass an optional disclaimer message to the journey tracker to set expectations, for example to make clear that progression through the process is subject to review and not guaranteed.
The journey tracker only shows actions that are meaningful to the contact. Internal actions such as time delays, list management, field updates, decisions, and email sequences are hidden.
15. Activating and Deactivating a Workflow
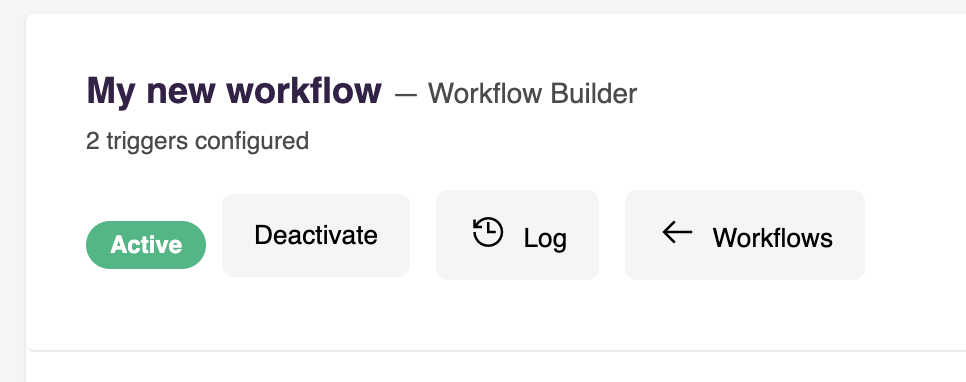
Each workflow has an Active or Inactive status shown in the header. Use the Activate or Deactivate button to toggle it. An inactive workflow will not fire even if a matching trigger event occurs. This is useful while you are setting up or testing a workflow before going live.
16. Triggers on Forms, Products, Courses, and Appointments
In addition to configuring triggers from the workflow builder, you can also manage triggers directly from the relevant module. When editing a form, product, or course, a Triggers tab is available where you can see all workflows that fire from that entity and add new ones. For forms and products that have an appointment calendar attached, appointment triggers are included in the same view alongside the standard form and product triggers, giving you a single unified place to manage everything that fires from that item.
Part 2: The Workflow Queue
17. What the Workflow Queue is
The Workflow Queue is where your team works. It lists every journey currently in flight across all your workflows, and it is where anything a workflow cannot decide on its own gets picked up.
Three kinds of wait end up here:
Waiting on your team — a Decision needing a route chosen, or a Manual Task needing ticking off.
Waiting on the contact — sign the contract, pay the invoice, buy the product, finish the application or the course.
Waiting on nothing — a clock running, an email scheduled for next week. No action needed and none offered; these are listed so you can see a journey is alive rather than wondering where it went.
18. Views and tabs
There are three tabs:
Open — journeys still running.
Completed — journeys that ran to the end, including any stopped by an End Journey step. The row shows the last step they reached.
Stopped — journeys somebody stopped by hand. Only these can be reopened. A step skipped by its conditions is not stopped, it completed, and appears under Completed.
On the Open tab a dropdown controls what kind of wait to show. It defaults to Your actions, which is decisions and tasks only, because that is what the queue is usually opened to answer. Widen it to Needs attention to add the steps waiting on contacts, or Everything in flight to see clocks and scheduled sends too. Whatever the view, the tiles at the top always count everything, so a short list never means a quiet queue.
19. What you can do from a row
View contact — opens a preview without leaving the queue.
View the submission — where a journey was started by a form, opens exactly what that person submitted. Worth reading before choosing a route.
Choose route — on a decision. Shows each route with its colour, how many steps it has, and whether it starts with an email. If it does, you can read and reword that email before it goes; the change applies to that contact only and the workflow itself is left alone.
Resend — sends the outstanding item itself again: the same contract, the same invoice, the same link. Not a generic reminder. Anyone already sent one today is skipped, and anything that turns out to be done already is completed rather than chased.
Mark done — for a task, ticks it off. For a step waiting on the contact, records it as done when it happened outside MyCo, for example paid by transfer or signed on paper. Either way the journey moves on to the next step.
Close — the journey stops here and the remaining steps will not run. It moves to the Stopped tab and can be reopened later.
You can also select several rows and resend to all of them, or write a new email to all of them, which opens the standard email composer with those contacts already added as recipients.
20. Search
Searching spans open, completed and stopped journeys at once, and matches on name, email address and workflow name. Each result says which state it is in, so you never have to guess which tab a person is on.
21. The Analysis tab
The Analysis tab answers a different question from the list: not where people are, but how far each group got.
Choose a workflow and one contact field — team, region, whatever that field holds on your account — and you get a grid of that field's values against the workflow's steps, with counts and percentages in every cell.
Each cell counts the forms submitted that completed that step. Counting is by submission rather than by person, so somebody who submitted twice went through twice and is counted twice, which is what makes these figures reconcile with the form's own numbers. Percentages are of that value's own total, so a cell reads "this share of that team got this far".
You can order the values by name or by volume, flip the grid so steps run down the side instead of across the top, and export as CSV, as a landscape PDF grid for comparing groups, or as a portrait PDF with a section per group for circulating. Both PDFs carry your logo and the time the report was generated.
Only steps that visibly happen to a contact appear as columns — field updates, form status changes, clocks and waits are left out, because each would add a column that pushes the ones that matter off screen.
Part 3: Pipeline Boards and Stage Automation
22. What is a Pipeline Board?
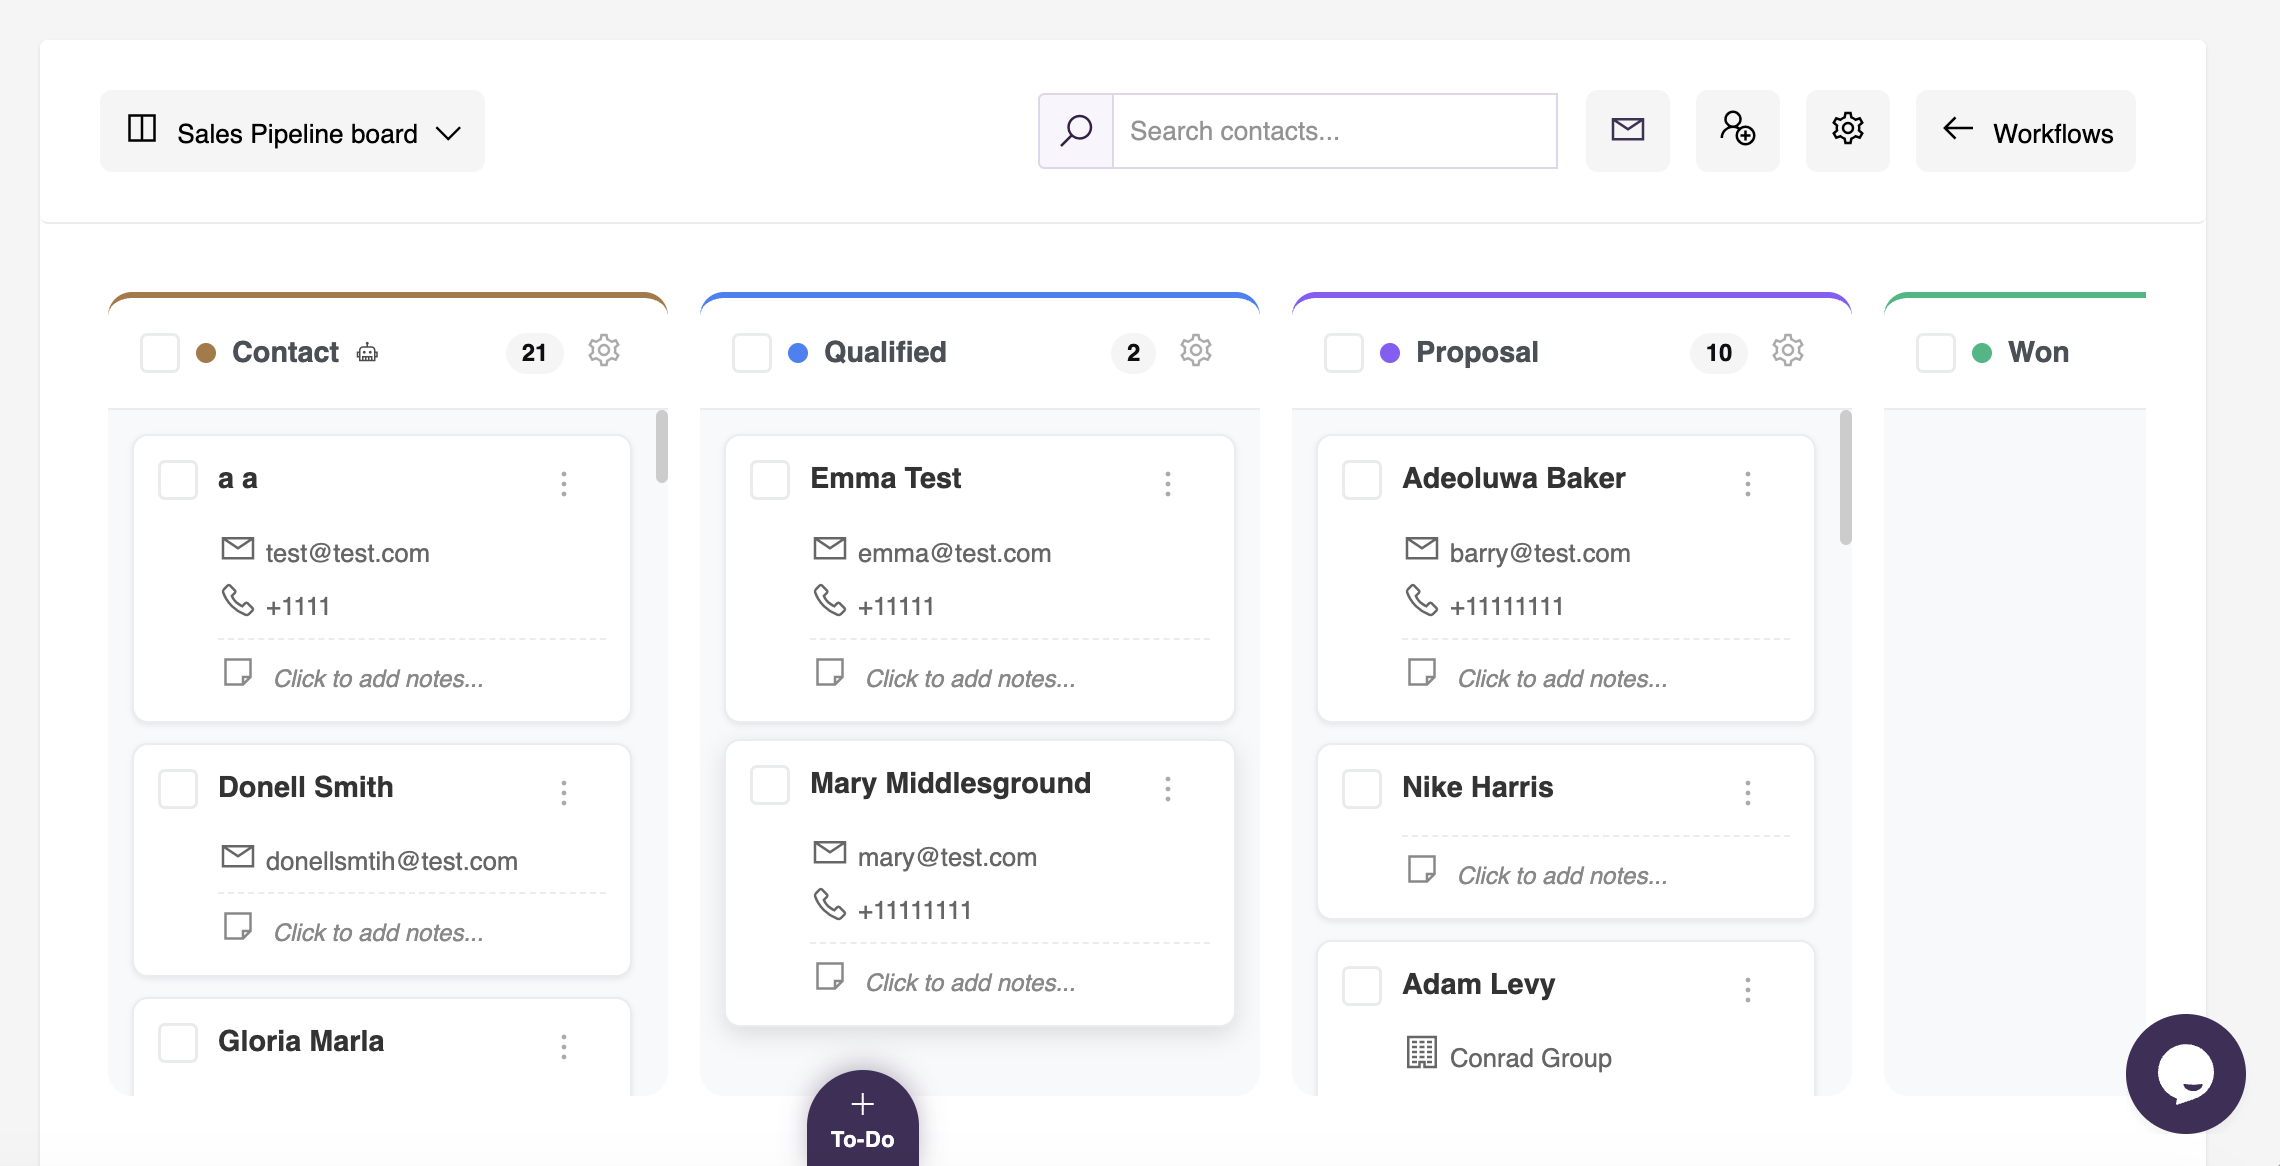
A pipeline board is a visual kanban-style board for tracking contacts through a process. Each board has a set of stages shown as columns, and contacts appear as cards that you drag between stages as they progress. You might have a board for your sales pipeline, another for member onboarding, and another for renewal follow-ups.
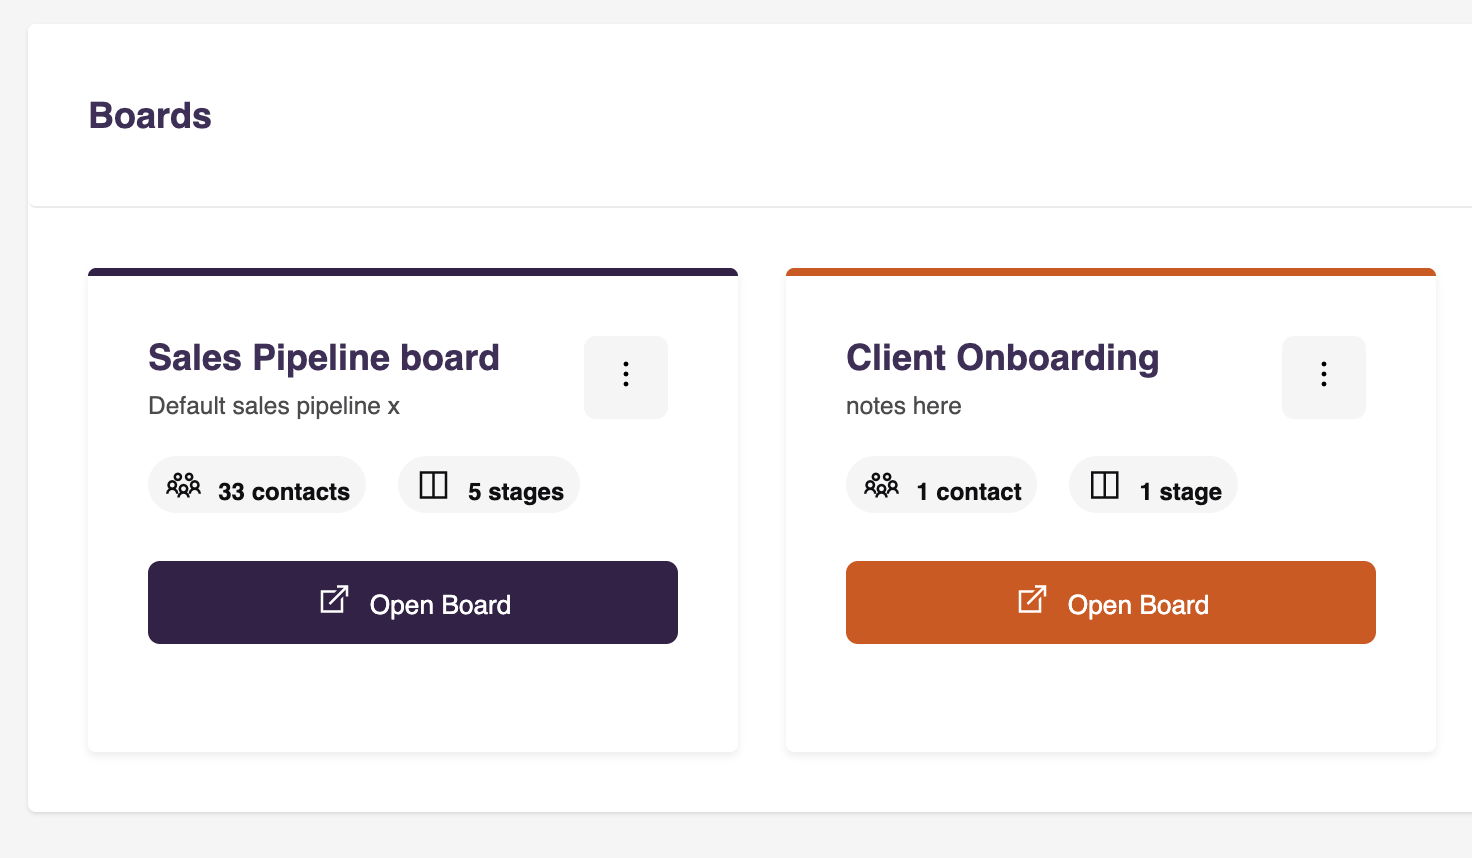
Pipeline boards are accessible from the Workflows section of the main navigation alongside standalone workflows.
23. Creating a Board
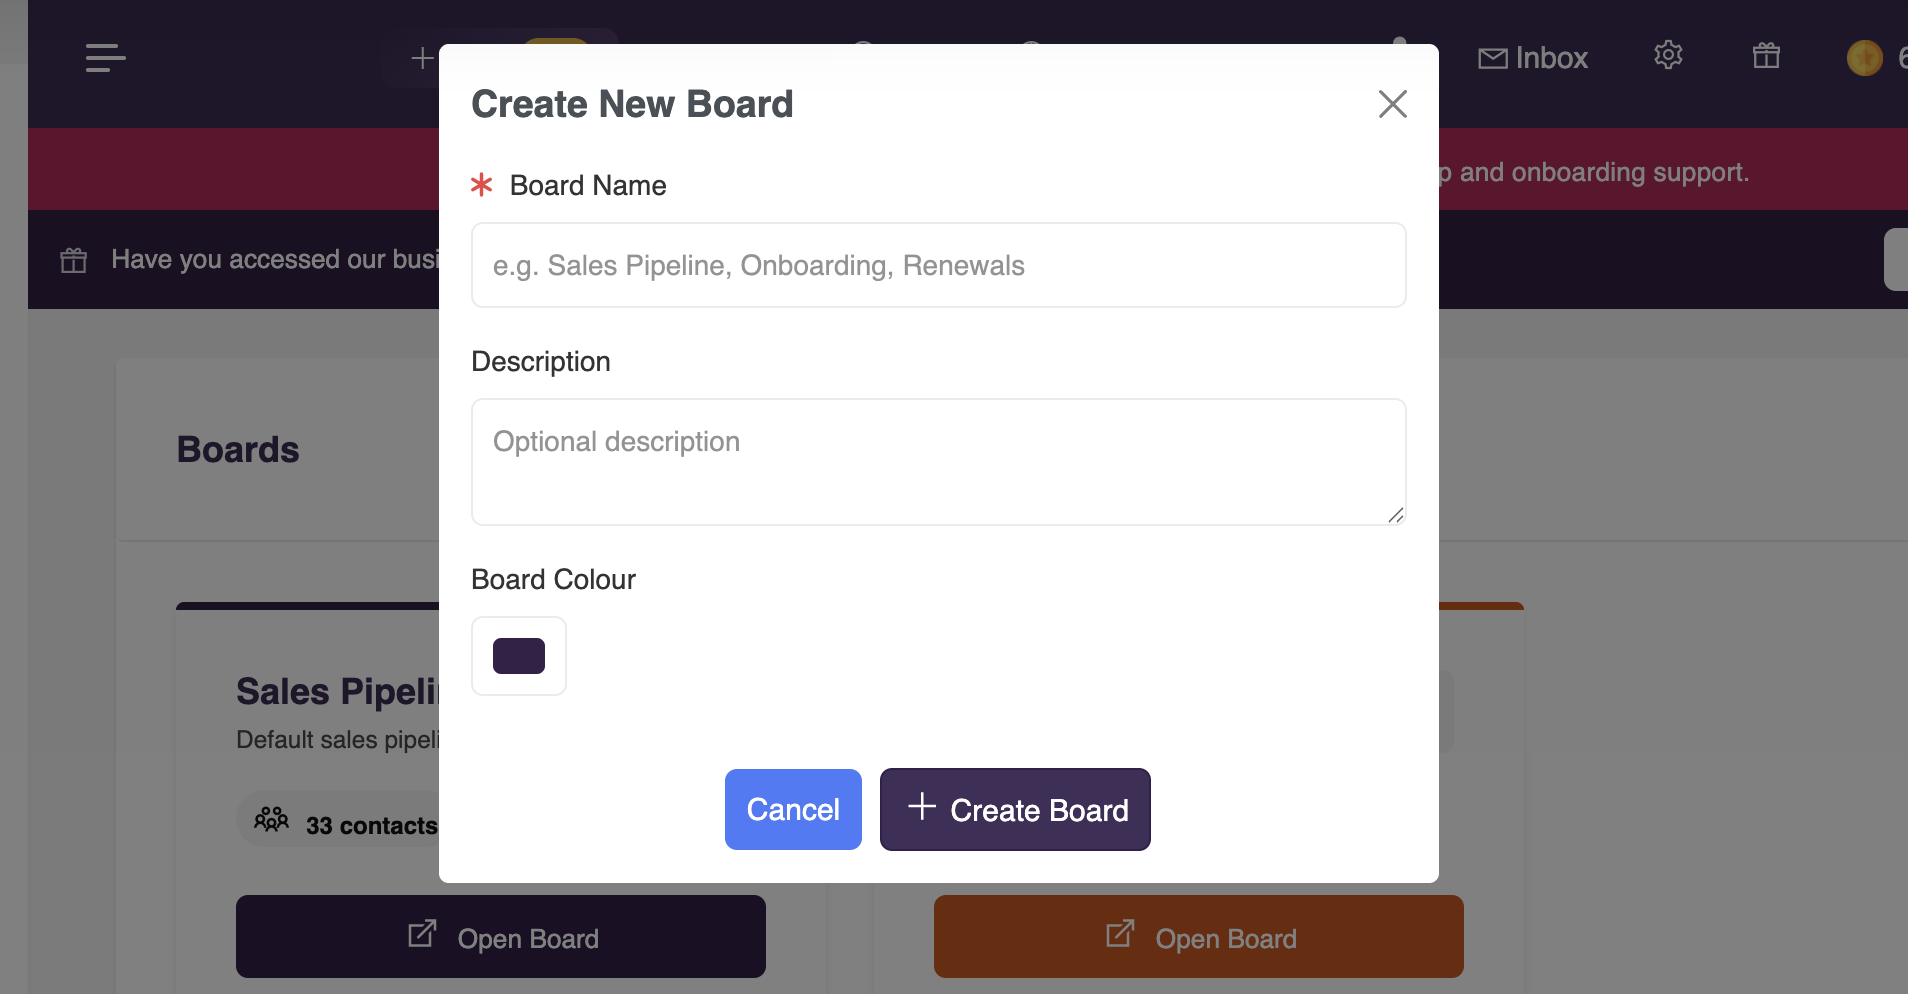
Click New Board from the Workflows home screen. Give it a name, an optional description, and choose a colour. Every new board starts with a default first stage which you can rename immediately.
24. Stages
Each board has its own stages which appear as columns. Stages represent the steps in your process. You can add, rename, reorder, and delete stages at any time from the settings icon on each column header. Each stage has its own colour to make the board easy to read at a glance.
25. Adding Contacts to a Board
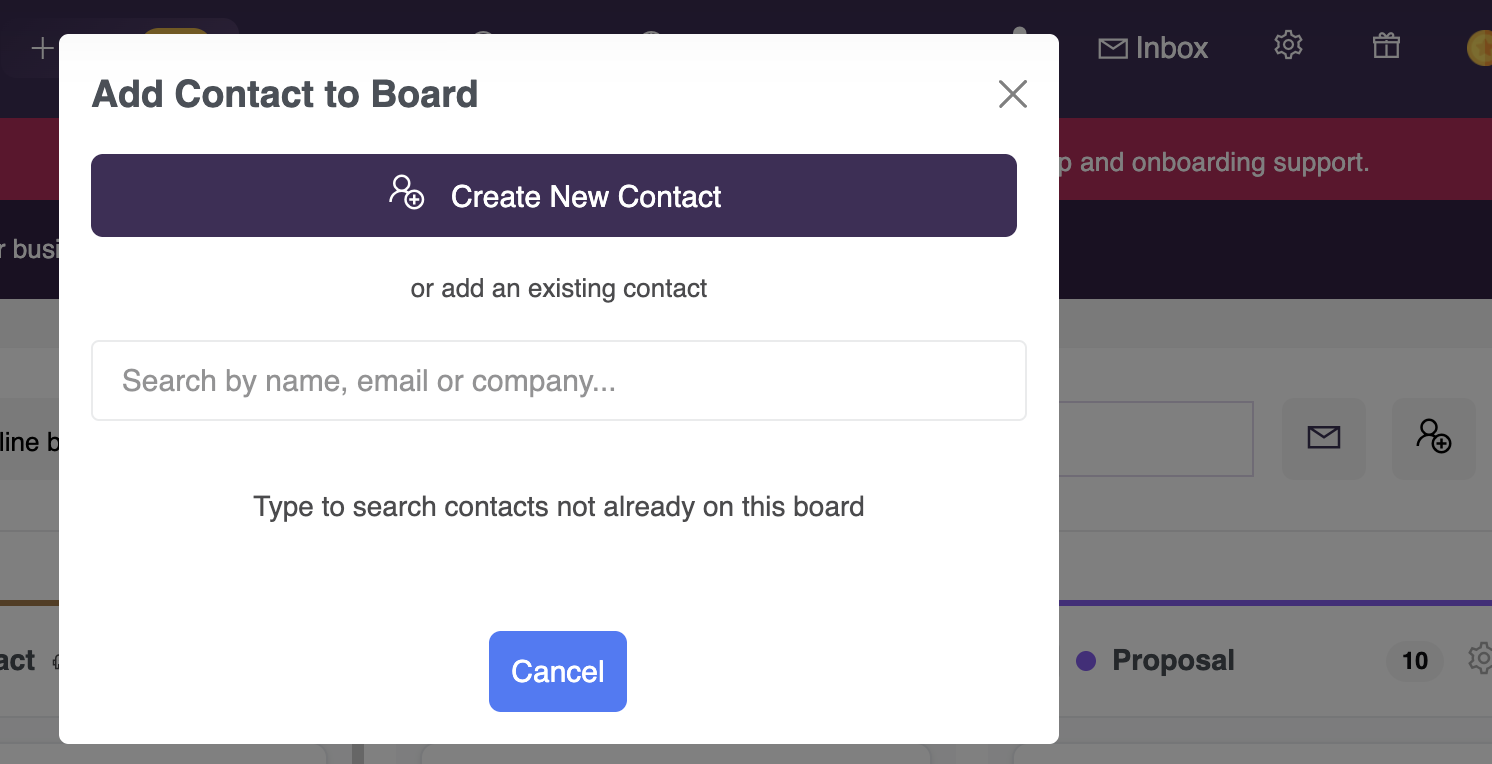
Contacts are the cards on your board. You can add existing contacts by searching for them from the board view, or create a new contact directly from the board without navigating away. A contact can appear on multiple boards at the same time, so the same person can be tracked across different processes simultaneously.
26. Moving Contacts Between Stages
Drag a contact card from one stage column to another as they progress through your process. The board updates instantly. You can also select multiple contacts using the checkboxes on each card and drag them all at once for bulk updates.
27. Notes
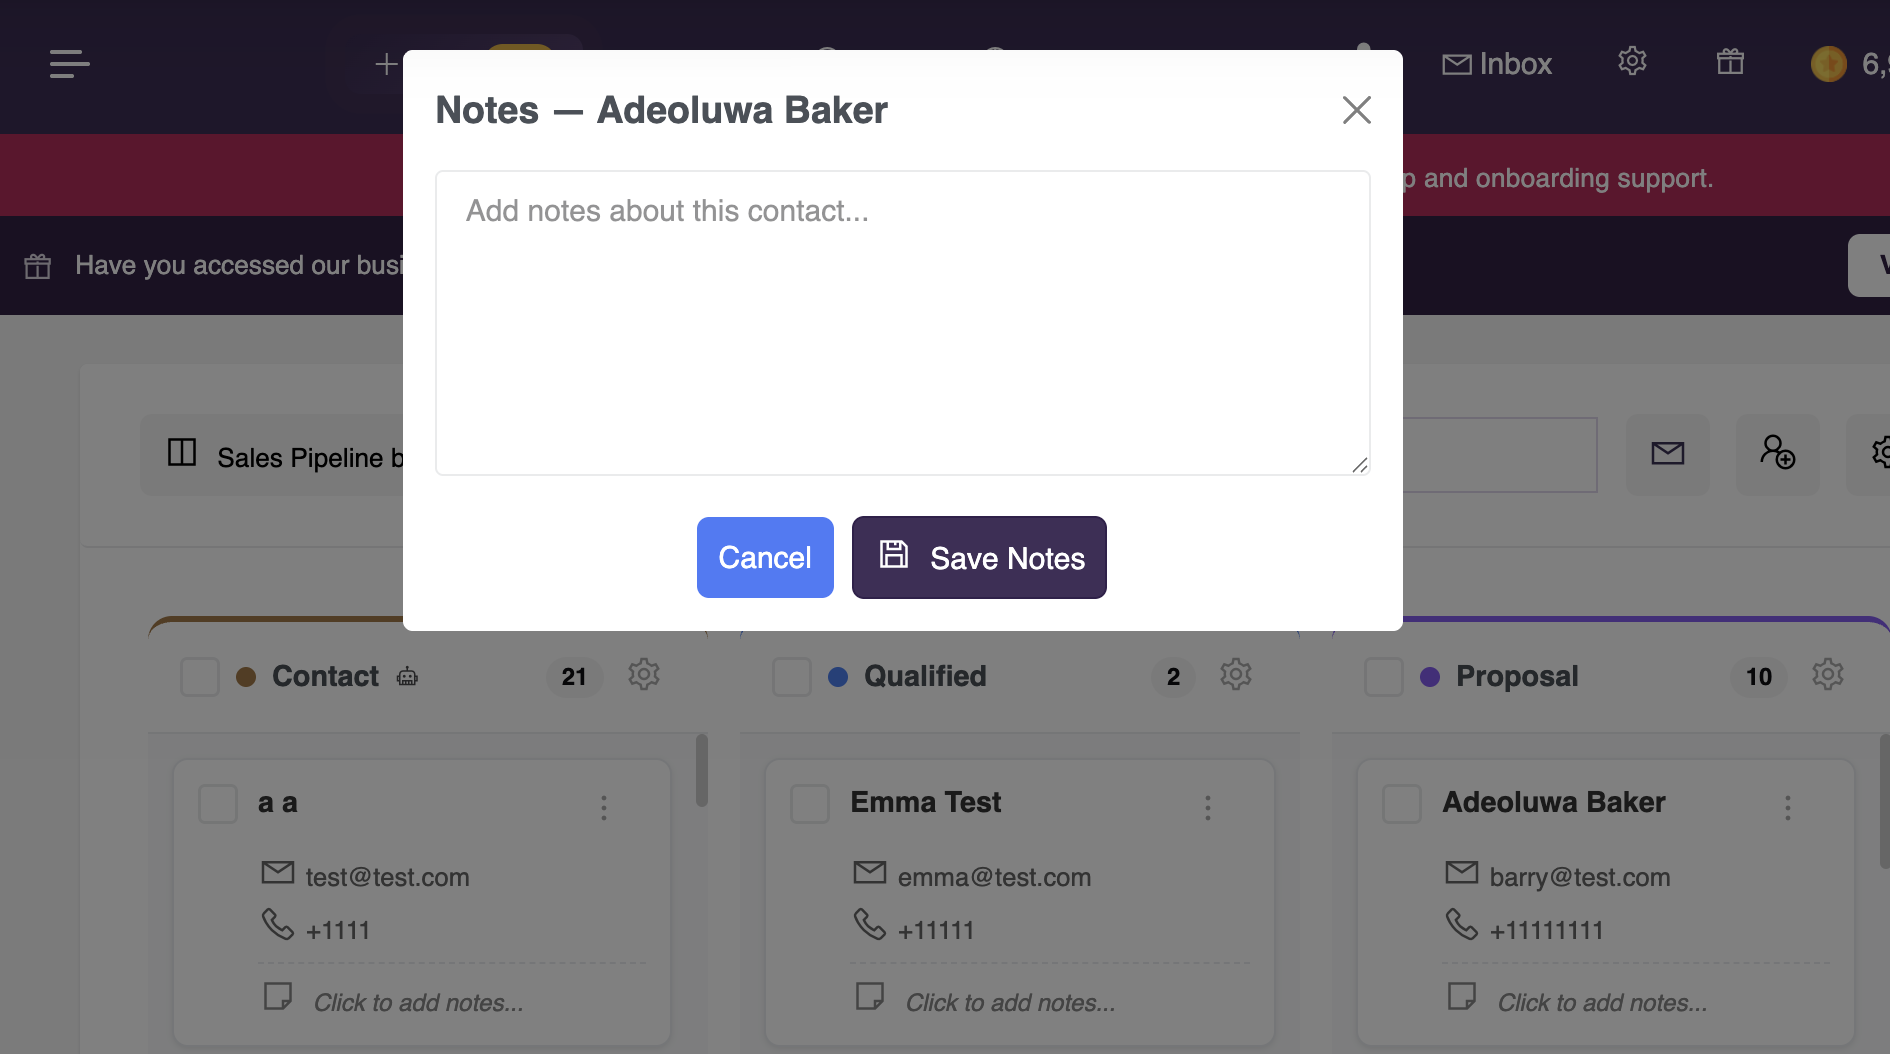
Each contact card has a notes field. Click the notes area on any card to add or update notes about that contact's progress, conversations you have had, or next steps. Notes are saved instantly and are visible directly on the card.
28. Email Sequences on Stages
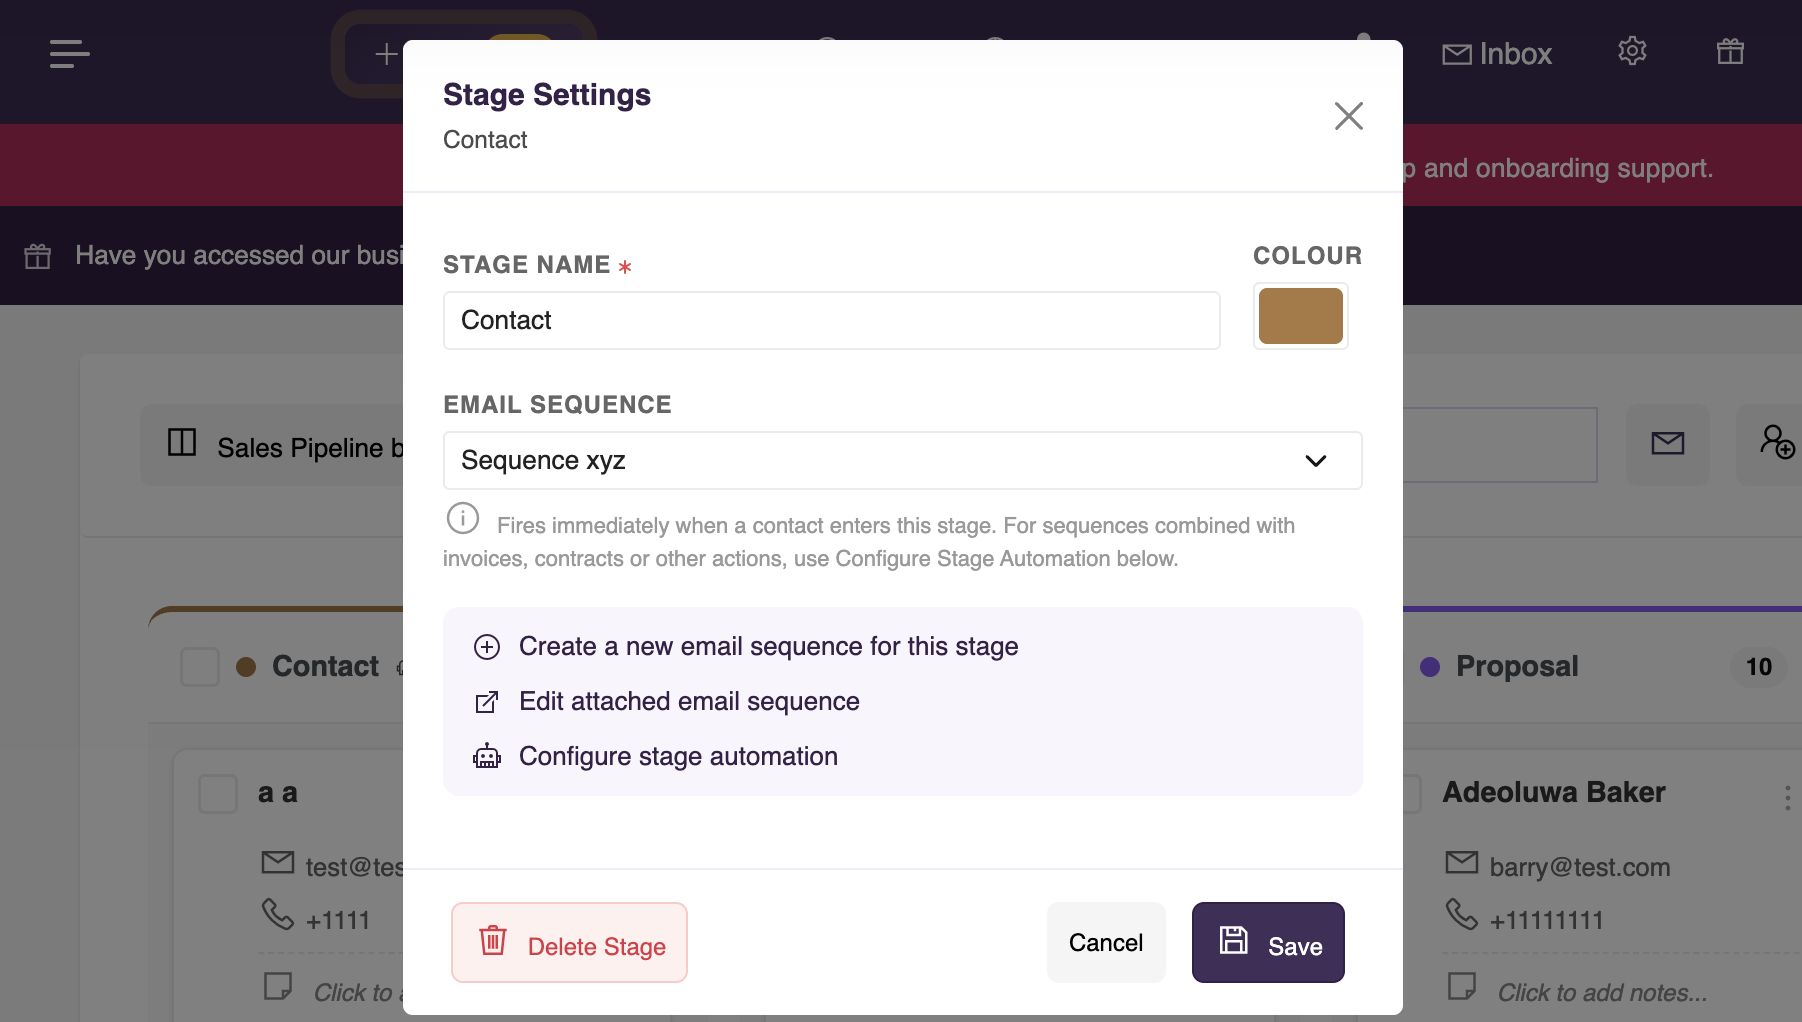
Each stage can have an email sequence attached to it. When a contact enters that stage, the sequence fires automatically. You can attach an existing sequence from your Email Sequences module, or create a new one directly from the stage settings. For more complex automations that combine emails with invoices, contracts, delays, or other steps, use Stage Automation instead.
29. Stage Automation
Each stage can have a stage automation attached to it. A stage automation works like a standalone workflow, except the trigger is a contact entering that stage rather than a form submission or product purchase. The same action types are available, including send email, send SMS, email sequence, update field, add to list, create invoice, issue contract, enrol on course, issue membership card, time delay, and move to another stage.
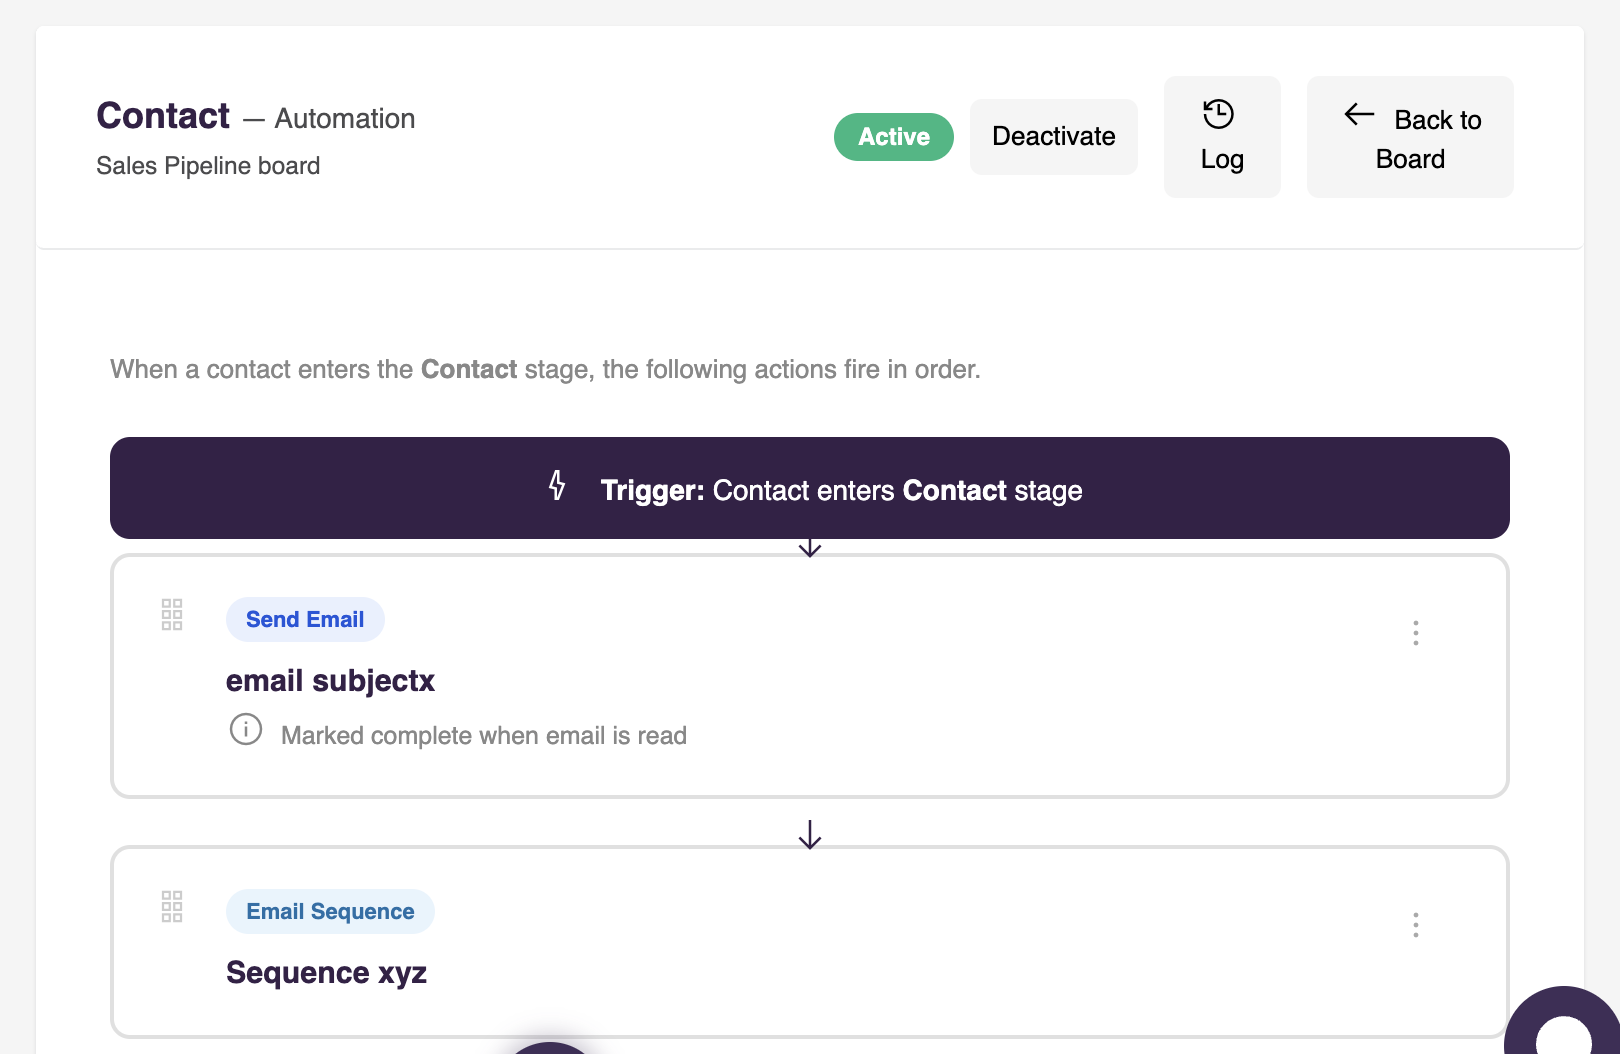
Decisions and routes are not available on stage automations. A stage automation is read through a builder that shows one linear path, so a decision added there would park waiting for a choice with nowhere on that screen to make it. If you need routes, build a standalone workflow.
To set up a stage automation, open the stage settings and click Configure Stage Automation. You can then add actions, set the order, choose completion conditions for each action, and view the full log.
For example, when a contact enters your Qualified stage you could automatically send them a welcome email and wait until they read it, then issue a service contract for signing, then create and send an invoice once the contract is signed, then wait three days using a clock step, then send a follow-up email, and finally move them to your Active stage. All of this happens automatically.
30. Automation History on Contact Cards
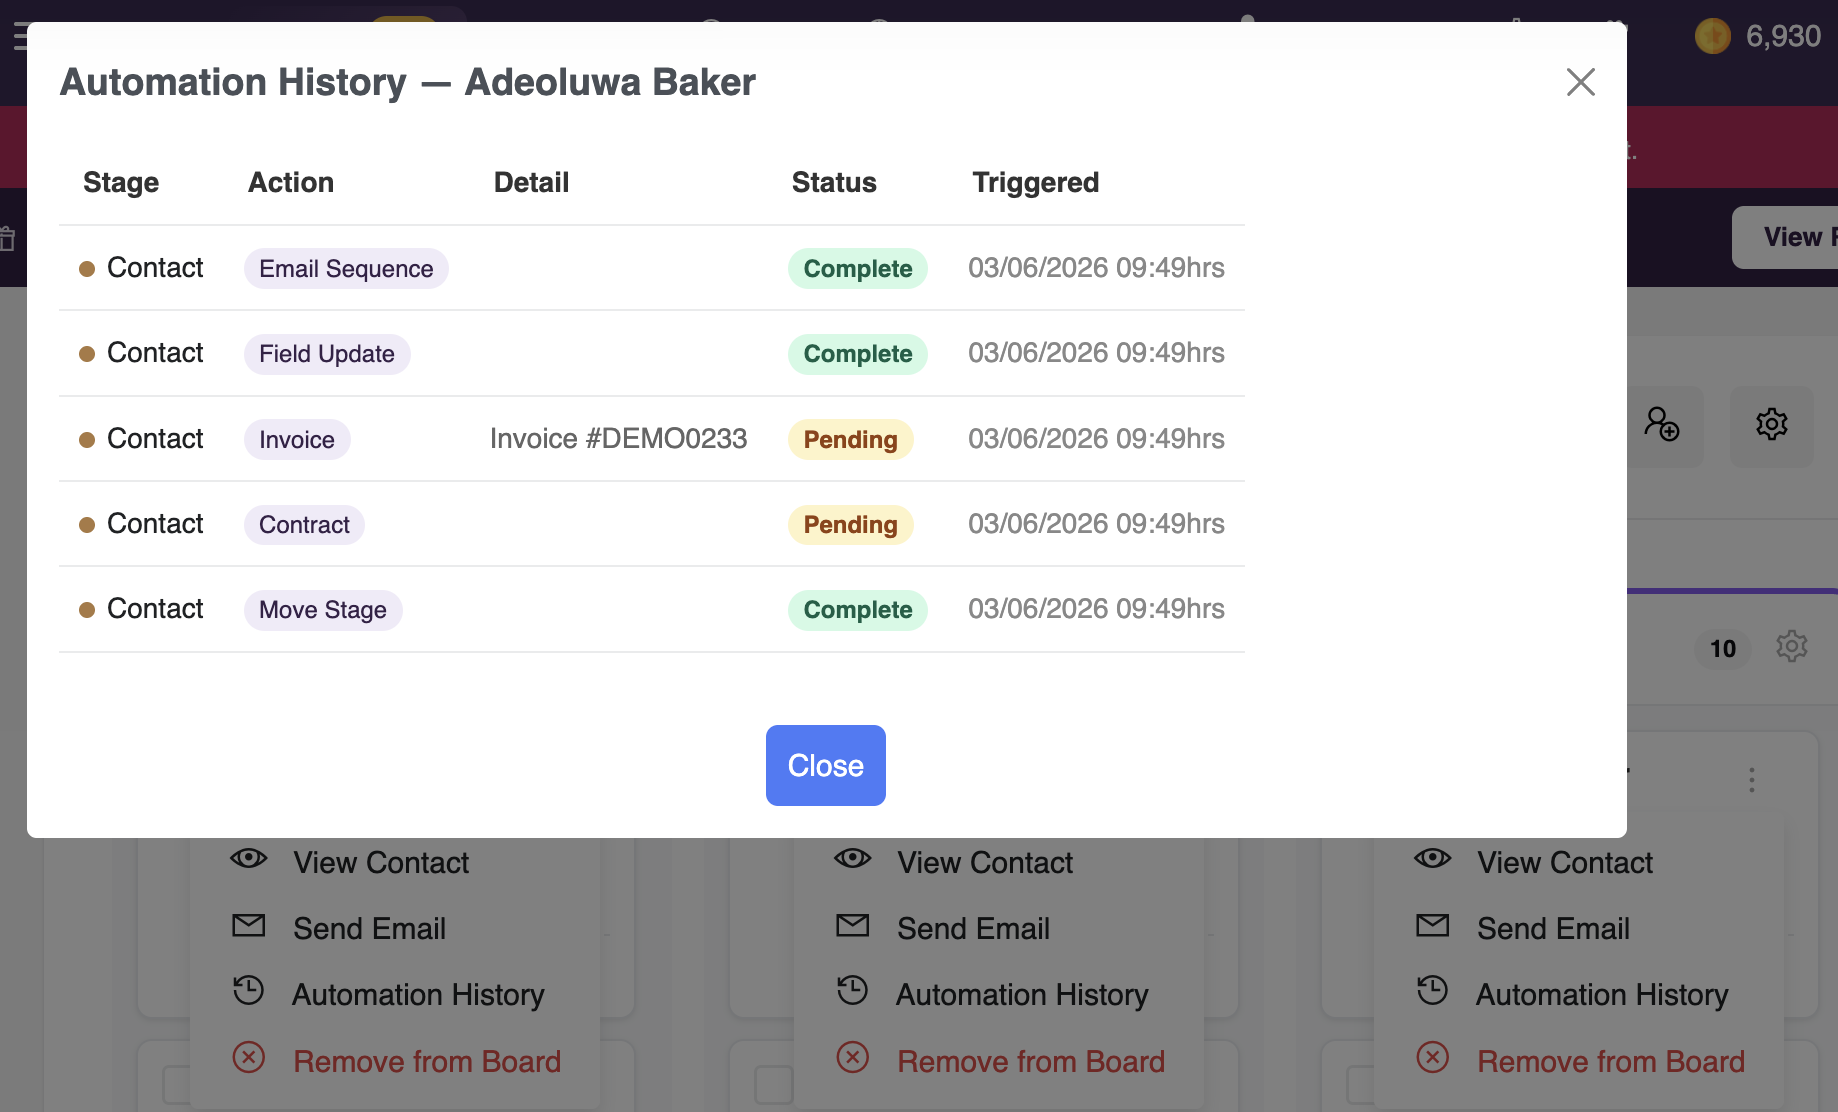
Every contact card on a board has an Automation History option in its dropdown menu. Click it to see a summary of every automation action that has fired for that contact across all stages on the board, including the action type, what happened, the current status, and when it was triggered.
31. Emailing Selected Contacts
Select one or more contacts on the board using the checkboxes and click the email button in the board header to compose a group email to all selected contacts. This feeds directly into MyCo's standard email composer with your selected recipients already populated.
32. Board Settings
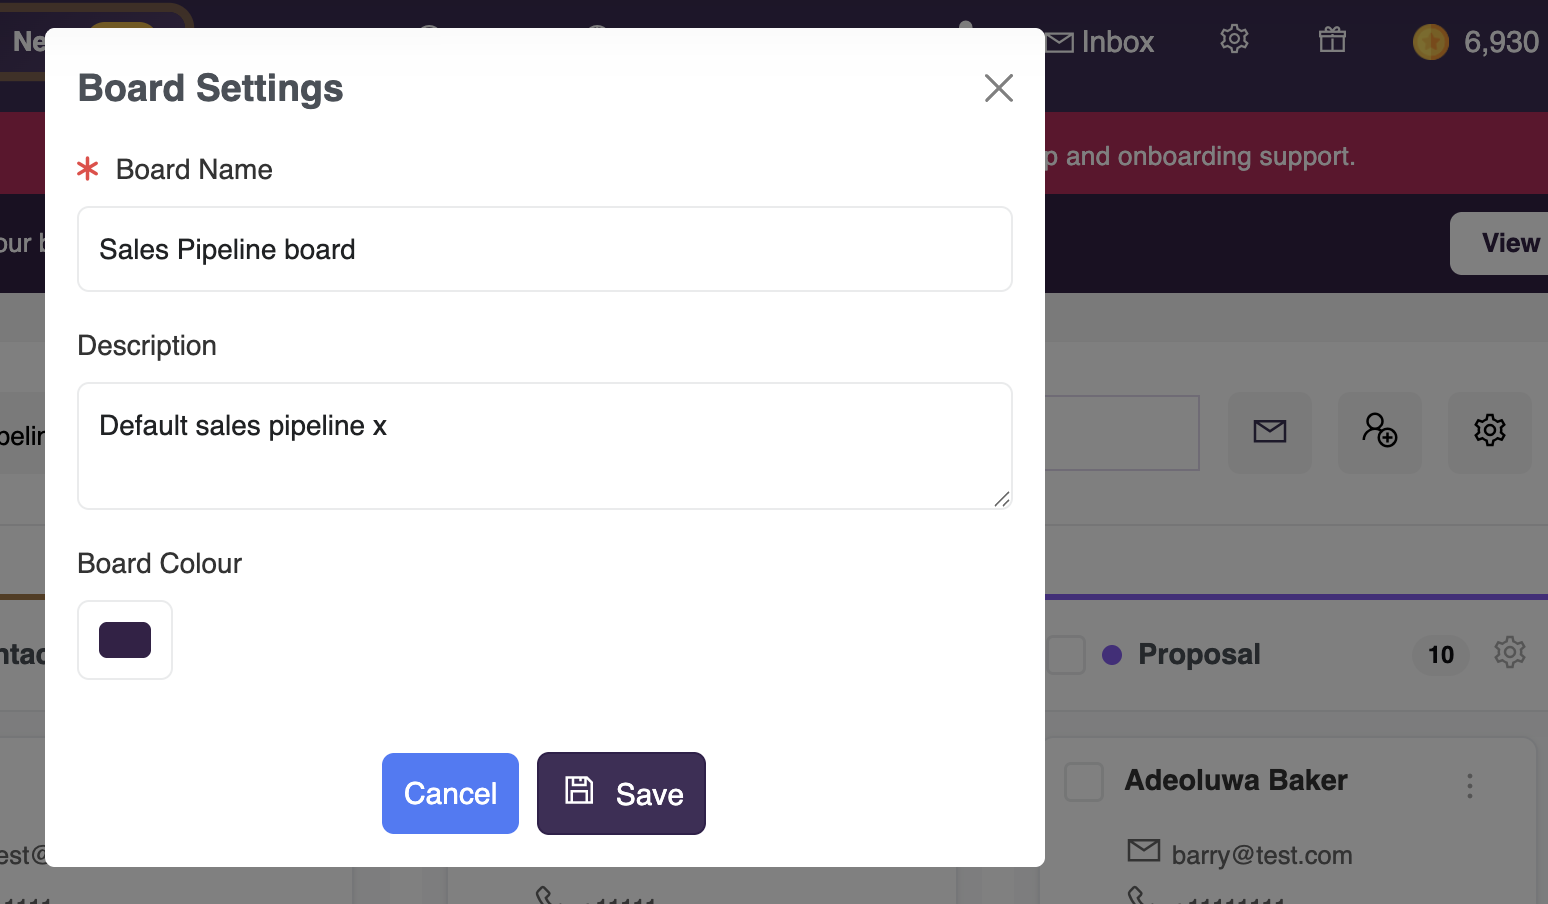
Each board has a settings panel accessible from the cog icon in the board header where you can update the name, description, and colour. Boards can be deleted from the Workflows home screen. Deleting a board permanently removes all its stages, contact associations, and automation history, though the contacts themselves remain in your MyCo account.
33. Switching Between Boards
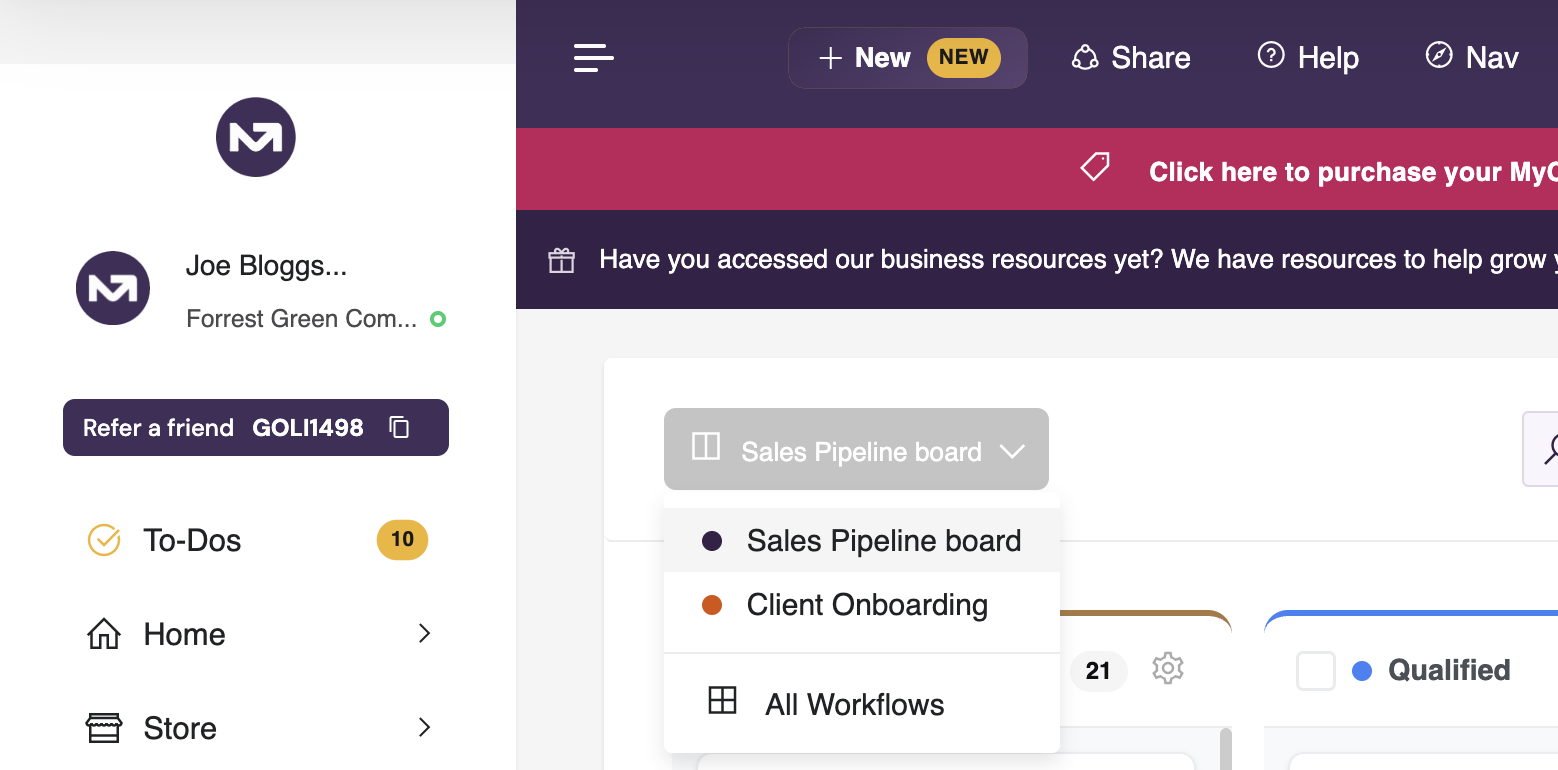
A board switcher dropdown at the top of each board lets you jump between your boards instantly without returning to the home screen. All your boards are listed there alongside a link back to the full Workflows overview.
Workflows — automate every process that matters to your business, all within MyCo