
1. Getting to the Document Library
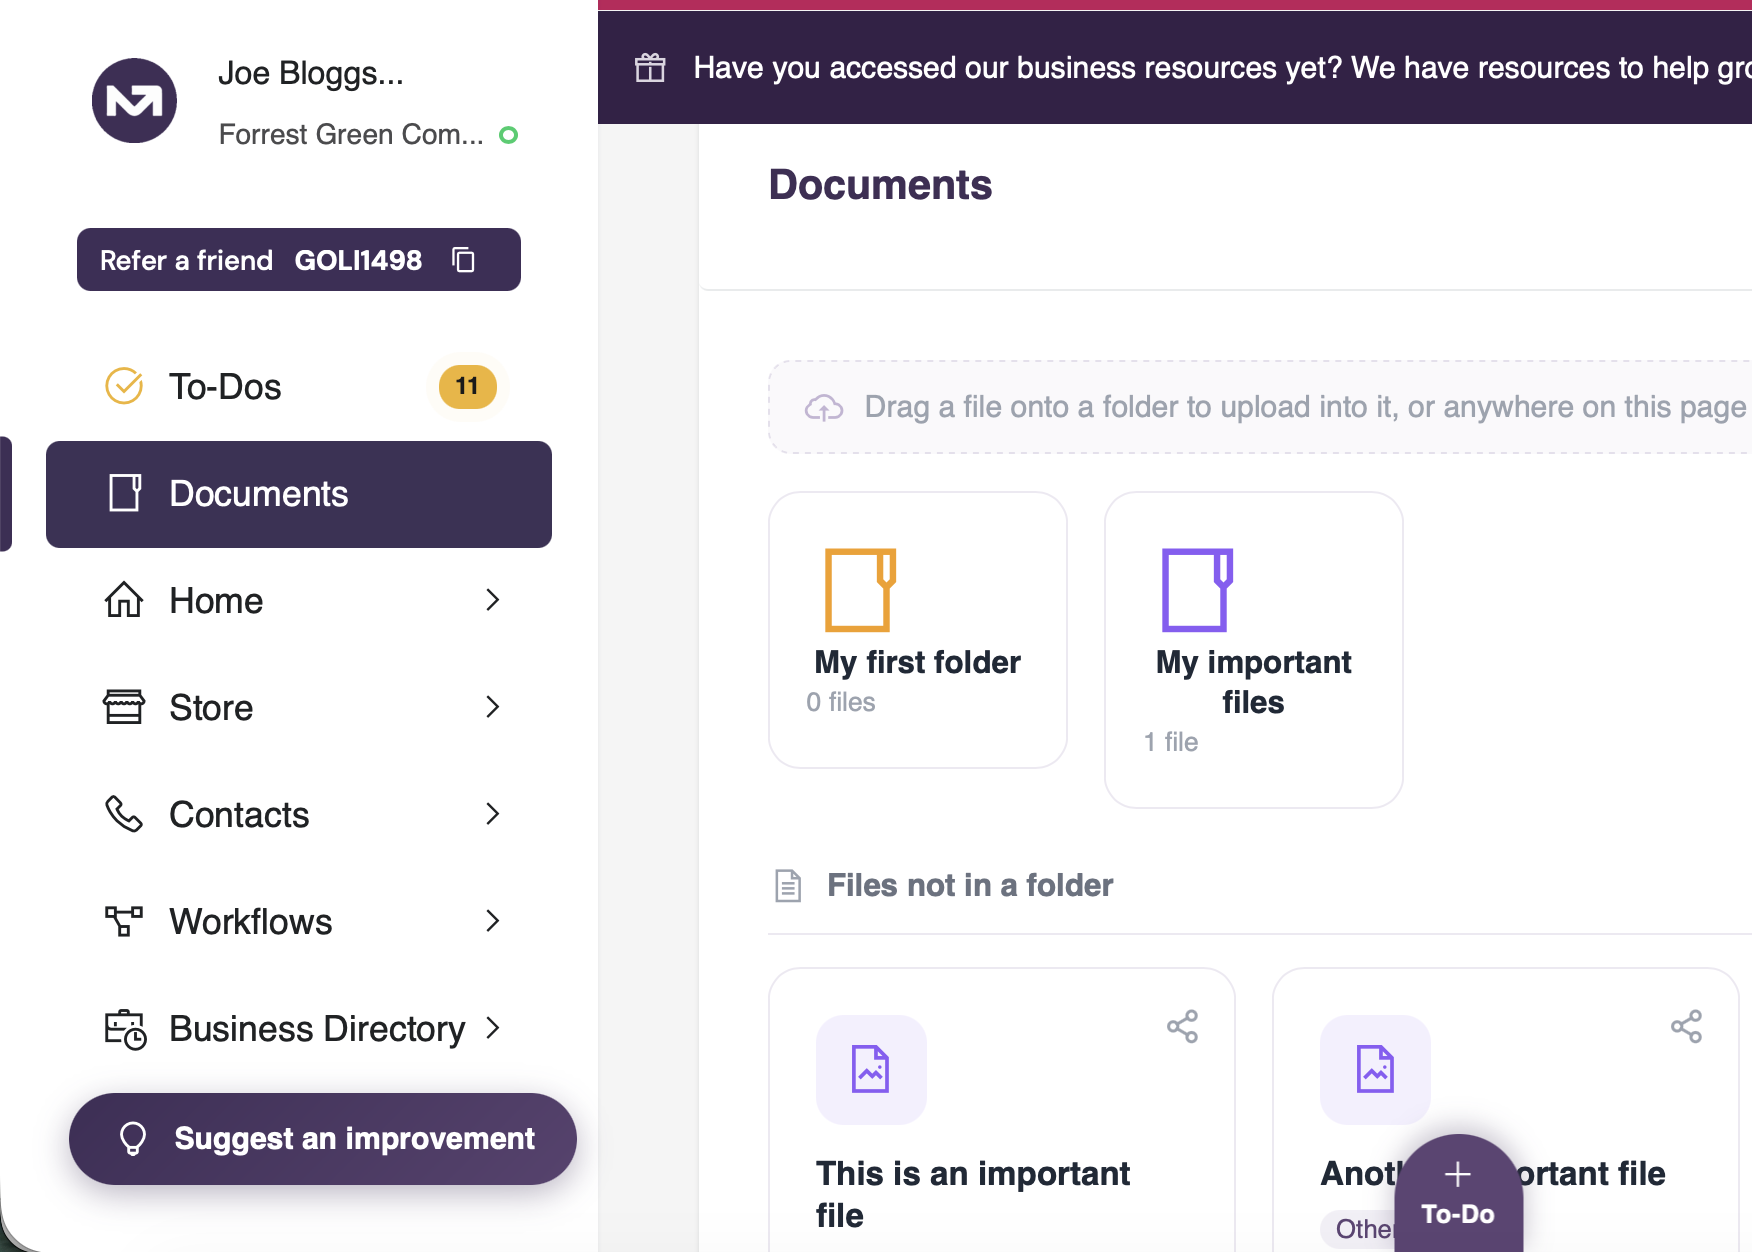
The Document Library is accessible from the Documents link in the main navigation, sitting just below To-Dos. Click it to open the root view, which shows all your folders and any files not yet assigned to a folder.
2. The Root View
When you first open Documents you are in the root view. This shows all your folders as tiles across the top, with any unfiled documents listed below them under a Files not in a folder section. Each folder tile shows the folder name and how many files are inside it. Click any folder to navigate into it.
3. Creating a Folder
Click the New Folder button in the top right of the page. A small input appears below the header, type a name and press Enter or click Create. The folder appears immediately in the root view. You can create as many folders as you need to organise your documents.
4. Uploading a Document
There are three ways to upload a document.
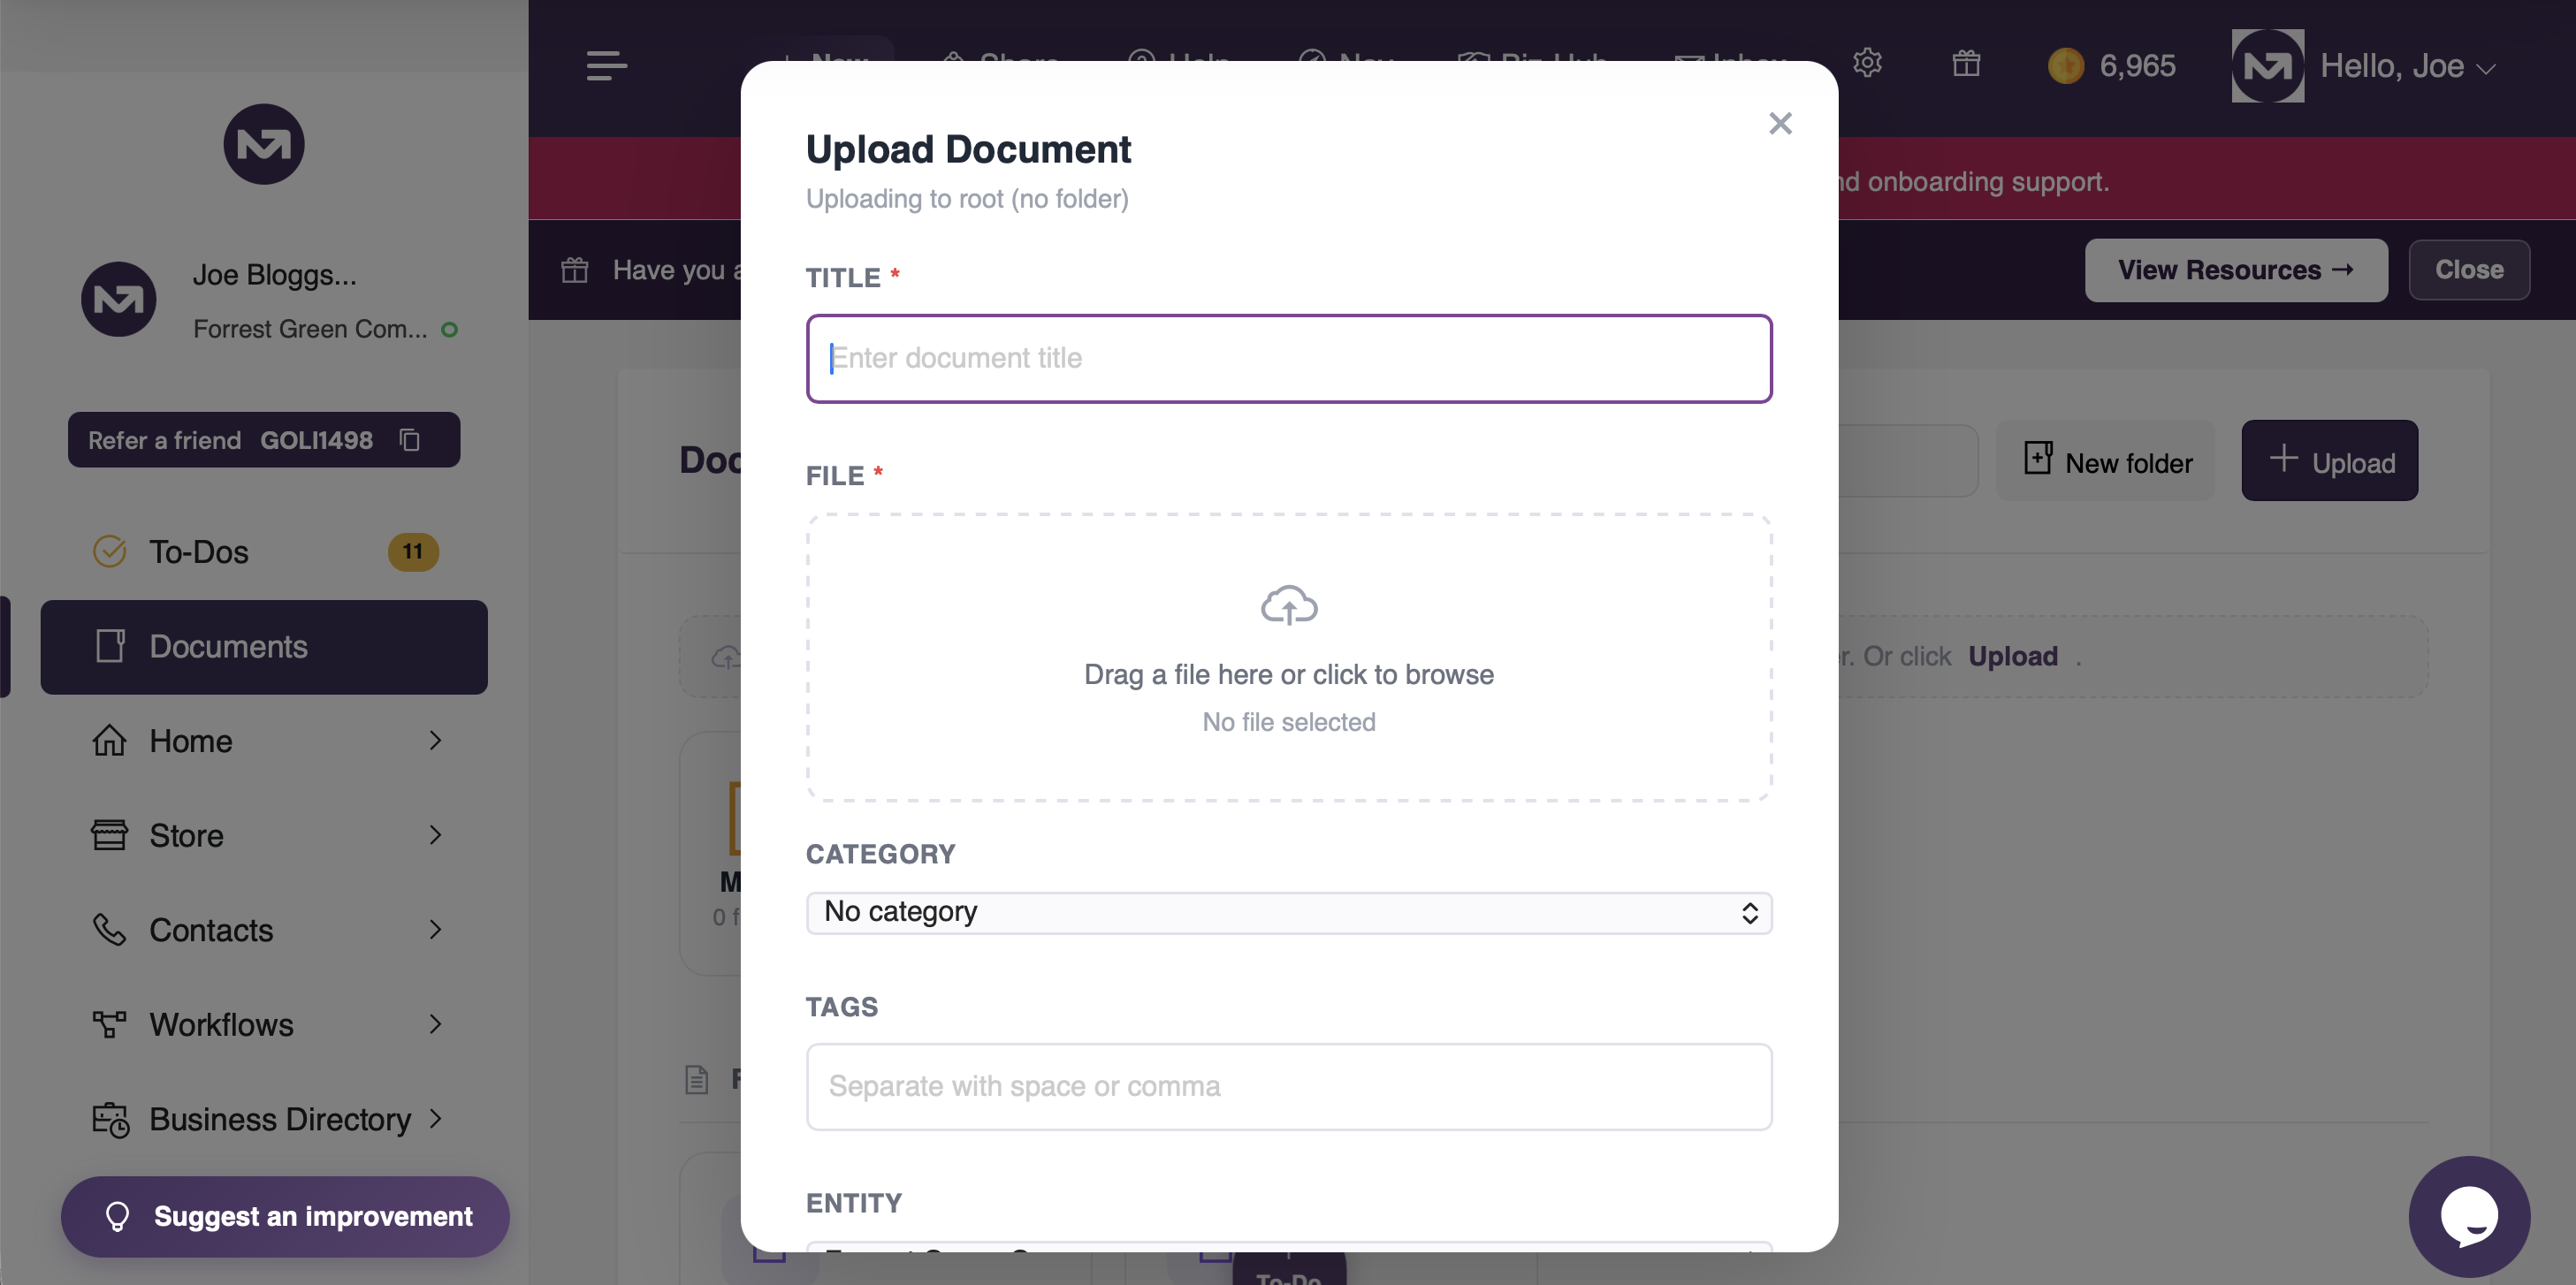
The first is to click the Upload button in the top right. This opens the Upload Document panel where you fill in the title, select your file, choose a category, add tags, set the entity the document belongs to, and optionally set an expiry date. Click Upload when done.
The second is to drag a file from your computer directly onto a folder tile. This opens the Upload panel with that folder already selected.
The third is to drag a file anywhere onto the page. If you are in the root view the Upload panel opens set to no folder. If you are inside a folder the Upload panel opens set to that folder.
When a file is attached in the Upload panel the drop zone turns green and shows the filename, confirming the file is ready. You can also click the drop zone to browse for a file instead of dragging.
5. Navigating into a Folder
Click any folder tile to open it. The page shows a breadcrumb at the top reading Documents / Folder Name so you always know where you are. All files inside that folder are shown as cards. Click Documents in the breadcrumb to return to the root view.
6. Moving a Document to a Different Folder
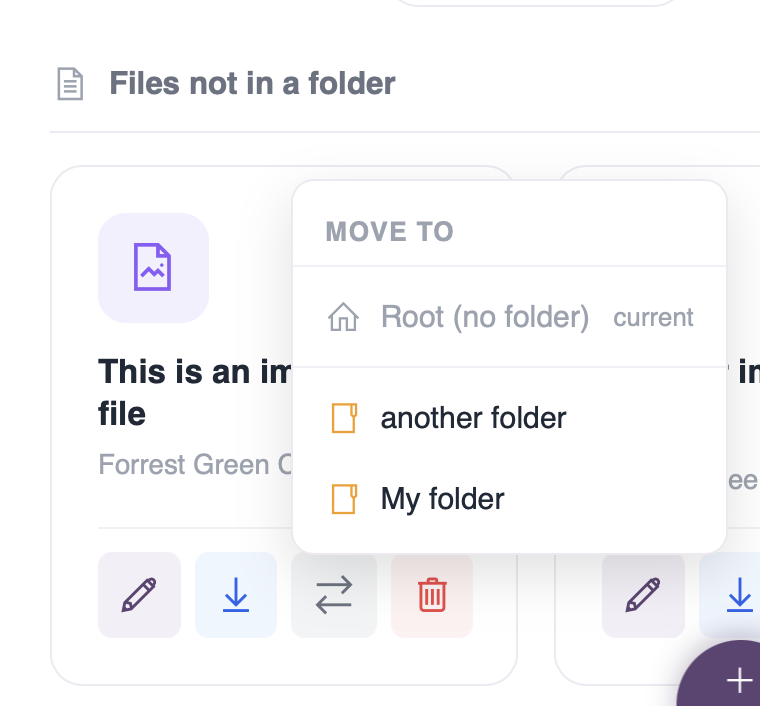
Every document card has a move icon in its action bar, it looks like two arrows. Click it to open a small menu showing Root (no folder) at the top, followed by all your folders. The current location is shown in grey and cannot be selected. Click any other location to move the document there instantly. The card fades out and disappears from the current view, and the file count on the destination folder tile updates automatically.
You can also move documents by dragging a card onto a folder tile. The tile highlights with a purple dashed border as you hover over it. Release to move the document into that folder.
7. Renaming a Folder
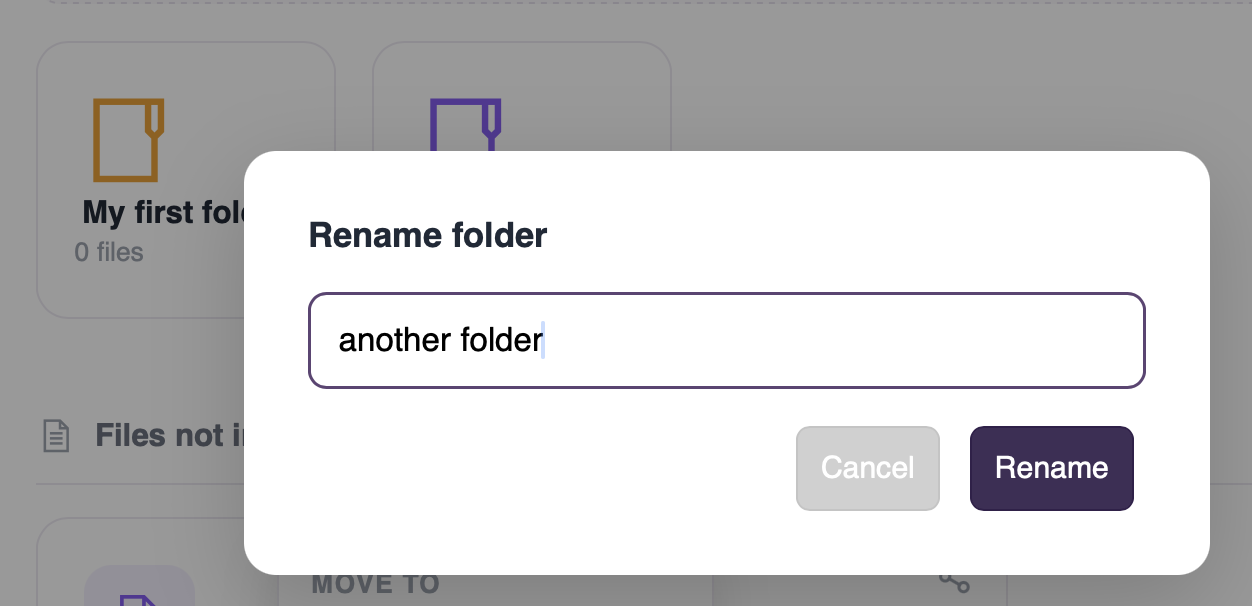
Hover over any folder tile and two icons appear in the top right corner. Click the pencil icon to rename the folder. A small modal appears with the current name pre-filled — edit it and click Rename. The tile updates instantly.
8. Deleting a Folder
Hover over any folder tile and click the red bin icon. You will be asked to confirm. When a folder is deleted, any documents inside it are moved to the root level automatically — no files are lost.
9. Editing a Document
Click the pencil icon on any document card to open the Edit Document panel. You can update the title, tags, and category, and optionally replace the file. Leave the file input blank to keep the existing file. Click Save changes when done. The card updates instantly without a page reload.
10. Downloading a Document
Click the download icon on any document card to open the file in a new tab. From there you can save it to your computer. You can also copy a direct download link using the share icon in the top right corner of any card — it copies the link to your clipboard and briefly turns green to confirm.
11. Deleting a Document
Click the red bin icon on any document card and confirm the deletion. The document is permanently removed.
12. Searching Documents
Use the search bar in the top right of the page to filter documents by title. On the root view, folder tiles and unfiled documents both filter as you type. Inside a folder, only the documents in that folder are filtered. Clear the search to return to the full view.
13. Categories
Categories are labels you can assign to documents to indicate their type — for example Contract, Invoice, or HR. They appear as a small badge on each document card. Categories are managed separately in Settings and are shared across the platform. In the Document Library they are used purely as a label on the card and do not affect where a document is stored — folders control the structure.
14. Expiry Dates
You can set an expiry date on any document when uploading or editing it. This is useful for documents such as insurance certificates or compliance records that need to be renewed periodically. The date is stored against the document and can be seen in the edit panel.
15. Approval
Some documents can be marked as requiring approval. When approval is required and a document has been uploaded, an approve button appears on the card. Click it to confirm you have reviewed and approved the document. Approved documents show a green status dot in the top left corner of their card.
Documents — keep your files organised, accessible, and always where you expect them